47
Presser foot lifter button
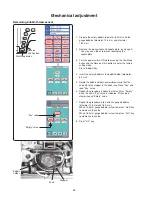
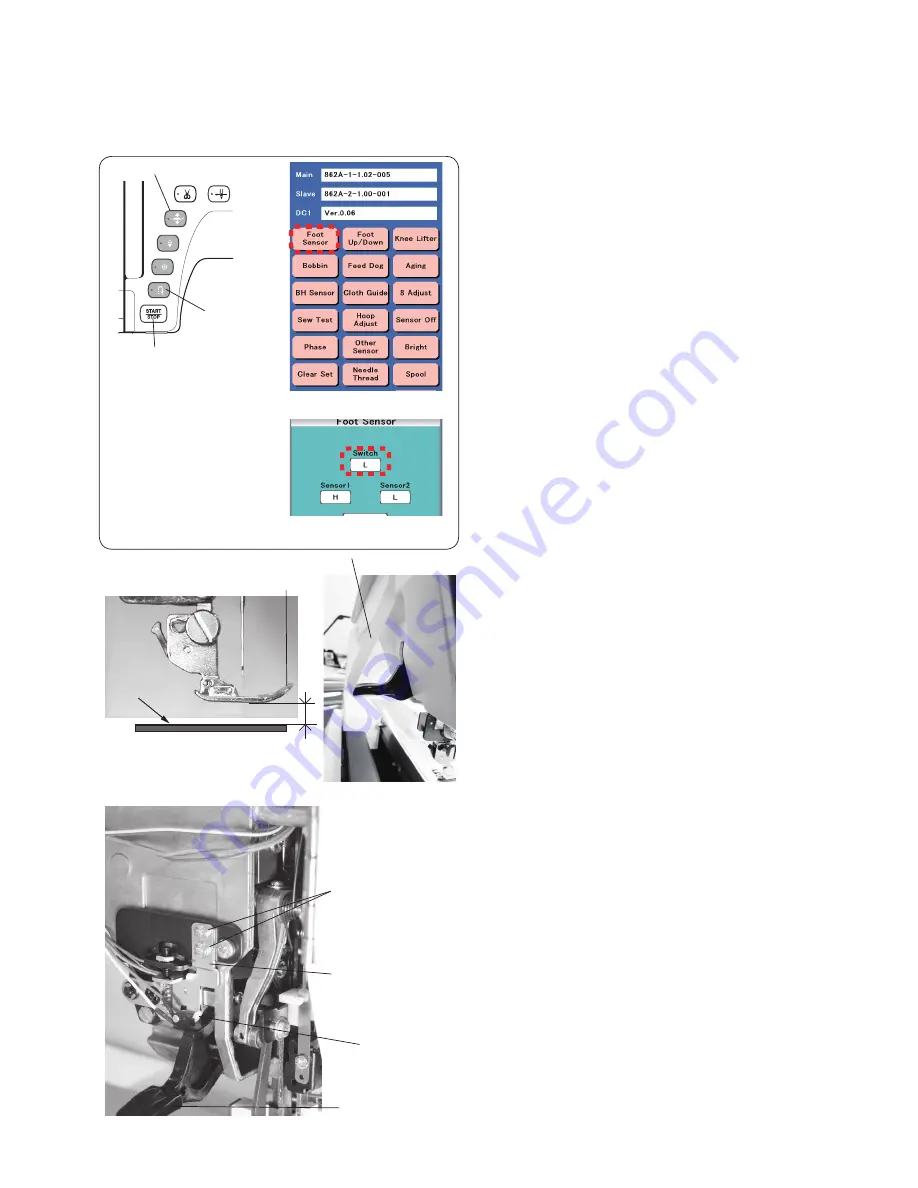
To check:
1. Attach the zigzag foot (A) .
2. Turn the power switch ON while pressing the Start/Stop
button and the Reverse stitch button to enter the factory
setting mode.
Press "Foot Sensor" key.
3. Press the presser foot lifter button to lower the presser
foot.
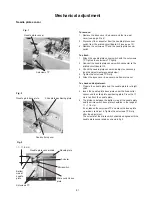
Raise the presser foot slowly by raising the presser foot
lifter. The distance between the lower part of the presser
foot and the surface of needle plate should be 4.5 mm to
5.5 mm when the "Switch" changes to "H" from "L"
If not, adjust as follows.
To adjust:
1. Remove the rear cover (page 6).
2. Loosen the setscrews of micro switch set plate.
3. Place the 5 mm block (spacer) between the presser foot
and the needle plate, and lower the presser foot.
4. Raise the presser foot lifter lightly as possible from its
lowest position. Stop the presser foot lifter at the point
where the lifter start to raise the presser foot.
Fix the lifter with a sticky tape at that position.
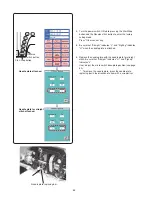
5. Lower the micro switch little by little, and stop it when the
"Switch" changes to "H" from "L". Tighten the setscrews.
6. Remove the 5 mm block (spacer). Remove the sticky tape
and lower the presser foot lifter.
Raise the presser foot lifter slowly. "Switch" changes to
"H" from "L" when the distance between the lower part of
the presser foot and the surface of the needle plate is 4.5
to 5.5 mm.
Mechanical adjustment
Presser foot lifter switch
zigzag foot (A)
Needle plate
4.5 - 5.5 mm
Setscrew
Micro switch
set plate
Presser foot
lifter switch
Presser foot lifter
Tape
⇒
Start/Stop button
Reverse
stitch button


