25
⇒
Mechanical adjustment
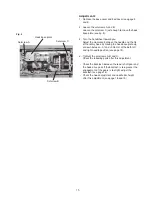
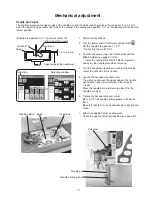
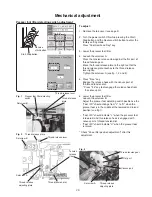
Buttonhole lever adjustment
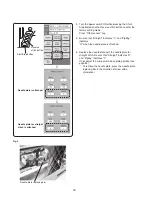
Start/Stop button
Reverse
stitch button
Setscrew A
Buttonhole
lever guide
1 Turn the power switch ON while pressing the Start/Stop
button and the Reverse stitch button to enter the
factory setting mode.
Press "BH Sensor" key.
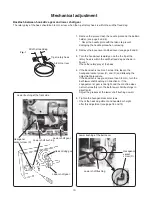
2. Attach the automatic buttonhole foot (R).
Open the face cover. Lower the Buttonhole lever.
Lower the drop feed dog.
Bind a piece of paper between the stopper and presser
foot slider for easier adjustment.
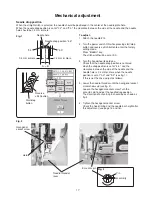
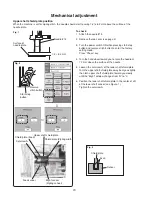
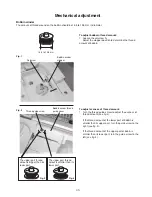
Sensor position adjustment
1. Adjust the clearance between the stopper and the
presser foot slider to 1.6 mm.
2. Loosen the hexagonal socket screw until the "BH Sen"
shows "H", then tighten the setscrew slowly until the
"BH Sen" shows "L".
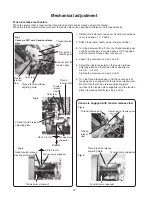
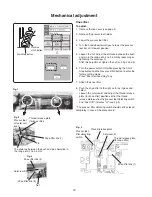
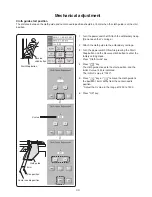
BH lever guide adjustment
1. Adjust the clearance between the stopper and the
presser foot slider to 2.6 mm.
Lower the presser foot.
2. Lower the BH lever.
Loosen the setscrew A.
Move the buttonhole lever left and right.
Tighten the setscrew when the buttonhole lever slightly
touches to the presser foot.
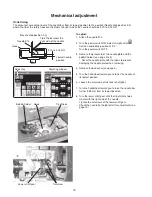
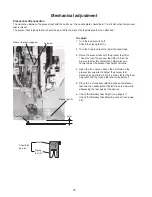
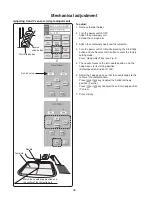
To check sensor position
1. "BH Sen" shows "H" when the clearance is 1.4 mm.
"BH Sen" shows "L" when the clearance is 1.8 mm.
If not, adjust the sensor position again.
To check BH lever guide position
1. After checking the sensor position mentioned above,
slide the automatic buttonhole foot (R) until the
buttonhol lever does not touch to the the buttonhole foot
R. (Free the buttonhole lever.)
Be sure that the "BH sensor" shows "L".
Move the Buttonhole lever back and forth slightly, and
"BH sensor" should still indicates "L".
If not, adjust the BH lever guide again.
Hexagonal
socket screw
Clearance
Stopper
Clearance
Presser foot slider
Buttonhole
lever


