29
DIAGNOSIS CHART FOR MC3000
Test operation
Turn on the power switch
while pressing Reverse stitch
key, then press Auto-lock key
within 2. 5 seconds.The
machine runs at normal
speed if Auto-lock key is
pressed too late.
Press the keys shown below
in order.REVERSE, AUTO-
LOCK, U/D, WIDTH -,
WIDTH +, LENGTH -,
, MEMORY,
CLEAR, stitchesThen press
the remaining key from left to
right and top to bottom.
1. Pull down the button—
hole lever.
2. Move the buttonhole lever
back and forth.
1. Shift the bobbin winder
spindle to the right,
2. Shift the bobbin winder
spindle to the left.
Turn the hand wheel toward
you to move the needle bar
to the highest, then continue
to turn the hand wheel until
needle bar comes to the
highest again
Turn the balance wheel
toward you to move the
needle bar to the highest
position. Then press the
Reverse key.
Turn the balance wheel
toward you to move the
needle bar to the lowest
position. Then press the
Reverse key.
Depress the foot control as
far as it will go. Then release
it.
Press the Reverse key.
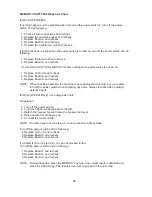
When the checking is completed, LCD shows [Self-Check End].
If the machine works properly, LCD, shows [Self-Check OK!
If not, LCD shows [ERROR-A] (Example)
“A” means Board A. The letters have the following meaning;
A: Printed circuit board A
B: Buttonhole sensor
C: Foot control
D: Driving motor
K: Printed circuit hoard K
P: Upper shaft sensor
R: Machine socket
X: Stepping motor for Zigzag
Y: Stepping motor for feed
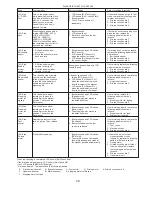
Step
(01) step
LCD, LED
Test
(02) Step
Keys
(03) Step
Buttonhole
sensor
(04) Step
Bobbin
winder
switch
(05) Step
Upper shaft
sensor
(06) Step
Stepping
motor for
zigzag
(07) Step
Stepping
motor for
feed
(08) Step
Foot
control
(09) Step
Driving
motor
Correct condition
I. LCD shows [840 Test mode].
2. LCD shows [Self—check Start].
3. Buzzer sounds.
4. The LCD turns on and off
repeatedly.
1. Buzzer sounds.
2. LCD shows [Key].
3. Each time you press the key,
buzzer sounds.
1. Buzzer sounds and LCD shows
[BH Sensor L].
2. LCD shows [BH Sensor H]
when the sensor is closed.
3. LCD shows [BH Sensor L] when
the sensor is open.
Buzzer sounds each time and LCD
shows [Spool].
1. Buzzer sounds and LCD
shows [PH Sensor H.H. ].
2. LCD shows [PH Sensor L.H.]
when the needle bar is moved
from the lowest to the highest.
3. LCD shows [PH Sensor H.L.]
when the needle bar is moved
from the highest to the lowest.
1. Buzzer sounds and LCD shows
[Zigzag motor],
2. The stepping motor moves to
the default position.
1. Buzzer sounds and LCD shows
[Feed motor].
2. The stepping motor moves to
the default position.
1. Buzzer sounds and LCD shows
[Controller].
2. Buzzer founds when the foot
control is released.
1. Buzzer sounds and LCD shows
[DC Motor].
2. The machine runs at low speed,
then at high speed and stops at
the highest position automatically.
Defect condition & remedy
If the machine does not go to Test
mode, replace the following parts
in order and recheck.
1. Printed circuit board F
2. Printed circuit board K
3. Printed circuit board A
If buzzer does not sound when you
press the key, replace the
following parts in order and
recheck.
1. Printed circuit board F
2. Printed circuit board K
3. Printed circuit board A
If machine does not work properly,
replace the following parts in order
and recheck:
1. Buttonhole sensor
2. Printed circuit board K
3. Printed circuit board A
If not working replace the following
parts in order and recheck:
1. Printed circuit board K
2. Printed circuit board A
If not working properly, replace the
following parts in order and
recheck:
1. Upper shaft sensor
2. Printed circuit board A
If not working, replace the
following parts in order and
recheck:
1. Stepping motor for zigzag
2. Printed circuit board A
If not working properly, replace the
following parts in order and
recheck:
I. Stepping motor for feed
2. Printed circuit board A
If not working properly, replace the
following parts in order and
recheck:
1. Foot control
2. Machine socket
3. Printed circuit board A
If the machine won’t stop at
highest position or runs
irregularly, replace the following
parts in order and recheck:
1. Driving motor
2. Printed circuit board AIf other
than the above fault, replace
the following parts in order and
recheck:
1. Printed circuit board C
2. Transformer unit
Summary of Contents for Memory Craft 3000
Page 1: ...SERVICE MANUAL...

