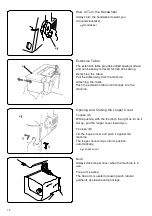


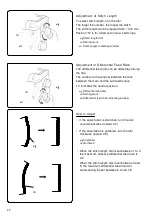

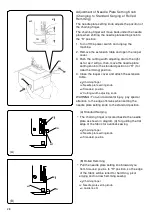
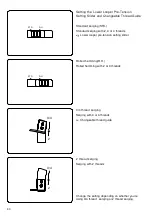

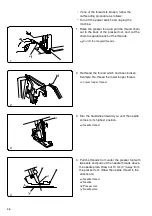

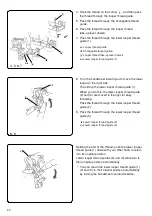
Adjustment of Needle Plate Setting Knob
(Changing to Standard Serging or Rolled
q
Hemming)
e
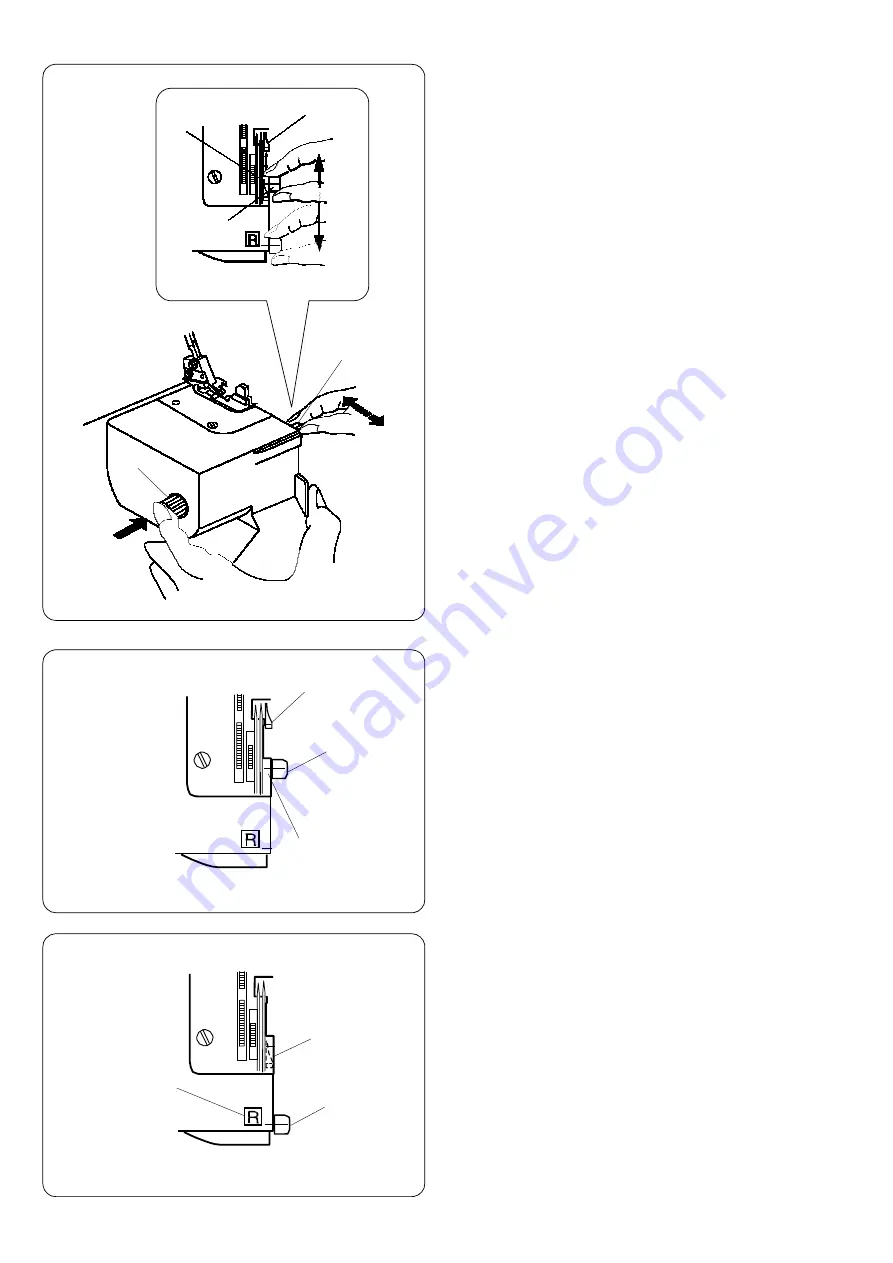
The needle plate setting knob adjusts the position of
the chaining finger.
The chaining finger will move back under the needle
plate when shifting the needle plate setting knob to
w
the “R” position.
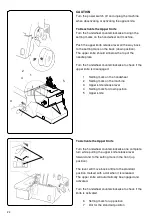
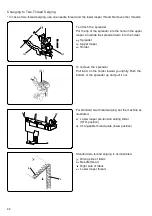
1. Turn off the power switch and unplug the
machine.
2. Remove the extension table and open the looper
cover.
w
3. Push the cutting width adjusting dial to the right
as far as it will go, then, move the needle plate
setting knob to the standard position or “R” (for
rolled hemming) position.
4. Close the looper cover and attach the extension
r
table.
q
Chaining finger
w
Needle plate setting knob
e
Standard position
r
Cutting width adjusting knob
WARNING: To avoid accidental injury, pay special
attention to the edge of knives when setting the
needle plate setting knob to the standard position.
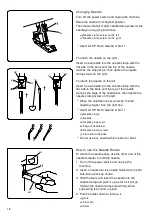
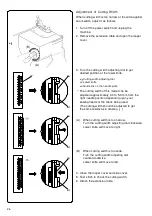
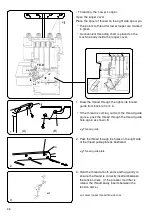
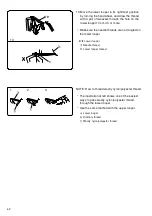
(A) Standard Serging
q
*
The chaining finger is located beside the needle
plate as shown in diagram (A) for guiding the flat
edge of the fabric for overlock sewing.
w
q
Chaining finger
w
Needle plate setting knob
e
Standard position
e
(A)
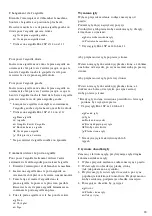
(B) Rolled Hemming
*
Pull the needle plate setting knob toward you
from
Standard position
to "R" position, so the edge
of the fabric will be rolled for hemming, picot
q
edging and narrow hemming sewing.
q
Chaining finger
e
w
Needle plate setting knob
w
e
Guide line R
(B)
28


