janome.com
Page 11
Power Cord
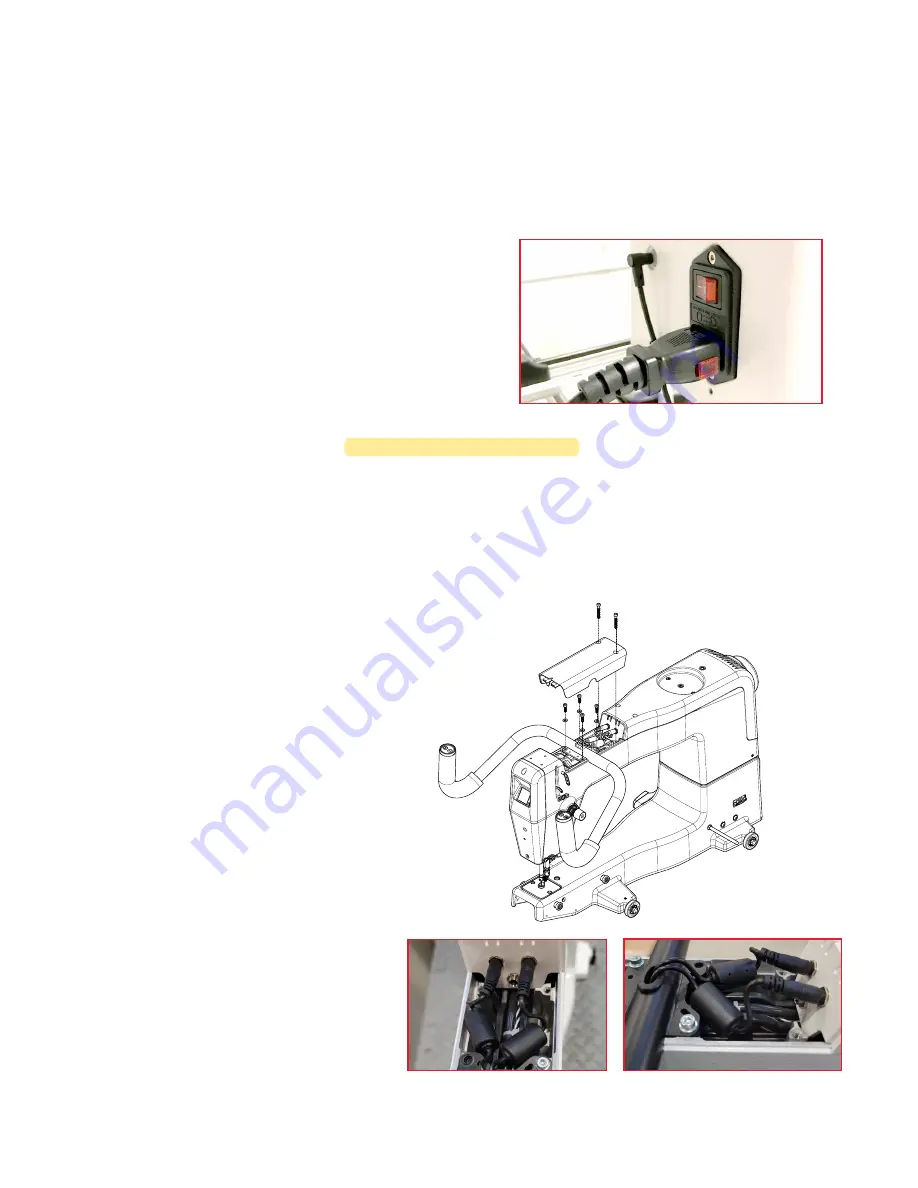
To install the Power Cord
• Insert the plug into the power connector on the rear of the machine. Plug the three-prong plug
end into your power source. Do not turn on the machine until the handlebars are installed.
To disconnect the Power Cord
• First pull out on the red buttons on the sides of the
plug and then pull the plug out of the machine.
NOTE: Make sure that the machine is off before
plugging into a power source. The main power
switch should be in the O (off) position
.
Front Handlebars
The Quilt Maker 15 comes with handlebars for the front of the machine. Optional rear handlebars are
available for quilting with pantographs and Groovy or pattern boards. The front handlebars are used|
for most other quilting activities.
U
CAUTION:
To prevent any electrical damage to the handlebars, always turn off all power to
the machine when connecting or disconnecting the handlebars.
To install the Front Handlebars
1. Remove the two screws in the front top
cover with a 3mm hex tool. Remove
cover by pulling up on the rear portion
then sliding tabs out in the front.
2. Place four M4x10mm screws with
washers down through the handlebar
into the top of the machine and
tighten them firmly with a 3mm hex
tool.
3. Plug the two handlebar cable plugs
into the two jacks in the back top (left
plug to left jack and right to right).
The right handlebar cable is labeled.
4. Push ferrites down into the space so
that the cover will fit back into place.
5. Replace the front top cover by sliding
tabs at the front into machine and
angling the back of the cover down
into place. Tighten the screws with a
3mm hex tool. Do not over tighten.
Summary of Contents for Quilt Maker 15
Page 1: ...15 Quilting Machine INSTRUCTION MANUAL...
Page 56: ...www janome com...


