Page 12
Quilt Maker 15 User Manual
2022.02
Optional Accessories
Quilt from the Back Kit
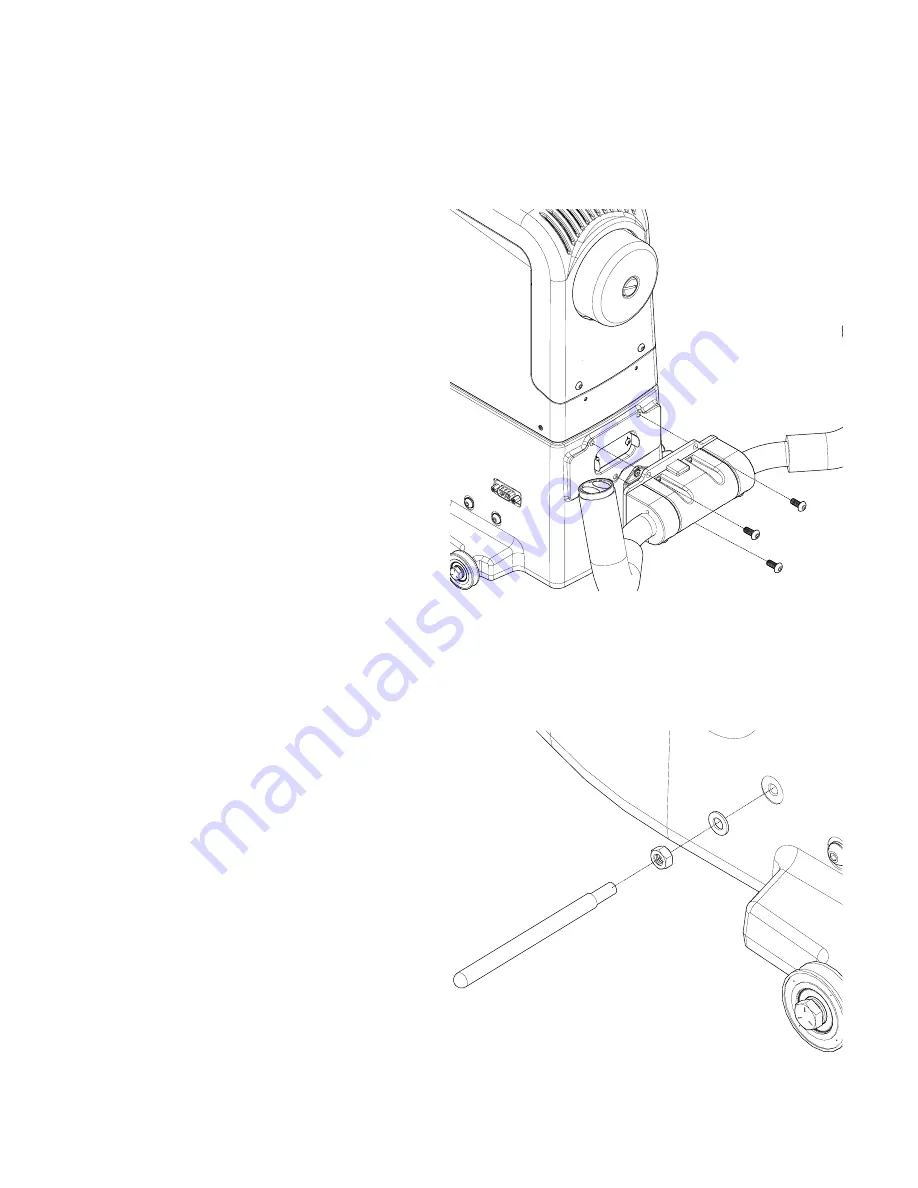
To install the Rear Handlebar
NOTE: Make sure that the machine is off
before installing the rear handlebar. The
main power switch must be in the O (off)
position.
1. Slightly loosen the two Philips screws on the
rear handlebar connection cover with a #1
Phillips screwdriver (not provided). Do NOT
remove the screws.
2. Pull off the plastic cover. It protects the
rear handlebar connection. Do NOT
remove the screws.
3. Re-tighten the two screws. They hold
the connection board to the machine.
4. You will need three M5 x 12 SKB ZN screws for
the rear handlebars (included in the Quilt from
the Back Kit) and a 3mm hex wrench.
5. Align the three holes in the handlebars with
the holes on the back of the machine.
6. Attach with the three screws. Tighten securely.
To install the Laser Pin
1. You will need the laser pin, washer and nut.
2. Screw the nut all the way onto the laser pin.
3. Slide the washer onto the laser pin threads and
screw the laser pin all the way into the side of
the machine.
4. While holding the laser pin, firmly tighten the
nut with the 8mm wrench (provided).
Summary of Contents for Quilt Maker 15
Page 1: ...15 Quilting Machine INSTRUCTION MANUAL...
Page 56: ...www janome com...


