


23
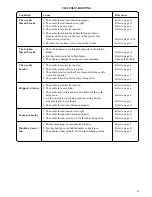
Reference
Refer to page 11
Refer to page 16
Refer to page 6
Refer to page 6
Refer to page 13,14
Refer to page 6
Refer to page 10
Refer to page 21
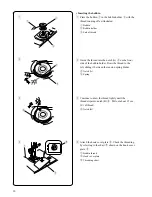
Change the bobbin.
Refer to page 6
Refer to page 6
Refer to page 7
Refer to page 6
Refer to page 6
Refer to page 6
Refer to page 6
Refer to page 6
Refer to page 11
Refer to page 16
Refer to page 11
Refer to page 6
Refer to page 5
Refer to page 21
Refer to page 9
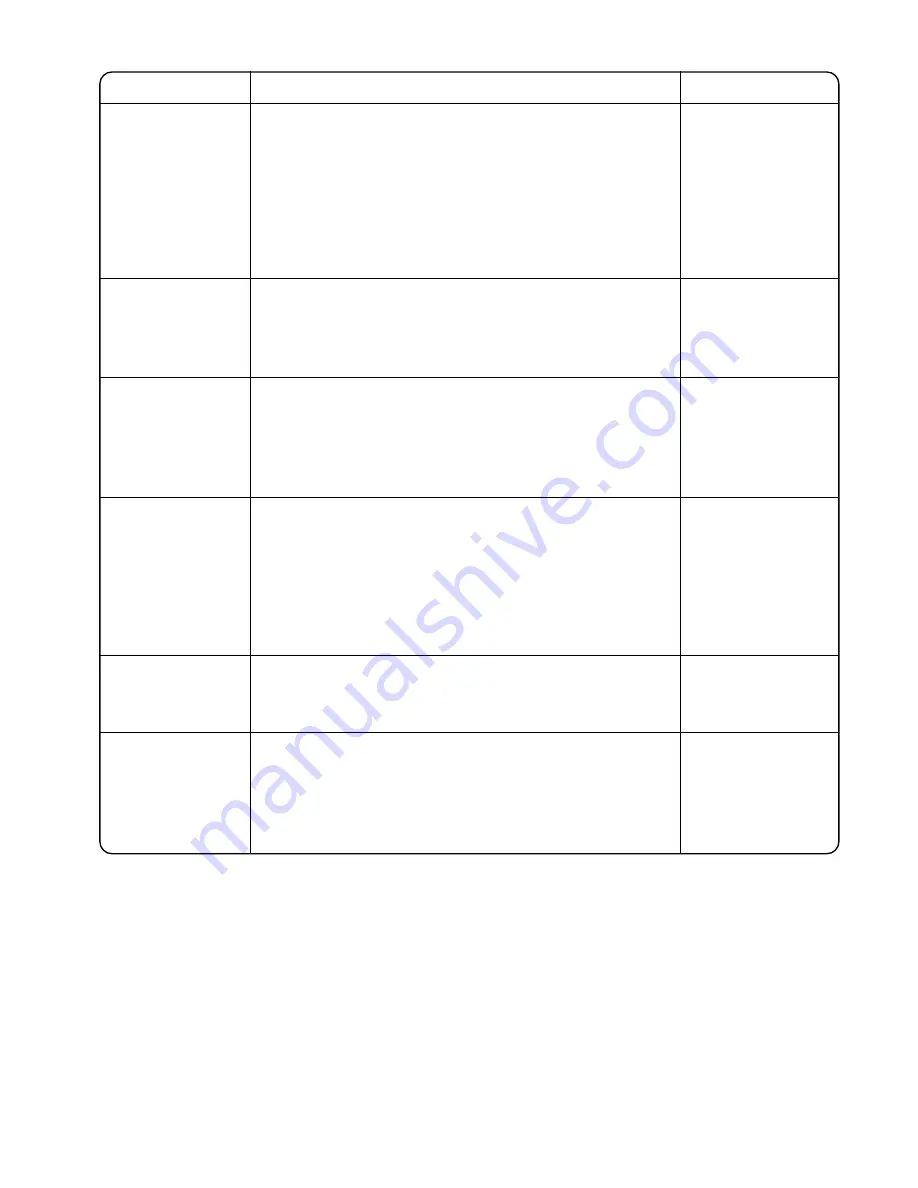
TROUBLESHOOTING
Condition
The needle
thread breaks.
The bobbin
thread breaks.
The needle
breaks.
Skipped stitches
Seam puckering
Machine doesn't
run
Cause
1. The needle thread is not threaded properly.
2. The needle thread tension is too tight.
3. The needle is bent or blunt.
4. The needle is incorrectly inserted.
5. The needle thread and the bobbin thread are not set
properly under (drawn to the rear of) the presser foot
when sewing is started.
6. The thread is too heavy or too fine for the needle.
1. The bobbin thread is not threaded properly in the bobbin
holder.
2. Lint has collected in the bobbin holder.
3. The bobbin is damaged and does not turn smoothly.
1. The needle is incorrectly inserted.
2. The needle clamp screw is too loose.
3. The pattern selector dial has been turned while the needle
was in the material.
4. The needle is too fine for the fabric being sewn.
1. The needle is incorrectly inserted.
2. The needle is bent or blunt.
3. The needle and /or threads are not suitable for the work
being sewn.
4. A blue tip needle is not being used for sewing stretch,
very fine fabrics or synthetics.
5. The needle thread is not threaded properly.
1. The needle thread tension is too tight.
2. The needle thread is not threaded properly.
3. The needle thread is too heavy for the fabric being sewn.
1. The machine plug is not connected properly.
2. Lint has built up in the bobbin holder or hook race
.
3. The bobbin winder spindle is still in the winding position.
Summary of Contents for Sewing Machine
Page 24: ......


