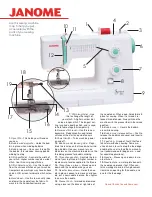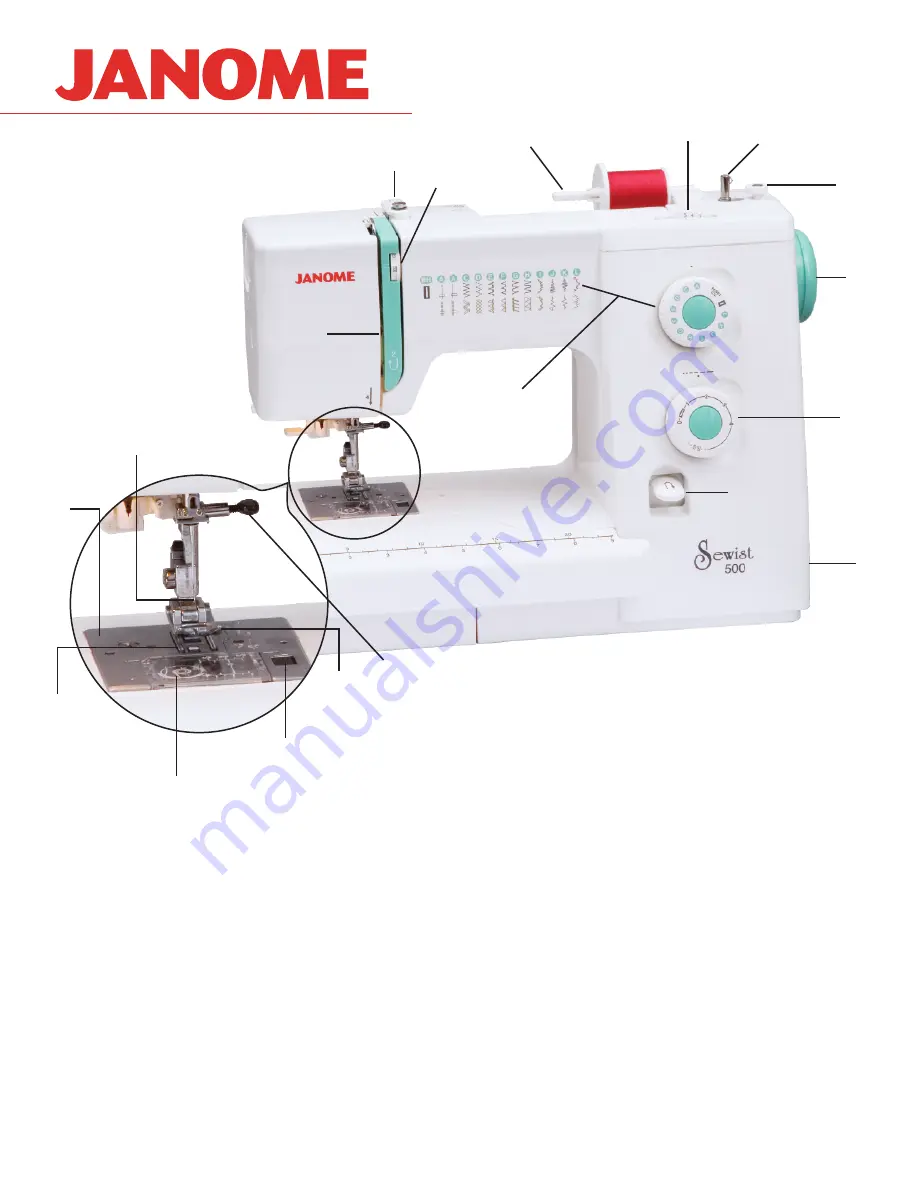
1.
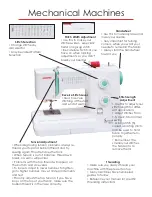
Spool Pin
– This holds your thread as
you sew.
2.
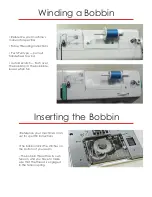
Bobbin winder spindle
– Holds the bob-
bin in place when winding bobbins.
3.
Bobbin release
– Once your thread fills
the bobbin, this releases, causing bobbin
winding to stop.
4.
Stitch width dial
– Controls the width of
your stitch. Higher number equals a wider
stitch. Use this on zig zag stitches.
5.
Stitch Selection dial
– Use this to select
from the various stitches on your machine.
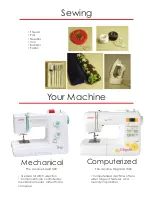
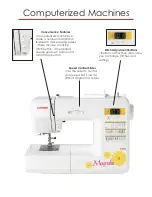
Computerized machines may have buttons
and an LCD screen to indicate stitch selec-
tion.
6.
Handwheel
– Use this to manually raise
and lower the needle from the fabric. Al-
ways turn the handwheel toward you.
7.
Stitch length dial
– Use
this to change the length of
your stitch. A higher number indi-
cates a longer stitch. The longest set-
ting is called a basting stitch, and is used
to hold fabrics together temporarily.
8.
Reverse stitch lever
– Use this to sew
backward. Predominantly used to lock
stitches at the start and end of seams.
9.
Power Switch
– Turns machine power
on and off.
10.
Bobbin winder tension guide
– Regu-
lates the tension on the thread when wind-
ing a bobbin. Use your manual or use
indicators on the machine to determine the
threading process for bobbin winding.
11.
Thread tension dial
– Controls the ten-
sion of your top thread. A higher number in-
dicates more tension applied to the thread.
12.
Thread take-up lever
– Moves up and
down with the needle bar as you sew.
13.
Needle clamp screw
– Holds the nee-
dle in place. Loosen to remove an old nee-
dle, put a new needle in place, then tighten
to secure the needle.
14.
Presser Foot
– Is raised and lowered
using a lever on the back or right side of
the needle bar. When down, holds fabric in
place for sewing. When it is raised it re-
leases thread tension. Always thread the
machine with the presser foot in the raised
position.
15.
Bobbin cover
– Covers the bobbin
area while sewing.
16.
Bobbin cover release button
– Push to
release the bobbin case cover and insert a
new bobbin.
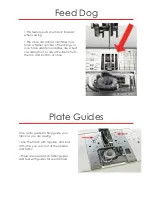
17.
Feed dog
– Group of ‘teeth’ that feed
fabric forward when sewing. Some ma-
chines have a lever to drop the feed dogs,
enabling the user to feed fabric manually
(not recommended for beginners – used
for special applications).
18.
Needle
– Moves up and down to cre-
ate stitches.
19.
Needle plate
– a metal plate beneath
the needle and presser foot. Often con-
tains markings to aid in stitch placement.
Contains an opening for the needle, and
one for the feed dogs.
Special thanks to sew4home.com.
18
19
17
9
8
5
13
14
16
15
7
6
11
1
4
2
3
10
12
Use this sewing machine
map to help you get
acquainted with the
parts of your sewing
machine.
Summary of Contents for Sewist 500
Page 1: ...Beginning Sewing eBook brought to you by ...
Page 13: ......

