


19
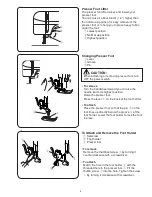
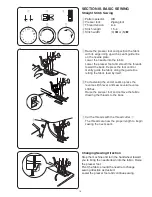
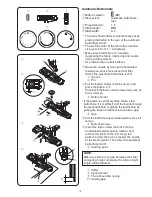
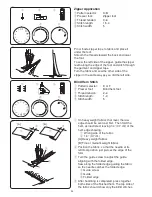
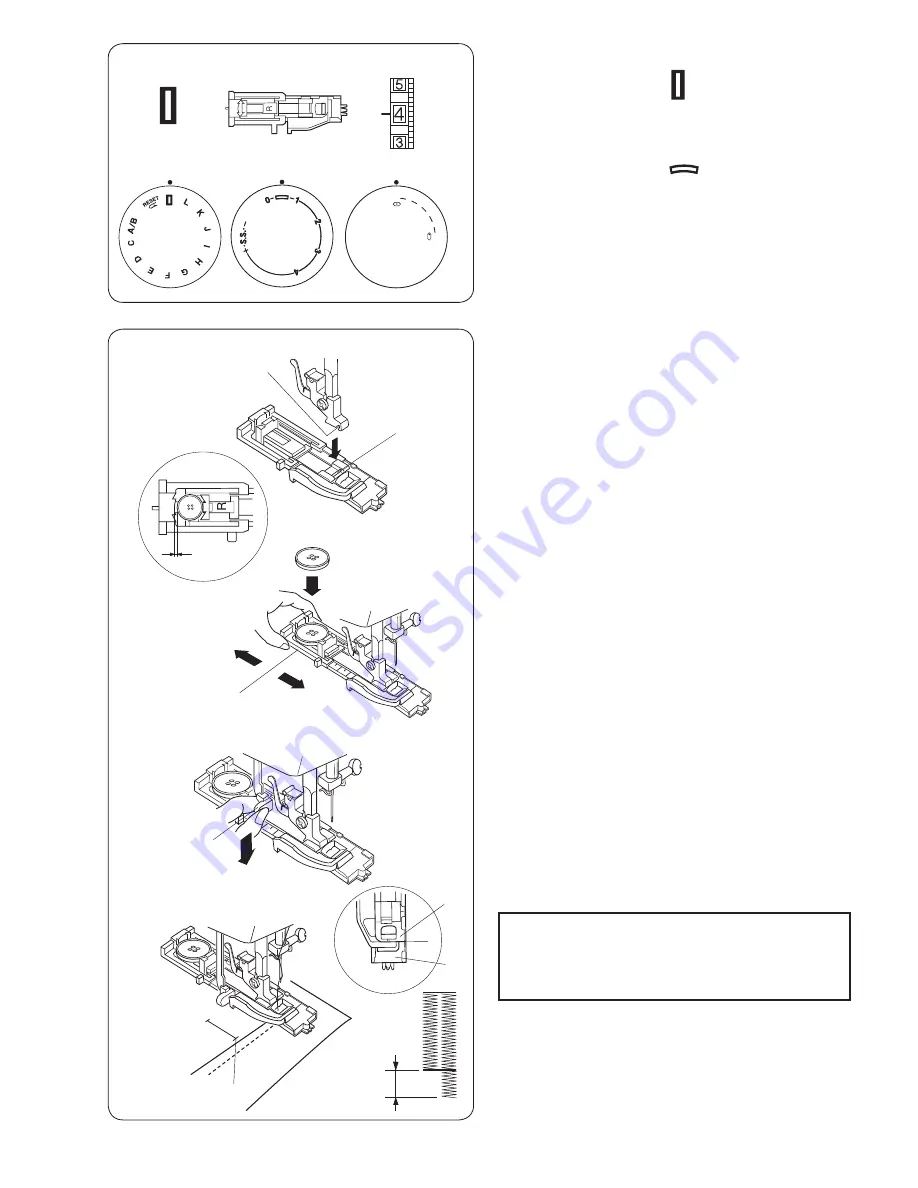
Automatic Buttonhole
q
Pattern selector:
(BH)
w
Presser foot:
Automatic buttonhole
foot
e
Thread tension:
1–5
r
Stitch length:
t
Stitch width:
3–5
* The size of buttonhole is automatically set by
placing the button in the rear of the automatic
buttonhole foot R.
* The button holder of the foot takes a button
size up to 2.5 cm (1˝) in diameter.
* Make a test buttonhole on a sample
duplicating the fabric, interfacing and seams
of the actual garment.
* Use interfacing on stretch fabrics.
w
e
q
r
t
1
2
4 3
5
0
z
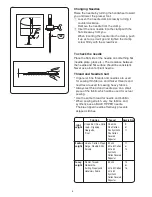
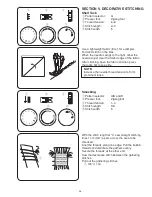
Raise the needle by turning the handwheel
toward you. Raise the presser foot lifter.
Attach the automatic buttonhole foot R.
q
Groove
w
Pin
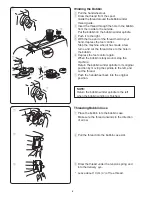
x
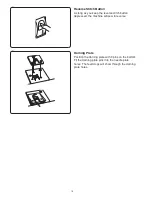
Pull the button holder to the back (A), and
place the button in it.
Push back the button holder toward you (B) as
far as it will go.
e
Button holder
* If the button is extremely thick, make a test
buttonhole. If it is difficult to fit the button through
the test buttonhole, lengthen the buttonhole by
pulling the button holder back to create a gap.
r
Gap
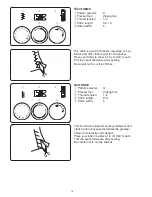
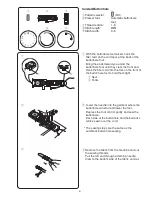
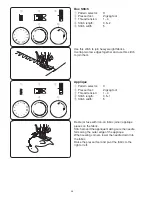
c
Pull the buttonhole lever downward as far as it
will go.
t
Buttonhole lever
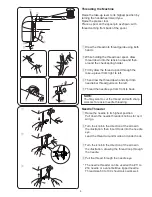
v
Insert the fabric under the foot. Turn the
handwheel toward you one rotation and
remove the fabric to the left. Insert the
garment under the foot, and lower the needle
at the starting point. Then lower the automatic
buttonhole foot R.
y
Starting point
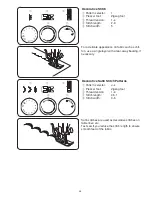
NOTE:
Make sure there is no gap between the slider
and spring holder, otherwise the left and right
length will be different.
u
Slider
i
Spring holder
o
There should be no gap
!0
Sewing gap.
q
w
r
e
(A)
(B)
t
u
o
i
!0
y
z
x
c
v


