

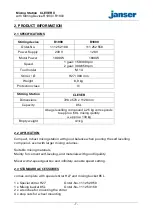

Mixing Station CLEVER II
with Stirring Device R1900 / R1800
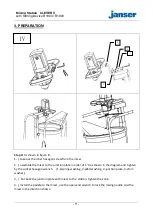
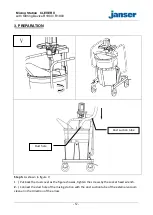
- 13 -
4. OPERATION
4.1 INSTRUCTIONS FOR SAFE USE
Safe work with the instrument is only possible after you read thoroughly this manual
for use and maintenance and observe precisely the here specified instructions.
Observe also other safety directions that are a part of each instrument delivery.
PERSONAL PROTECTION
-
Wear work clothes and the recommended protective equipment.
-
Take care of long hair and fashion accessories,
work in properly buttoned garments without free-flowing parts.
-
Take care that take a safe and firm stand at work.
-
Use the supplementary handle
-
Consider possible reaction torque.
WORKING ENVIRONMENT
-
Check the Instrument should not be operated in clamp, wet premises, during a
rain, fog and snow in the open, and in environment with a risk of explosion.
-
Ensure that the mixing station is placed in a firm and secure position.
A mixing station that is not properly secured may move unexpectedly.
-
Take protective measures when dust can develop during working that is harmful
to one´s health, combustible or explosive. Example: Some dusts are regarded as
carcinogenic. Wear a dust mask and work with dust extraction.
ELECTRICAL SAFETY
-
If the mixer falls into the material to be mixed, unplug the tool immediately and
have the mixer checked by a qualified repair person. Reaching into the mixing
container with the tool still plugged in can lead to electric shock.
SECURITY AGAINST UNINTENDED START
-
Before putting the plug in the mains socket the switch should be in the
“
off
”
position.
-
Turn off the machine if it stops for any reason. In this way you avoid the sudden
start in the unattended condition.


