Mixing Station CLEVER II
with Stirring Device R1900 / R1800
- 17 -
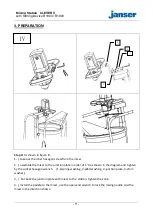
4. OPERATION
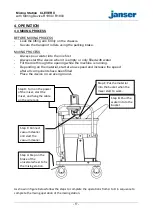
4.4 MIXING PROCESS
BEFORE MIXING PROCESS
- Lock the lifting arm firmly on the chassis.
- Secure the transport rollers using the parking brake.
MIXING PROCESS
- Always pour water into the mix first
- Always start the device when it is empty or only filled with water
- Fill the mix through the opening while the machine is running.
- Depending on the material, start at a low speed and increase the speed
after all components have been filled
- Place the device on an even ground.
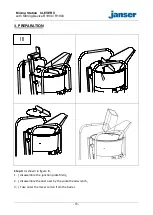
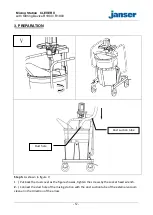
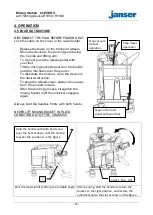
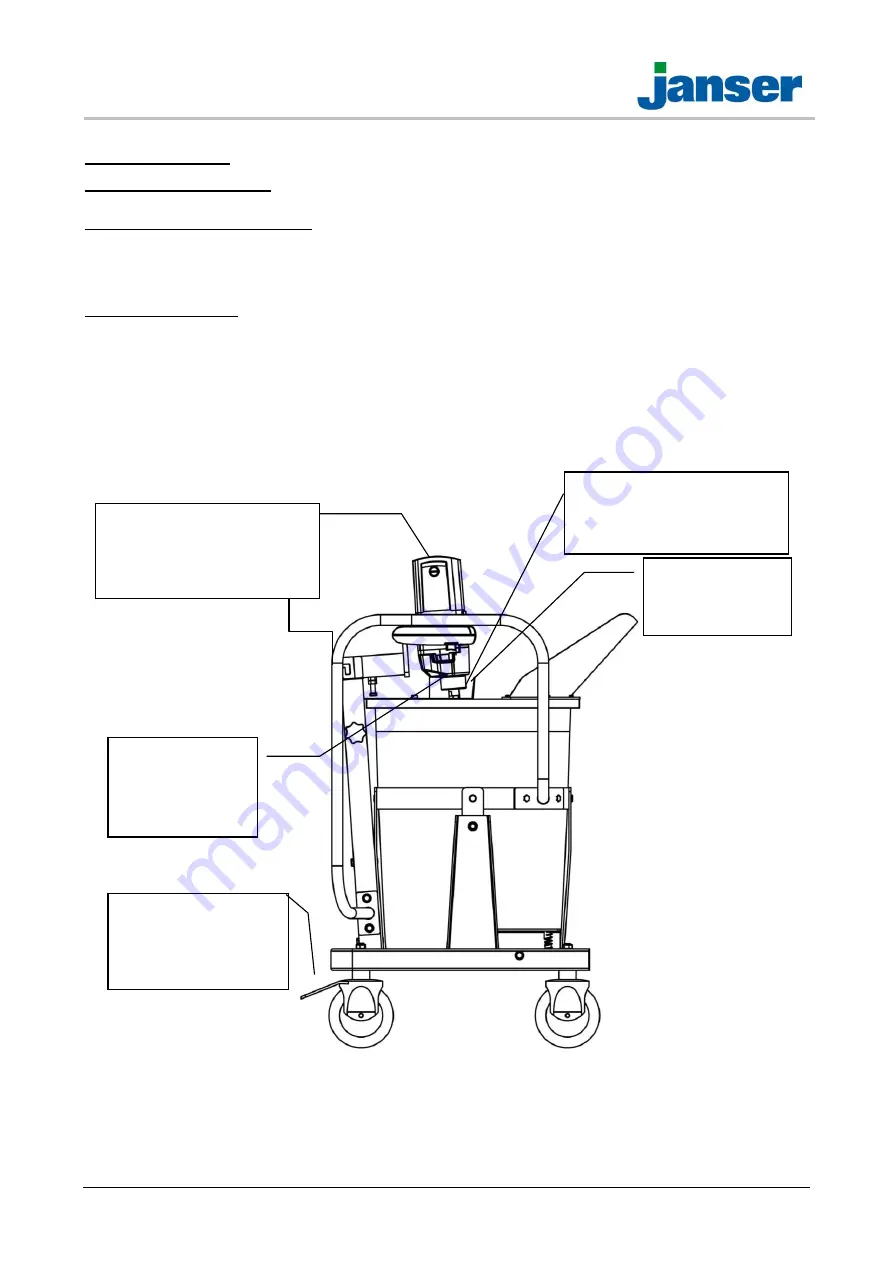
As shown in figure below follow the steps to complete the operations from A to D in sequence to
complete the mixing operation of the mixing station.
Step D: Turn on the power
of the mixer, start the
mixer, and hang the cable
on the wire rack.
Step B: Pour the
water into to the
bucket.
Step C: Connect
vacuum cleaner
and start the
vacuum cleaner.
Step A: Step on the
brake of the
universal wheel to fix
the mixing station.
Step E: Put the material
into the bucket when the
mixer start to work.


