emVIEW-12T/D (
User's Manual
) Use of emVIEW-12T/D
4 - 17
Rev. 1.3
© Janz Tec AG
4
Use of emVIEW-12T/D
Once the emVIEW is installed it can be used at once, it is already configured. The user is free to
adjust the configuration at will. To do so, the installed
o
n
s
creen
d
isplay (OSD) must be used.
To finish the driver installation, the touch screen must be calibrated.
4.1
Using and calibrating the touch-screen on Windows XP
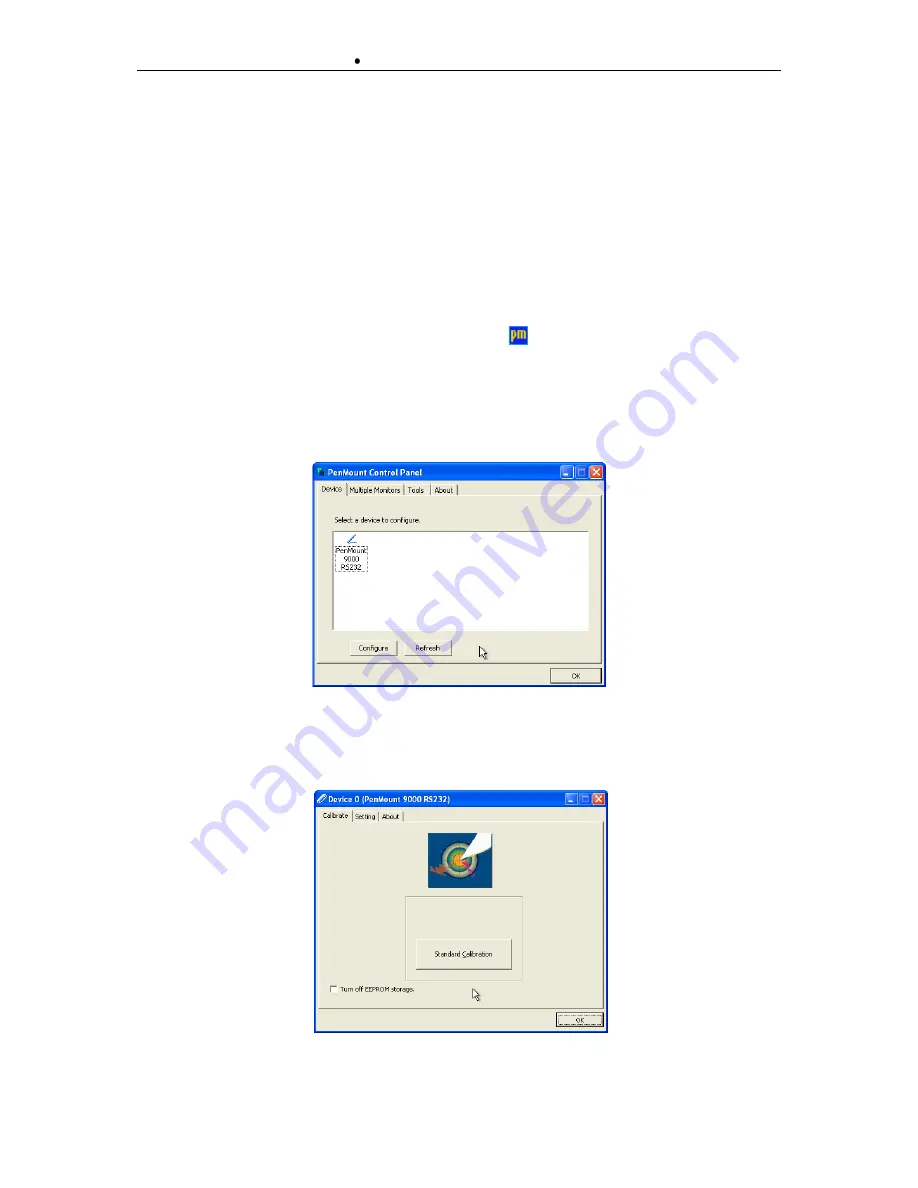
Once the drivers are installed, the PenMount monitor icon
is shown in the taskbar. By clicking the
icon the control panel is started and the touch screen configuration is displayed as shown in figure 7.
There are four tabs in the control panel,
‘Device’
,
‘Multiple
Monitors
’
,
‘Tools’
and
‘About’
. On the device
tab a field with found device is shown. By selecting one of these devices it can be configured. While
using more than one monitor with touch-screen
the ‘
Multiple Monitors
’
tab helps to map the touch-
screens at will. The ‘
T
ools’
tab shows miscellaneous small tools for working with the touch-screen and
at least the ‘
A
bout’
tab shows version information for the control panel.
figure 7: PenMount Control Panel
The device window displays the detected devices, in case of figure 7 there is only one device installed.
By double clicking this device (PenMount 9000 RS232) another window (figure 8) is shown.
figure 8:
‘Device 0’ configuration


