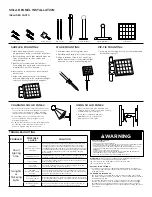
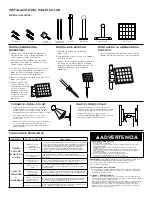

1. Mark mounting locations of short or
long-arm base using screw holes as guides.
2. Before drilling, check that marked areas are
clear of obstacles such as cables and
electrical lines.
3. Drill holes for screws and wall anchors.
For drilling into wood and other composite
materials use a 3/32in. drill bit.
4. Insert anchors, then secure base in place
with screws.
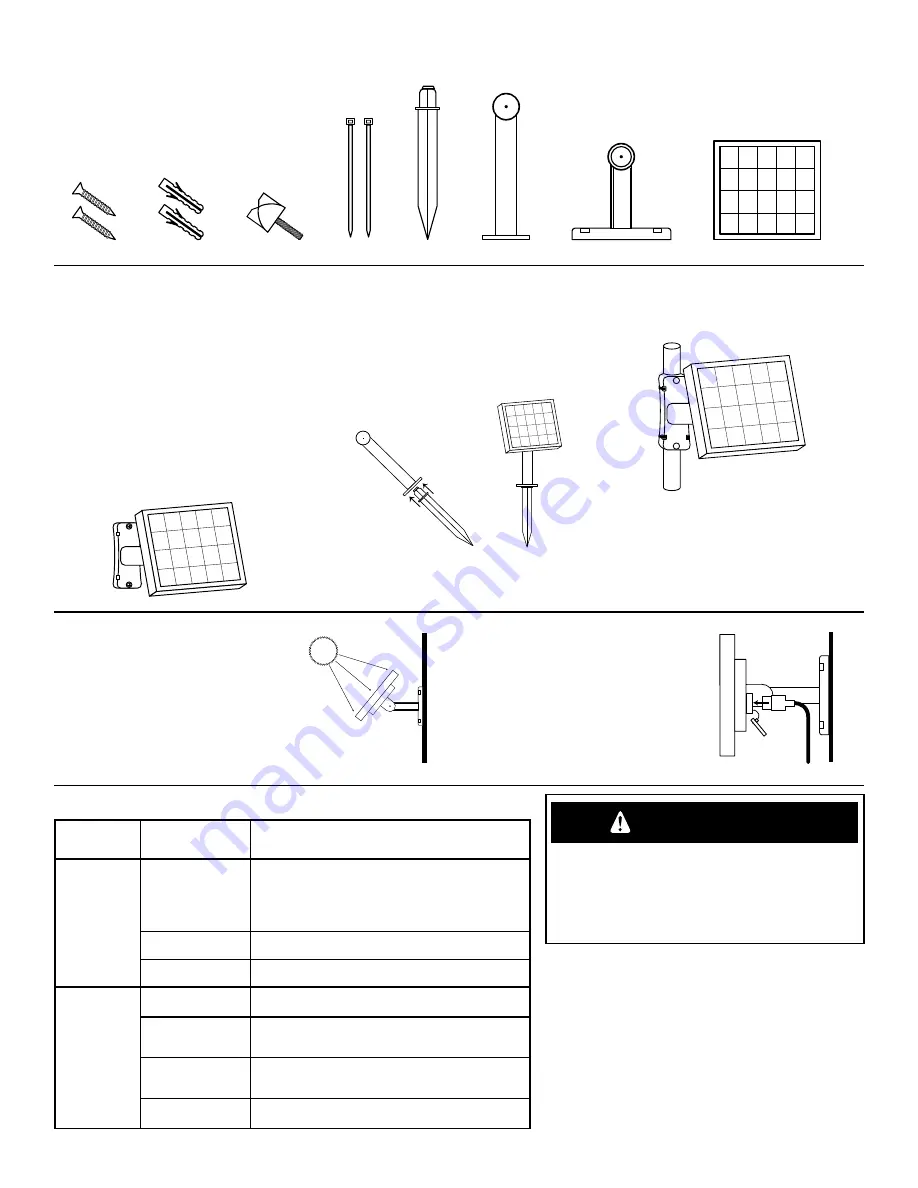
5. Align solar panel with top of mounting
arm and adjust angle for optimum sunlight
exposure. Secure to arm with wing nut.
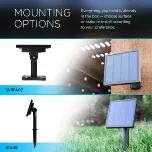
SURFACE MOUNTING:
1. Combine stake with long-arm base.
2. Carefully, but firmly, place stake into ground.
3. Align solar panel with top of mounting
arm and adjust angle for optimal sunlight
exposure. Secure to arm with wing nut.
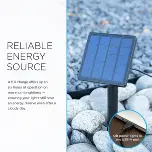
1. Ensure your solar panel is placed so that its expo
sure to the sun is optimized. Be aware of objects
such as trees or property overhangs that may
impede the panel’s ability to generate a charge.
2. A full charge (up to seven hours) offers six
hours of operation while your lights are on
maximum brightness.
3. To adjust the solar panel, loosen the wing nut and
position the panel. When desired position is
achieved, tighten wing nut until secure.
STAKE MOUNTING:
CHARGING SOLAR PANEL:
ZIP-TIE MOUNTING:
USING SOLAR PANEL:
PROBLEM
POSSIBLE
CAUSE
SOLUTION
Short
lighting
time
Panel is not
properly exposed to
sunlight
When using solar power ensure the solar panel is located in an
area where it can receive the maximum amount of full, direct
sunlight every day. If the solar light does not receive enough
sunlight during daytime the battery will be recharged on the next
sunny day and resume normal operation. Keeping the solar panel
clean is equally important to ensure the maximum charging
performance.
Failing battery life
Internal battery is non-serviceable, and the solar panel should be
replaced. Contact Jasco Products to get a new solar panel.
Timer setting
Select a longer timer setting using the in-line controller for your
USB-powered café lights.
No lights
or
flickering
lights
Poor USB
connection
Check the USB plug and socket for dirt or foreign matter, and
ensure that the plug is properly inserted.
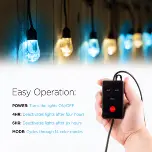
POWER
button hasn’t been
pressed
Press the button on the back of the solar panel to ensure that
power is being supplied to the café lights and press the POWER
button on the café light’s in-line controller.
The solar panel is
over-exposed at
night
When the light exposure reaches a certain intensity, the product
may not automatically light up. The product needs to be installed
in a dark place at night.
Insufficient power
supply
When using solar power, make sure the product is charged for
more than 3 hours under strong sunlight before testing.
RISK OF ELECTRIC SHOCK
• DO NOT SUBMERSE.
• DO NOT USE AROUND AQUARIUMS.
• SOLAR PANEL IS A WET LOCATION PRODUCT AND HAS NO SERVICEABLE PARTS.
• KEEP SOLAR PANEL AT LEAST 16 FEET FROM POOLS AND SPAS.
• AVOID DAMAGE TO SOLAR PANEL. INSPECT THE SOLAR PANEL FOR PHYSICAL
DAMAGE OR OTHER DAMAGE CAUSED BY OUTDOOR EXPOSURE TO THE
ELEMENTS.
• REPLACE THE SOLAR PANEL IF DAMAGED.
• DO NOT INSTALL IN LOCATIONS WHERE SOLAR PANEL CAN BE STEPPED ON.
• CHILDREN SHOULD NOT PLAY WITH SOLAR PANEL.
• ONLY USE SOLAR PANEL WITH USB POWERED CAFÉ LIGHTS.
WARNING
TROUBLESHOOTING
1. Loop zip ties through slots on short-arm base and
fasten them together.
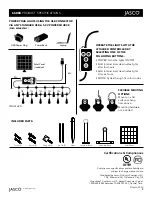
1. Once solar panel has been mounted and
charged, remove USB cover located on back
of panel and plug in café lights.
2. Cover panel completely and press
POWER button on solar panel to
supply power to café lights.
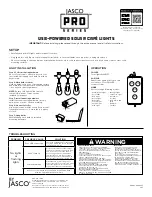
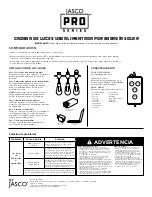
WARNING:
Read all safety precautions and installation instructions
carefully before installing or operating this fixture.
• Do not expose the solar panel to fire or intense heat
• Do not immerse in water
BATTERY INSTRUCTIONS:
• This product contains a rechargeable lithium battery. The battery
is non serviceable, please contact Jasco Products for a replacement
solar power unit.
CARE AND MAINTENANCE:
• The solar panel is not allowed to dip into water or any other liquid.
The water-resistant function is limited to correct installation or within
a certain angle in rain.
• To optimize the effectiveness of your solar panel, do the following:
Choose a location for your solar panel that gets the most sunlight
throughout the year. Wipe the panel every few months to remove
dust or debris that might affect the solar energy harvesting efficiency
of the panel.
SOLAR PANEL INSTALLATION
INCLUDED PARTS:
Screw (2)
Anchor (2)
Wing Nut (1)
Zip Tie (2)
Stake
Long-Arm Base
Short-Arm Base
Solar Panel


