background image


1


Jasmine EVO-I   

Full-HD 1080P Media Player 


Owner’s Manual 

Summary of Contents for EVO-I

Page 1: ...1 Jasmine EVO I Full HD 1080P Media Player Owner s Manual ...

Page 2: ...en unplug from power outlet take hold of plug head but don t draw power cord 4 Press power key to turn power off when you no longer use the product Unplug the cable when don t use it for a long time 5 Don t open the cover or touch all components inside of the product 6 Don t install operate this product in the sunshine or hereby heat sources to protect it from overheating 7 This product should be ...

Page 3: ...lling a hard disk drive for EVO I 4 2 Connecting Cables 6 3 Familiar with the remote controller 8 4 Installing software and basic operations 10 5 Firmware updating guide 30 6 FAQ 32 7 EVO I Description and Parameters 32 ...

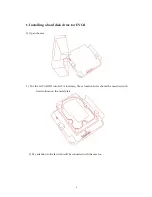
Page 4: ...d disk drive for EVO I 1 Open the case 2 Put the SATA HDD into SATA interface Those location holes should be matched with fixed column on the metal plate 3 Pay attention to the fan it should be connected with the case too ...

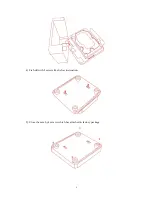
Page 5: ...5 4 Fix hdd with 2 screws like below instruction 5 Close the case by 4 screws which has attached in factory package ...

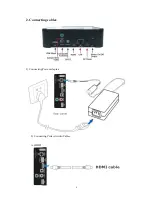
Page 6: ...6 2 Connecting cables 1 Connecting Power adapter 2 Connecting Video Audio Cables A HDMI ...

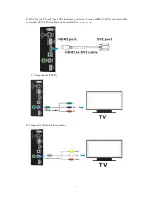
Page 7: ...7 B DVI If your TV only have DVI interface you have to use a HDMI to DVI converter cable to connect EVO I This cable is not a standard accessories C Components YPbPr D Composite Video Stereo audio ...

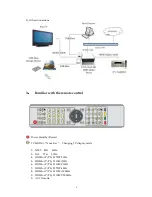
Page 8: ... Restart TV MODE Num Key Changing TV display mode 1 NTSC 480i 60Hz 2 PAL 576i 50Hz 4 HDMI or P Pb Pr 720P 50Hz 5 HDMI or P Pb Pr 1080i 50Hz 6 HDMI or P Pb Pr 1080P 50Hz 7 HDMI or P Pb Pr 720P 60Hz 8 HDMI or P Pb Pr 1080i 59 94Hz 9 HDMI or P Pb Pr 1080P 59 94Hz 0 AUTO mode ...

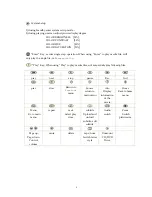
Page 9: ...le not sequentially Play Key When using Play to play media files will sequentially play following files prev next stop pause Rev fwd prev slow Return to Previous menu Source return to main menu info Display information of the movie Home Back to home menu Menu Go to main menu repeat seek Select play time subtitle Upload and unload subtitle edit subtitle Audio switch Zoom Switch picture size Page up...

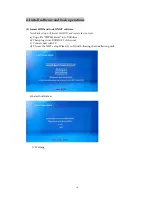
Page 10: ...ftware Note Fresh setup will format the HDD and remove the contents a Copy file SMP8634 nmt into USB drive b Then plug it into USB HOST of the unit c Connect unit with TV d Choose the NMT setup Wizard you ll find following the installation guide e Select hdd format f Warning ...

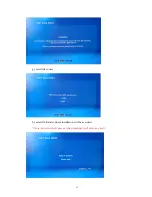
Page 11: ...11 g select file source h select USB and confirm installation will be executed Note don t swich off power After finish unit will reboot by itself ...

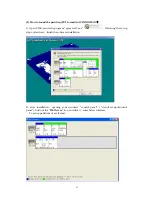
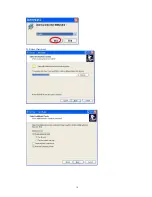
Page 12: ...e program egreat ext3 exe Following the set up steps select next finish the software installation 2 after installation opening your windows control panel startÆset upÆcontrol panel find out the IFS Drives icon and click it enter below interface To set up partitions of ext format ...

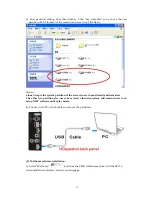
Page 13: ...rtition of the server it never been deleted and formated The other two partition also never be revised otherwise system will remind user to re setup NMT software under play mode 4 Connect with PC via usb cable you can see the partitions 3 Myihome software installation 1 Select Myihome icon from the CD R which come from with the EVO I enter installation interface selecet your language ...

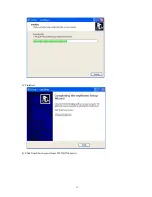
Page 14: ...14 2 Enter then next ...

Page 15: ...15 3 Finished 4 Click finish button and enter MYIHONE menu ...

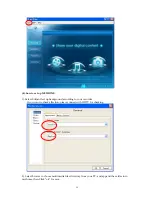
Page 16: ...and set up background according to your own idea If you want to check effection please connect with HDTV for checking 2 Select browse to choose multimedia files directory from your PC and append these files into myihome then Click ok for save ...

Page 17: ...information default is 8000 no necessary to revise anywhere 4 Return to main menu now you will find all the files has been linked into this software already You can set up playlist or photo play interval and so on ...

Page 18: ...8 5 After finish setting tick this selection before existing then the icon will appear on the monitor at the right bottom position After finish all installation this PC will be found in the media source ...

Page 19: ...19 5 Network share 1 Select NMT applications start Samba server 2 Find the unit from workgroup Select Network share default User Name is nmt Password is 1234 ...

Page 20: ...n the LAN if other computer want to enter this share units they should input the same user name nmt and Password 1234 3 Return to main menu you can see this icon 6 MSP service and BT download MSP interface ...

Page 21: ...21 ...

Page 22: ...22 Other BT download method copy BT seeds into USB drive Insert this USB drive into usb USB host of unti select seeds from After confirm above picture will appear 7 Audio setup ...

Page 23: ...23 8 Video set up ...

Page 24: ...24 ...

Page 25: ...25 Picture display interval setting ...

Page 26: ...26 9 Network set up ...

Page 27: ...27 Set up time zone ...

Page 28: ...28 10 Server set up ...

Page 29: ...29 11 CD DVD driver set up Being sure the USB DVD device is connected ...

Page 30: ... firmware software package from http www jasmineaudio net faq html 2 Preparing an USB Flash disk or other USB storage devices 3 Unpacking the firmware software to your U Disk then plug the U Disk to the USB port located at front panel of EVO I 4 Using files browsing function to find the firmware files like these 50 15 080401 14 EGR 402 000 bin Linda html ...

Page 31: ...er key the screen will show following information 6 Executing 8634 ES update 50 15 08xxxxx 14 EGR 402 000 bin the system will enter the firmware upgrading program 7 Keeping the power on when the EVO I is upgrading after the upgrading procedure ...

Page 32: ...an t find HDD A 1 HDD isn t format pls format your hdd first 2 HDD is destroyed pls change HDD 3 Others Q Why there is no audio output A 1 Pls check all the device connected method is right or not 2 If the file is DTS format pls connect with your AVR unit can t support DTS decode at present Q Why there is no signal output on the monitor A 1 Check your device connect method 2 Press TV MODE button r...

Page 33: ...FS FAT32 Power adapter AC100 240 V DC12V 2A 5V 3A Human Interface Device Handheld remote standard USB keyboard optional Connectivity Protocol s Support Protocols UPnP AV NMPR v2 1 UPnP 1 0 connect to myiHome Lite Bonjour NMT Streaming Application Specifications Streaming via HTTP protocol over local network or the Internet WMS over HTTP support via the Internet RTSP over HTTP support via the Inter...

Page 34: ...ional Portuguese optional Swedish optional Media Codecs Video 4 standard definition streams PAL and NTSC formats in any of the following format H 264 VC 1 MPEG 4 and MPEG 2 MKV M2TS TS AVI One high definition stream 1920 x 1080i 60 1920 x 1080p 30 1280 x720p 60 and one standard definition stream simultaneously H 264 MP HP L4 1 VC 1 WMV9 MP HL AP L3 MPEG 4 ASP L5 1 MPEG 2 MP HL and MP ML Audio MPEG...

Page 35: ...t system HDD format HDD partition create copy delete File transfer Password protection etc Proprietary server myiHome Lite detection by Networked Media Tank slim client with UPnP 1 0 Media Player extender Supports any other DLNA compliant devices Browser support HTML 3 2 compliant and partial HTML 4 0 support Partial Javascript 1 5 support Partial CSS2 support Proprietary Consumer HTML support to ...

Page 36: ...t Playback feature support Photo Album JPEG with the entire supported audio format as background music Internet Radio supporting Shoutcast server MP3 Internet Radio stream Playback control Play Pause Go to seeking Fast Forward Rewind Slow Motion MPEG 1 and MPEG 2 only Audio and Video Play List supported MP3 playback with album art support proprietary server e g myiHome Lite allows playback on mult...

Reviews: