Jason International, Inc. •
501.771.4477
Page 3 of 26
Customer Service : 800.255.5766
Copyright © 2014 Jason International, Inc.
INSTALLATION INSTRUCTIONS (cont.)
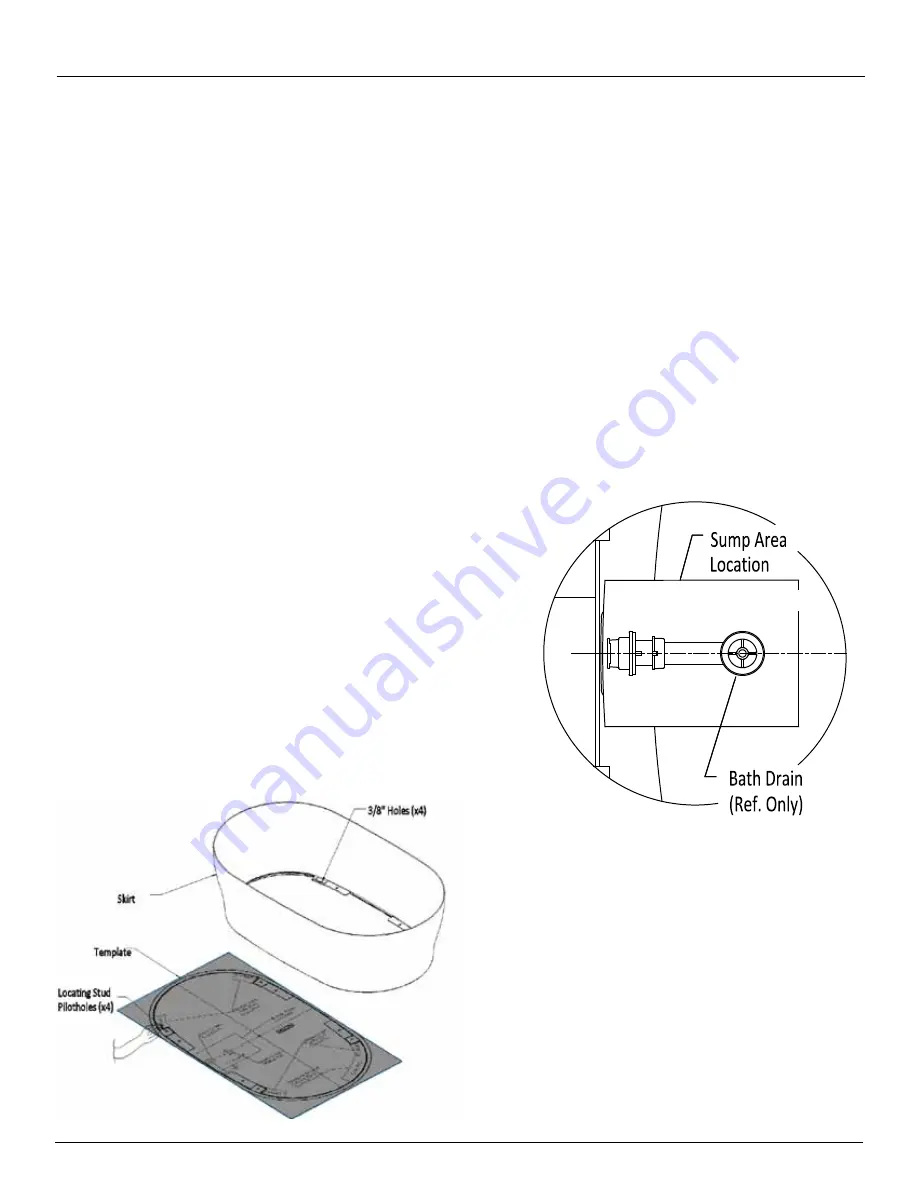
Figure 3
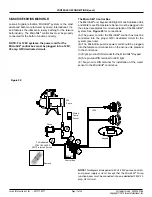
Figure 4
8. After the finished floor is installed, position the installation
template on the finished floor. Place the template to line up
with the existing floor drain location and orient the template
to the desired position.
Note: The sump area location cutout and remote
blower tubing floor location cutout (when applicable),
and water inlet stub-out must line up with the template.
Note: The Sani-Design™ cleaning system (for AirMas-
seur
®
baths) has not been installed. See the forma
®
Collection FIELD INSTALLATION INSTRUCTIONS for
the installation procedures.
9. Tape the template to the finished floor; using care to align
both center lines and assure that the template is lying flat on
the floor.
10. Transfer the center lines of the template to the finished
floor.
CAUTION: Use a marker that can be removed from the
finished floor after installation.
11. Position the Skirt (only) and align it with the centerlines on
the finished floor. Use the four existing 3/8" holes located
in the bottom four corners of the skirt to mark where to drill
the pilot holes for the four locating studs. If installing on a
wooden floor, 1/4" [6mm] holes are required, and a 5/16"
nut to install the locating studs into the wooden floor. When
installing on a cement slab, 3/8" [9.5mm] holes are required.
See Figure 3. After marking the hole locations, remove the
skirt and set aside.
12. Dry fit the drain and overflow to the bath.
a. Dry fit the drain and overflow to the bath. Use the
instructions included with the drain and overflow to
determine proper fit. It is recommended that flex
PVC pipe be used between the overflow and drain.
This will assure there is enough clearance between
the bath shell and the skirt for the drain.
b. Position bath in place and attach the drain and
overflow to the floor drain “P” trap. CAUTION:
Only dry fit the drain and overflow tee to the
“P” trap at this time.
c.
Disconnect the drain and overflow from the bath
and leave the drain assembly free standing in the
“P” trap.
13. Align the drain with the center line on the template.
See Figure 4.
14. Permanently attach the drain tee to the “P” trap.
15. Remove the template from the floor.
16. Install the skirt location studs into the four (4) posi-
tions in the floor. See Figure 5.


