Jason International, Inc. •
501.771.4477
Page 5 of 18
Customer Service : 800.255.5766
Copyright © 2011 Jason International.
instALLAtiOn instRuctiOns (cont.)
CAUTION: Do not allow any dirt or debris to enter into
the system plumbing or MicroSilk
TM
pump Assembly.
This could cause system blockage and equipment
damage.
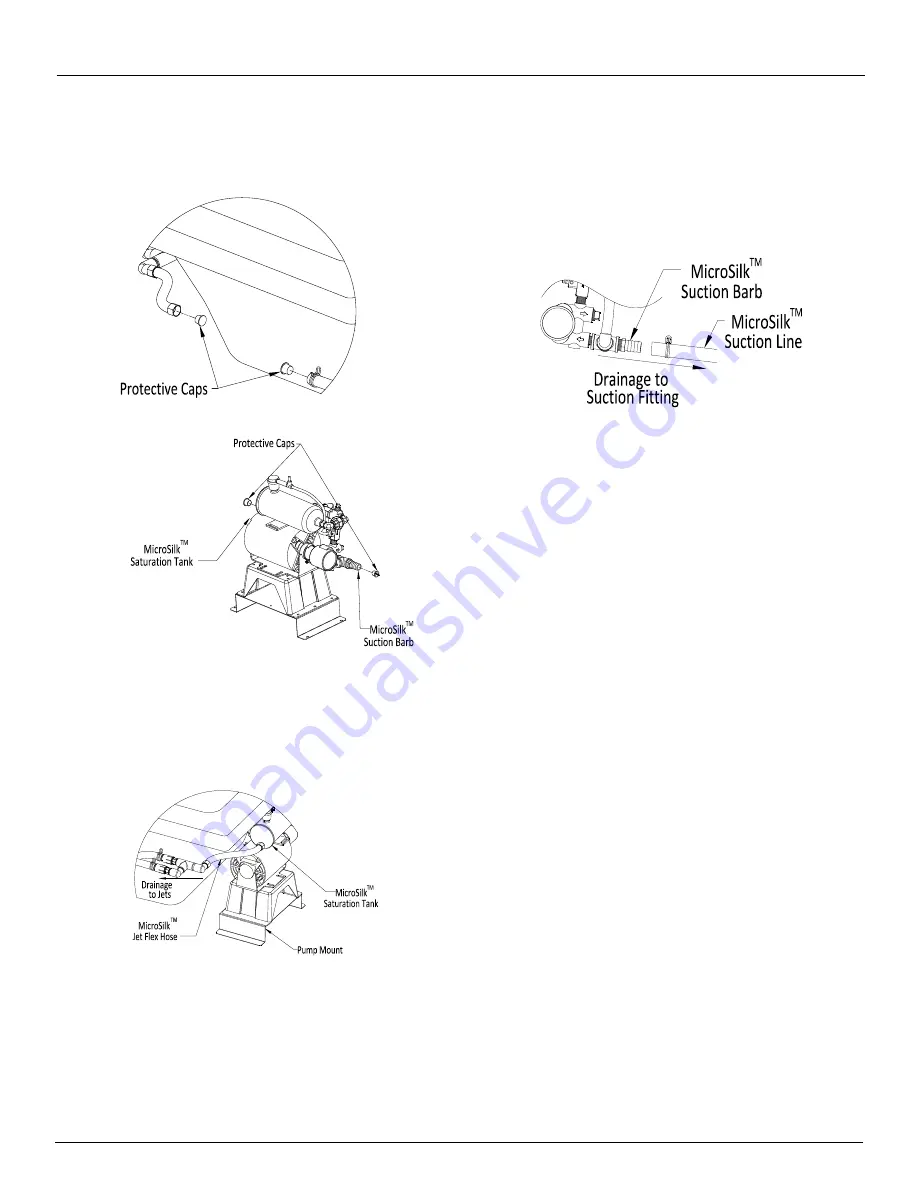
Remove the protective caps from the MicroSilk™ Jet Flex
4.
Hose and the MicroSilk™ Suction Line that are located on
the bath
(See Figure 5)
, also remove the protective caps
from the MicroSilk™ Saturation Tank and the MicroSilk™
Suction Barb that are located on the MicroSilk™ Pump
Assembly
(See Figure 6).
Figure 5
Figure 6
Figure 7
Thread the MicroSilk™ Jet Flex Hose onto the MicroSilk™
5.
Saturation Tank, located on the MicroSilk™ Pump
Assembly. Verify that all connections on the discharge side
are tight
(See Figure 7).
Assure the MicroSilk™ Jet Flex
Hose will allow proper drainage to the jets. All hoses must
have a continuous drop from the saturation tank to the jets.
NOTe: verify the pump wet-end is angled to allow for
proper drainage.
Clamp the MicroSilk™ Suction Line to the MicroSilk™
6.
Suction Barb using the clamp provided on the tubing.
Assure the MicroSilk™ Suction Line will allow proper
drainage to the suction
(See Figure 8)
. The suction
hose must have a continuous drop from the suction
barb to the suction fitting.
Figure 8
CAUTION: Confirm all tubing is fully engaged on
its respective barb and its clamp has secured the
tubing to the barb.
7. The bottom of the Pump Mount must be secured and
level with the bottom of the bath, it is recommended
removable fasteners be used in case any future servicing
is required.
8. Continue bath installation per the Jason Owner’s Manual
Installation, Operation, and Maintenance guide.


