Jason International, Inc. •
501.771.4477
Page 4 of 24
Customer Service : 800.255.5766
Copyright © 2013 Jason International.
INSTALLATION INSTRUCTIONS (cont.)
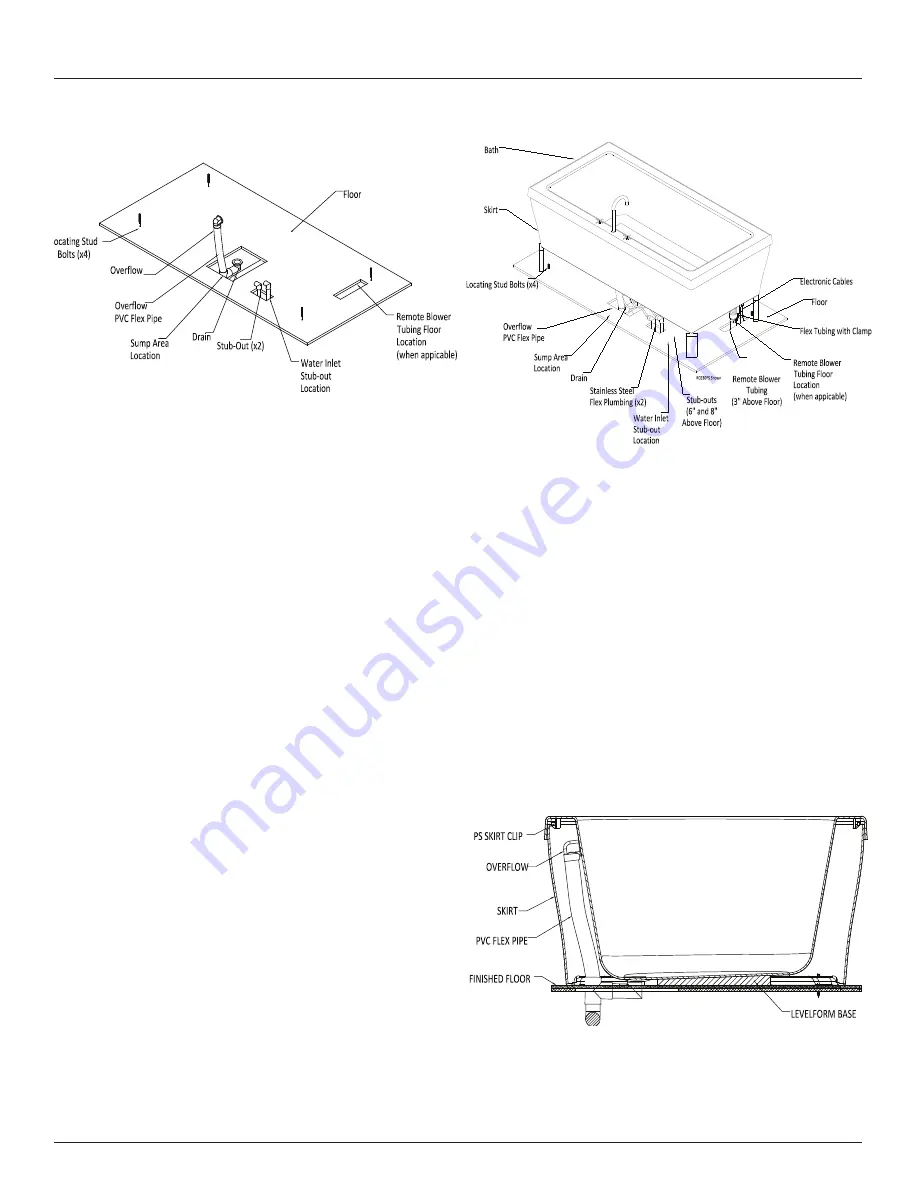
Figure 5
Figure 6
17. Attach faucet accessories to the bath (if applicable).
CAUTION: There is not enough room to mount a deck
mounted diverter valve on the deck of the bath.
If a hand-held shower is desired consider a floor mounted
faucet or a faucet with an above deck diverter.
If a floor mounted faucet is desired, be sure to install the
faucet to allow for sufficient overhang into the well of the
bath. This will ensure an unobstructed water flow out of the
faucet when filling the bath. Follow the faucet manufacturer’s
installation instructions.
18. Flex plumbing. Attach stainless steel flex plumbing to the
deck-mounted faucet (if applicable).
Note: Flex plumbing lines must be long enough so the
bath can be removed from the skirt if access is re-
quired in the future.
½" [12mm] 4 foot [122cm] stainless steel flex hoses may be
purchased from Jason International, Inc.
19. Remote Mounting of Blower. If the blower for the AirMas-
seur bath is to be remote mounted, refer to the REMOTE
MOUNTING OF AIR BLOWER section of this manual,
before proceeding to the next step.
20. Reattach the skirt to the bath by positioning the skirt on
the bath and fastening the 5/16" nut and washers to the
5/16” leveling bolts, nuts and washers attached to the bath.
Be sure that the skirt is positioned correctly allowing the PS
skirt clips to rest against the back of the skirt.
21. Position the bath and skirt assembly over the four locat-
ing studs. Align the drain and overflow with the correspond-
ing bath holes. See Figure 6.
Place bath and skirt assembly on raised blocks approxi-
mately 8" tall.
22. Flex Plumbing. Attach stainless steel flex plumbing to stub-
outs (if applicable). Faucetry connections should be tested
for leaks at this time.
23. Route cables. When applicable, route any electronic
cables through the floor cutout and make the appropriate
connections to the control box. See the CONTROL BOX
CONNECTIONS section of this manual for locations.
24. Remove blocks and place bath and skirt assembly in posi-
tion.
Jason baths are designed to be supported at the base of
the bath. If the floor is smooth and level the bath’s Level
Form™ base will provide proper drainage and support.
See Figure 7.
Note: Do not use a sand bed to install or level the bath.
Note: The bottom of the bath’s Level Form™ base must
be 1/8" lower than the bottom of the skirt.
Figure 7


