F
x8
F
A
6
1
2
1
2
7
A
2.5x2.5
A
A
5x5
12
5
12
B
x20
B
A
4x4
A
5
7
G
C
x8
A
2.5x2.5
A
8
C
5
9
12
8
10
G
x4
16
16
16
5
STEP6
STEP7
STEP8
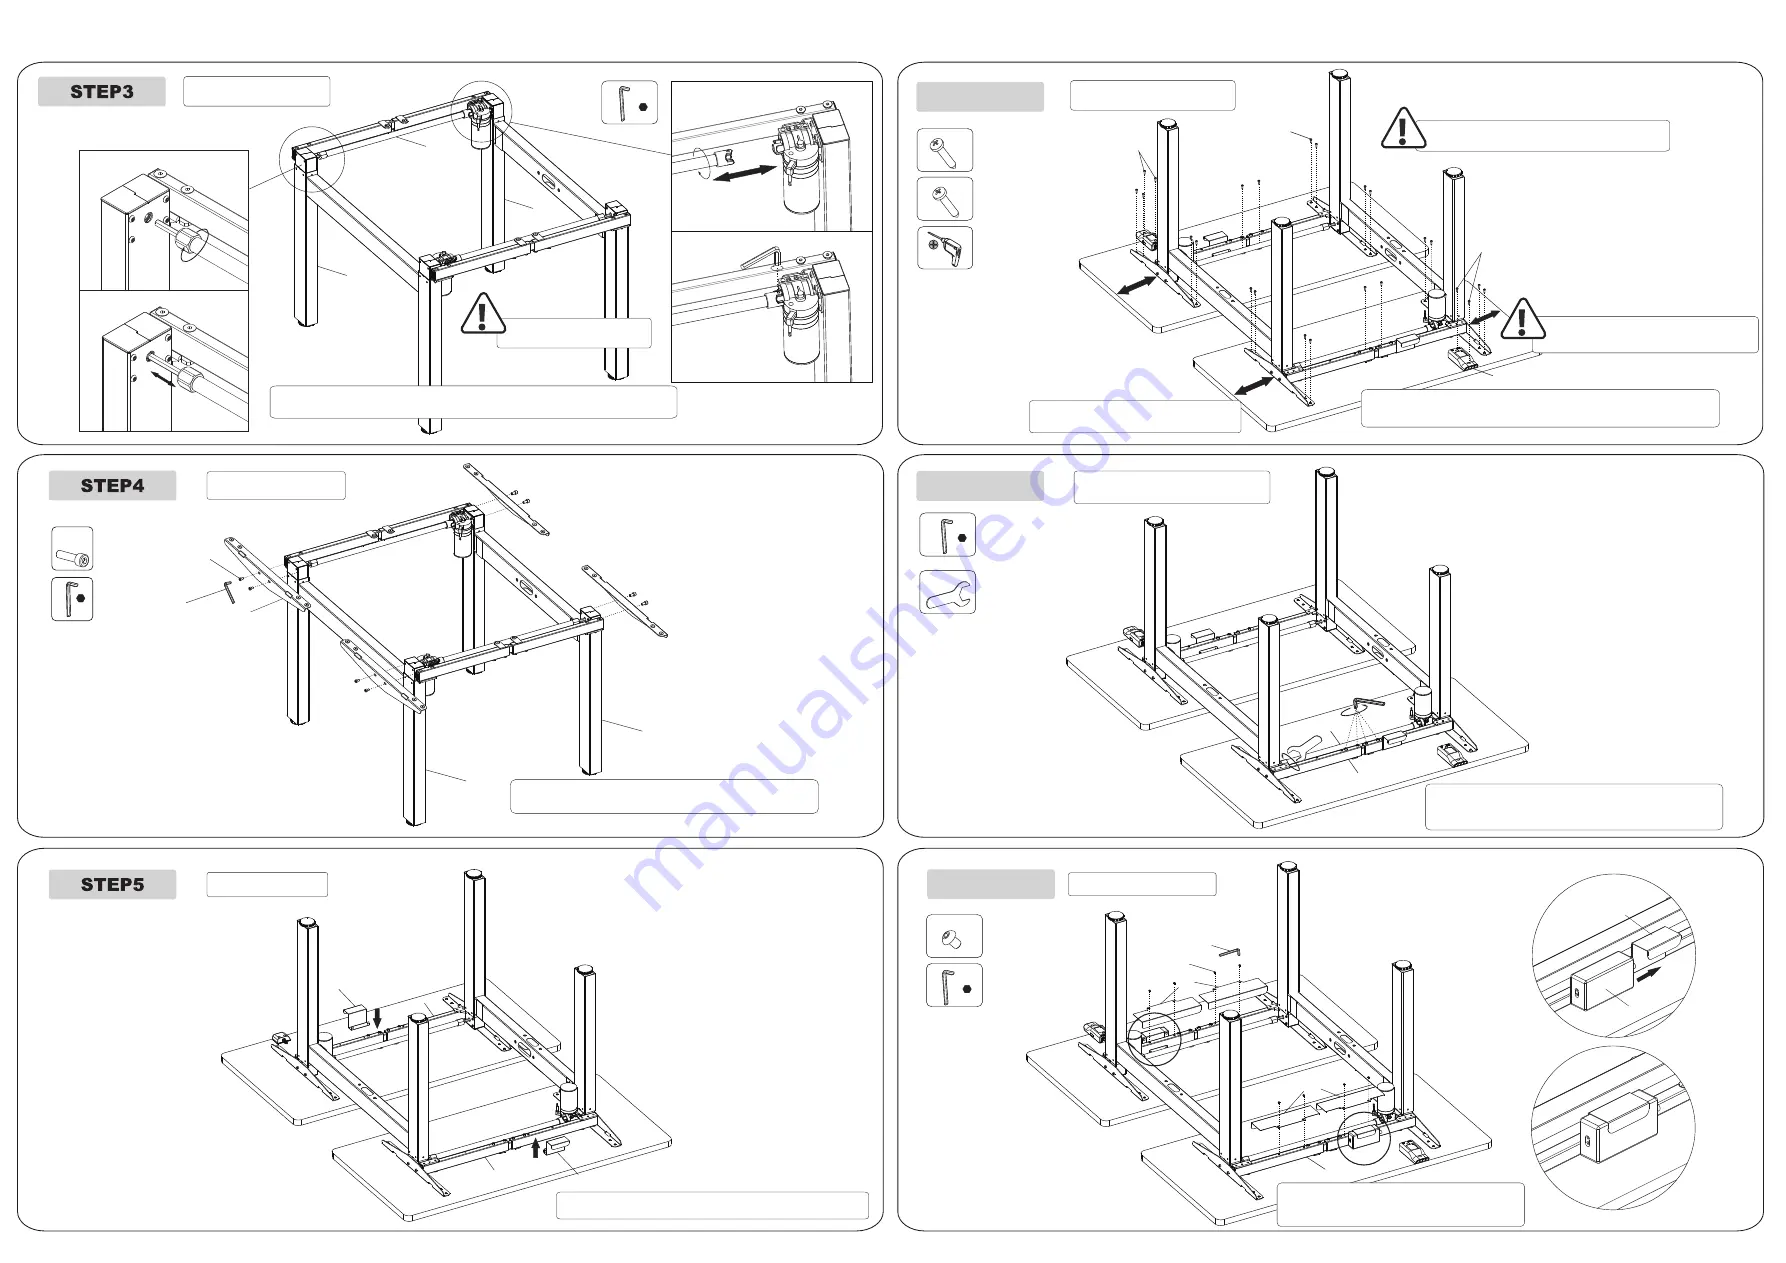
Install Transmission Rod
Insert
Rotate
Tighten
Do not rotate the angle
exceed 120°
Connect transmission rod(7) with column (1) & (2), use the allen key (A) to
tighten the screws.
Unscrew
Insert
Install Supporting Plate
Connect supporting plate(6) with columns (1) & (2) , use
the allen key(A) to tighten the screws (F).
Install Adapter Hook
Buckle the adapter hook (12) on the supporting beam(5).
Adjust the length of the supporting beam (5)
according to the dimension of the tabletop.
The handset should be located on
the side of the column with the motor.
The distance between the two
sides shall not be longer than 200mm.
Fix the tabletop with screws(B), connect the handset(10) with the
screws(16), and use a pistol drill to tighten the screws.
Tighten the Screws on Beams and
Nuts on Transmission Rod
Use the allen key (A) to tighten the four screws on the
supporting beam(5), and use the wrench (G) to tighten
the nuts on transmission rod(7).
Install Baffle and Adapter
Use the screw(C) to assemble baffle (8) to
supporting beam(5), use the allen key(A) to
tighten the screws.
Insert
Self-Prepared
Install Tabletop and Handle


