MANUAL DE INSTRUCCIONES • INSTRUCTION MANUAL • MANUAL DE INSTRUÇÕES
38
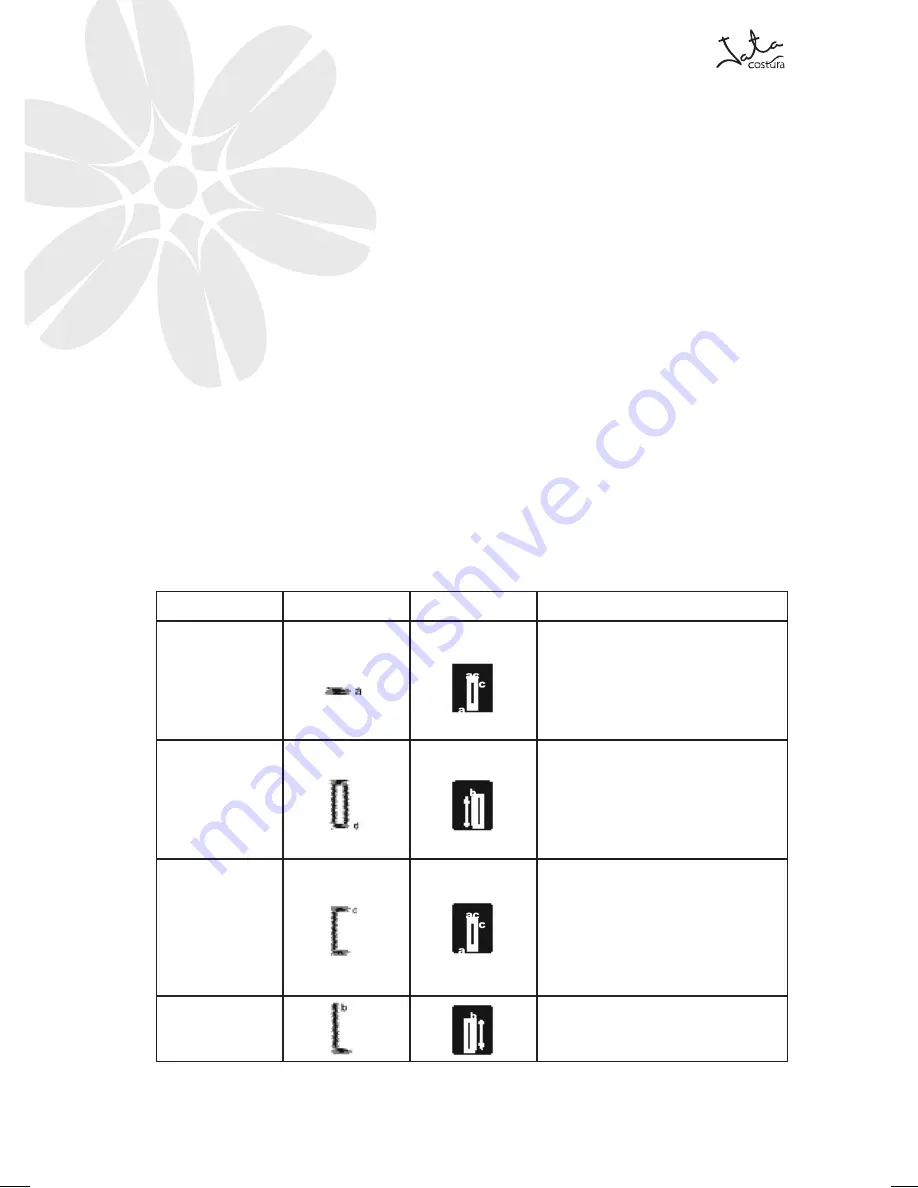
Steps
Sewing
Design
How to do it
Step a: front end of
buttonhole
1. Set the Pattern Selection Dial to a.
2. Lower the presser foot and sew 5 to 6
stitches
3. Stop the machine when the needle is at
the left side of the stitches and raise the
needle from the material.
Step b: left side
1. Turn the Pattern Selection Dial to b
2. Sew the predetermined length of the
tailor’s chalk line
3. Stop the machine when the needle is at
the left side of the stitch and raise the
needle.
Step c: Back end of
buttonhole
1. Turn the Pattern Selection Dial to c
(same position as a).
2. Lower the presser foot and sew 5 to 6
stitches
3. Stop the machine when the needle is at
the right side of the stitch and raise the
needle from the material
Step d: right side
1. Set the Pattern Selection Dial to d.
2. Sew the right side until the needle
reaches the stitches formed in step a.
Making a buttonhole
1. Using tailor’s chalk, mark the position and length of
the buttonhole on the fabric.
2. Attach the buttonhole foot and push the silver
frame back until it stops with the plastic insert in
front of the metal frame.
3. The front bar tact will be sewn first. Place the fabric
under the presser foot so that the center of the front
bar tack mark is directly under the center of the
presser foot and aligned with the two red lines.


