background image

18

Problem:

 Your film scanner will not connect to the computer

Solution:

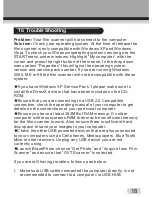
 Check your operating system: At the time of release the 

film scanner is only compatible with Windows XP and Windows 

Vista. To check your Windows operating system version go to the 

START menu under windows. Highlight “My computer” with the 

cursor and press the right button of the mouse. In the drop down 

menu select “Properties” this will give the operating system 

version and service pack number. If you are running Windows 

2000, ME or 98 the film scanner will not be compatible with these 

system.

If you have Windows XP Service Pack 1 please make sure to 

install the DirectX drivers that have been included on the CD-

ROM.

Ensure that you are connecting to a USB 2.0 Compatible 

connection, check the operating manual of your computer to get 

details on the connections of your particular computer.

Ensure you have at least 384MB of RAM memory. On older 

computer with less systems RAM their may be insufficient memory 

for the film scanner to work. Also ensure there is sufficient hard 

disc space to save your images to your computer.

Check the other USB powered devices that are also connected 

to your computer such as Cell phones, Media players, Blue Tooth 

Mice or other devices. Unplug any USB device you are not 

currently using.

Launch BlazePhoto-choose “Get Photo” and “Acquire from Film 

Scanner” and ensure that “OVT Scanner” is selected.

If you are still having troubles, follow up as below: 

I. Make sure USB cable connected the computer directly, is not 

recommended to connect to a computer via USB HUB.

10. Trouble Shooting

Summary of Contents for DS100

Page 1: ......

Page 2: ...afety Precautions Unpacking Your Product Installation The Film Scanner Loading Slides Loading Negatives Capturing Images Saving Images Cleaning Maintenance Trouble Shooting Technical Specifications 1 3 4 5 6 7 9 14 17 18 20 ...
Page 3: ...phones and other USB devices may result in an insufficient supply of power to your film scanner for normal operation Please make sure that this scanner does not get into the hands of children it is not a toy Please contact our technical support for questions regarding the scanner its mode of operation safety and proper connection Do not disassemble the device and do not open the housing there is d...

Page 4: ...p the scanner away from water and other liquids It should not be used in rain or snow Moisture may cause electric shock or even fire Cleaning and Care Use a soft dry cloth to clean the surface Store the device in a clean and dry location Packing Do not leave the packing material lying around Plastic bags are dangerous and not toys Interference Most electronic devices such as lamps computers teleph...

Page 5: ... please read all the operating instructions and the notes on safety carefully USB Connection Use the USB cable to connect the device to your PC This symbol on the product or in the instructions means that your electrical and electronic equipment should be disposed at the end of its life separately from your household waste There are separate collection systems for recycling in the EU For more info...

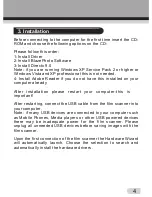
Page 6: ...uter already After installation please restart your computer this is important After restarting connect the USB cable from the film scanner into your computer Note if many USB devices are connected to your computer such as Mobile Phones Media players or other USB powered devices there may be inadequate power for the film scanner Please unplug all unneeded USB devices before saving images with the ...

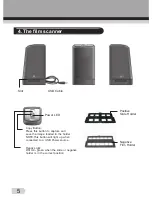
Page 7: ...ton to capture and save the image loaded in the holder NOTE This button will light up when connected to a USB Power source Ready Light Will turn green when the slide or negative holder is in the correct position Power LED Negative Film Holder Positive Slide Holder ...

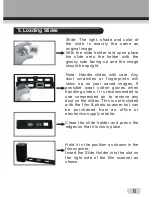
Page 8: ...prints will show up on your saved images If possible wear cotton gloves when handling slides It is recommended to use compressed air to remove any dust on the slides This is not included with the film photo scanner but can be purchased from an office or electronics supply retailer Close the slide holder and press the edges so that it locks in place Hold it in the position as shown in the film scan...

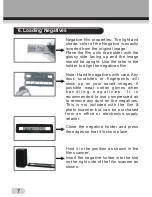
Page 9: ...hes or fingerprints will show up on your saved images If possible wear cotton gloves when h a n d l i n g n e g a t i v e s I t i s recommended to use compressed air to remove any dust on the negatives This is not included with the film photo scanner but can be purchased from an office or electronics supply retailer Close the negative holder and press the edges so that it locks in place Hold it in...

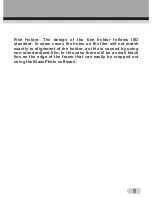
Page 10: ...In some cases the holes on the film will not match exactly to alignment of the holder as this is caused by using non standardized film In this case there will be a small black line on the edge of the frame that can easily be cropped out using the BlazePhoto software ...

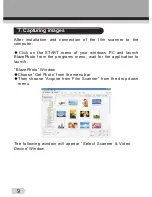
Page 11: ...f your windows PC and launch BlazePhoto from the programs menu wait for the application to launch BlazePhoto Window Choose Get Photo from the menu bar Then choose Acquire from Film Scanner from the drop down menu The following window will appear Select Scanner Video Device Window 7 Capturing images ...

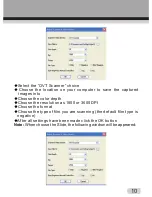
Page 12: ...d images into Choose the color depth Choose the resolution as 1800 or 3600 DPI Choose the format Choose the type of film you are scanning the default film type is negative After all settings have been made click the OK button Note When choose the Slide the following window will be appeared ...

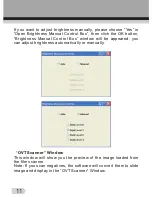
Page 13: ...utton Brightness Manual Control Box window will be appeared you can adjust brightness automatically or manually OVT Scanner Window This window will show you the preview of the image loaded from the film scanner Note If you scan negatives the software will convert them to slide image and display in the OVT Scanner Window ...

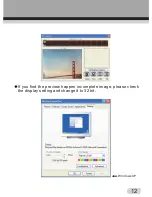
Page 14: ...12 If you find the preview happen incomplete image please check the display setting and change it to 32 bit Windows XP ...

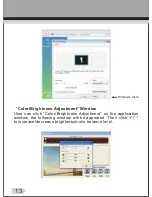
Page 15: ... Vista Color Brightness Adjustment Window User can click Color Brightness Adjustment on the application window the following window will be appeared Then click to increase decrease brightness color balance level ...

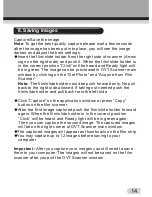
Page 16: ...t side allowed If taking out needed push the film slide holder and pull back from the left side Click Capture on the application window or press Copy button on the film scanner After the first image captured push the film slide holder forward again When the film slide holder is in the correct position Click will be heard and Ready light will be in green again Then you can capture the second image ...

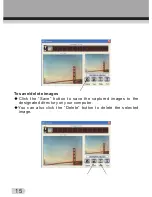
Page 17: ...15 To save delete images Click the Save button to save the captured images to the designated directory on your computer You can also click the Delete button to delete the selected image ...

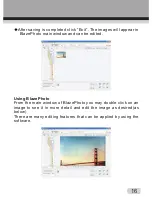
Page 18: ...n BlazePhoto main window and can be edited Using BlazePhoto From the main window of BlazePhoto you may double click on an image to see it in more detail and edit the image as desired as below There are many editing features that can be applied by using the software ...

Page 19: ... door on the right side Clean the backlight panel placed in the film scanner For further cleaning you can use an ordinary cotton swab and a bottle of lens cleaning fluid Wet the end of the cotton swab with Lens Cleaning Fluid and insert into the right side of the film scanner so the door opens Then clean the entire surface of the glass on the inside of the film scanner with the cotton swab Note Co...

Page 20: ...Ensure that you are connecting to a USB 2 0 Compatible connection check the operating manual of your computer to get details on the connections of your particular computer Ensure you have at least 384MB of RAM memory On older computer with less systems RAM their may be insufficient memory for the film scanner to work Also ensure there is sufficient hard disc space to save your images to your compu...

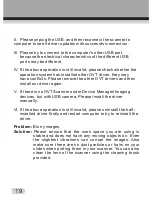
Page 21: ...tall our driver again V If there is no OVT Scanner under Device Manager Imaging devices but with USB camera Please install the driver manually VI If the above operation is still invalid please uninstall the half installed driver firstly and restart computer to try to reinstall the driver Problem Blurry images Solution Please ensure that the work space you are using is stable and does not have any ...

Page 22: ...ite LED Powered from USB USB 2 0 Windows XP Vista Windows 7 BlazePhoto driver 90x90x165mm English French German Italian Spanish Traditional Chinese Simplified Chinese Japanese Dutch Polish Portuguese Korean Lens Sensor Focus Range Exposure Color Balance Scan High Resolution Data Conversion Scan Method Light Source Power Interface Operating System Software Dimensions Language 20 ...

Page 23: ...SB connection The dimensions of the film holders supplied conform to ISO standard ISO International Organization for Standardization It is not permitted to modify or alter any part of the product The manufacturer is not responsible for damage to persons or property resulting from unintended use This is the responsibility of the operator Power is supplied via USB Please understand that incorrect op...

Page 24: ...es Service Hours Monday Thursday from 8 00 am to 5 00 pm Friday from 8 00 am to 2 00 pm Phone No 02161 5758950 Email info jay tech de Please do not send your scanner to our address unless requested to do so by our service team All costs and the risk of loss are the responsibility of the sender We reserve the right to reject unrequested deliveries or return the package at the sender s expense ...

Page 25: ......

Reviews: