background image


3 Touch Screen 


The touch screen is easy and convenient to use.   
You can use the touch screen in the following methods: 
Single click: briefly touch the screen with the finger and then move away. 
Click and hold: click the screen with the finger and hold for about 2 seconds. 
Drag: click a certain icon in the screen and hold, then move the finger, the icon will move 

accordingly. 

  To avoid damage the screen, never put anything on the it. 

4 Using SD Card 


☆ 

The device supports up to 32GB storage card.   

Insert the card into the card slot, and push it in with your finger until a “click” is heard. Now the 
card is ready for use.   

Removing SD card 

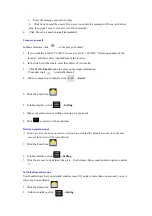
Close all programs or files on the card first. Click Settings 

 Storage 

 Remove SD card 

 OK. 

Then press the card with your finger, and simply remove it when it is ejected.   

    Do not insert and remove the card repeatedly in a short time, this may cause damage to the 

card. 

    We suggest you use the card of famous brand to ensure compatibility. 


5 Getting Started 


Charging the device 

Charge the device with USB cable is not recommended. 

You may operate the device while charging it, but this may prolong the charging time. 

Connect one end of the AC adaptor to the mains supply and the other end to the power jack on the 
device to charge it (it may take about 5 hours to fully charge the device). 


Starting the device 

Press and hold the power switch for 3 seconds and wait for system startup. 


Wi-Fi setting 

We suggest you configure your Wi-Fi network before using, as many functions require for it to 

Summary of Contents for PA1042

Page 1: ...einstalled applications 6 9 Desktop menu function 9 10 Managing Applications 10 11 Clock 11 12 Installing Software Online 12 13 Browser 13 14 Calendar 13 15 Camera 14 16 Calculator 15 17 Sound Recorde...

Page 2: ...d the power switch for 3 seconds click Power off click OK Lock unlock screen briefly press the power switch to lock unlock the screen Forced shout down if the device has no response press and hold the...

Page 3: ...s on the card first Click Settings Storage Remove SD card OK Then press the card with your finger and simply remove it when it is ejected Do not insert and remove the card repeatedly in a short time t...

Page 4: ...icon is displayed you need to enter a password to connect to such Wi Fi network 3 Click the desired Wi Fi network Enter the password if any Click Connect 4 Click to return to desktop The Wi Fi set as...

Page 5: ...time 4 Volume 5 Task 6 Return to desktop directly 7 Return 8 Volume Click any icon to run it Press and hold to drag the procedure or shortcut icon to other places on the screen Press and hold to drag...

Page 6: ...Lock Screen You can set auto lock screen or lock screen manually by pressing the power switch The lock screen interface is as follow Slide at the right to unlock the screen 8 Reinstalled applications...

Page 7: ...arithmetic operation Browser Connect to Internet Sound recorder Record and play recorded sound Calendar A calendar where you can set agendas Settings Make personalized settings Clock Make personalize...

Page 8: ...ogle Talk Talk with your friends through your Google account Local search Search for banks hotels restaurants etc near your location Map View map location etc Navigation Realize route planning and nav...

Page 9: ...9 Desktop menu function On the desktop click and hold at the center of the screen for 2 seconds to display wallpaper menu Wallpaper Select wallpaper from picture or wallpaper album...

Page 10: ...will display in the interface that displays all applications 4 Click Open to run the application or click Complete to return to File Browser interface Downloading applications from internet You can d...

Page 11: ...n appears in the status bar on the top of the screen it means at least one alarm clock is activated Add alarm clock 1 Click Clock icon 2 Click Alarm clock icon at the top right 3 Set your desired alar...

Page 12: ...list of classification or ranking You can also search for the application you want by entering a specific name 3 Click one application Download Confirm to download 4 At completion click Open to direc...

Page 13: ...the Browser icon on the desktop to open the browser 14 Calendar Click the Calendar icon If this is the first time you use this function you need to open an Exchange account first Enter your email addr...

Page 14: ...he date with agenda is displayed in grey 15 Camera Click Camera icon Menu function 1 Click to switch between front and rear camera 2 Click to switch camera mode Take a photo In camera interface click...

Page 15: ...perations 3 Click Clear to clear the entry one by one or click and hold Clear to clear all entries 17 Sound Recorder 1 Click the Sound Recorder icon 2 Click the icon to start recording When recording...

Page 16: ...ing you can click Manual setting and make necessary changes 7 Click Next 8 Optional enter account name 9 Enter the signature Click Complete When setting completes if you cannot connect to a free email...

Page 17: ...nformation If needed click to add attachment 4 When composition completes click Send 1 Click the Email icon 2 In inbox interface click Setting 3 Make your email account setting according to your needs...

Page 18: ...3 Click to select default account mark to select it as the default account of e mail If the default account is deleted the next account in the list will become default...

Page 19: ...ernal internal storage mediums To copy files into the device you can firstly copy them to SD card or USB disk The folder name of the internal storage medium is Local the name of the storage card is sd...

Page 20: ...Select the file or file folder to be deleted select Click Deletion Click OK for deletion...

Page 21: ...bum Track Play list Now playing 3 Click the track to play 4 To return to previous interface while playing a track click to return to desktop Click the track in the list to enter Music Player The inter...

Page 22: ...ete click Delete 21 4K Video player Support RM RMVB MKV H 264 MPEG AVI MOV FLV MPG VOB MPE DAT formats Support 2160P 3840 2160 Supported picture format JPG JPEG BMP and PNG 1 Click 4K video player ico...

Page 23: ...enters sleep mode or is being charged G sensor coordinate system Use the different coordinate system mode which is necessary under certain conditions Storage Total capacity free space Display total c...

Page 24: ...y When an application is reinstalled the system will recover the back up setting or other data Restore factory setting Click to clear all data on the device Click Reset the device will be reset or cli...

Page 25: ...eceive emails A The device support POP3and SMTP accounts The device may not support some free email accounts Please consult the email provider for details Storage card Q What storage card does the dev...

Page 26: ...ent The battery is not fully charged when leaving the factory so we suggest you charge the battery for at least 4 hours before using The useful life of the battery is usually counted by charging times...

Page 27: ...ications not expressly approved by party responsible for compliance coulk void the user s authority to operate the equipment Note This equipment has been tested and found to comply with the limits for...

Page 28: ...s equipment complies with FCC radiation exposure limits set forth for an uncontrolled environment This transmitter must not be co located or operating in conjunction with any other antenna or transmit...

Reviews: