


z
Storage: standard MicroSD slot supports up to 16 GB.
z
Sound: built-in stereo speakers ,support audio frequency, built-in microphone
z
Product Size: 203 x 137 x
13 mm
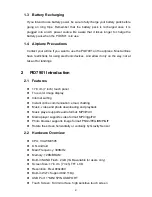
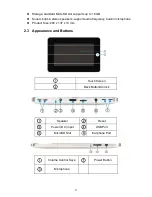
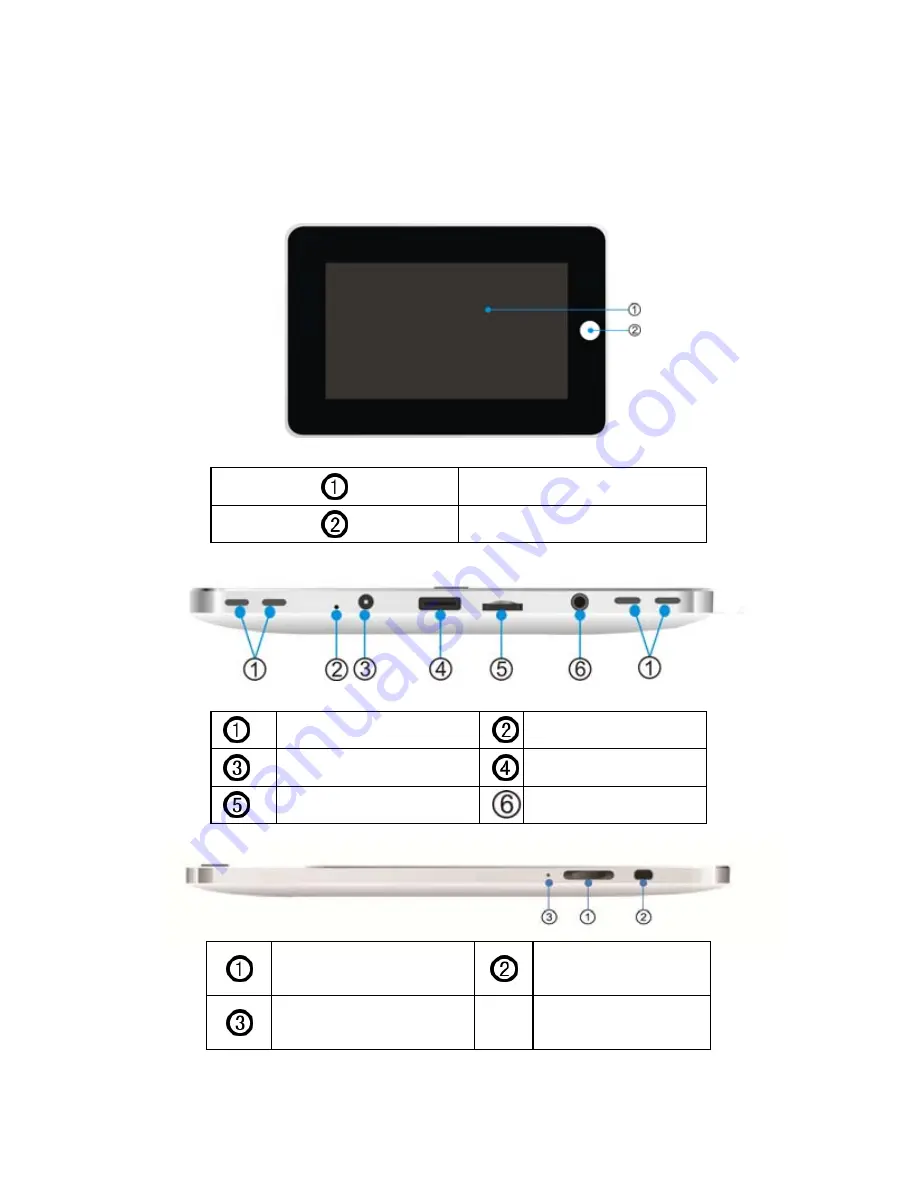
2.3 Appearance and Buttons
Touch Screen
Back Button/Unlock
Speaker
Reset
Power (DC) input
USB Port
MicroSD Slot
Earphone Port
Volume Control Keys
Power Button
Microphone
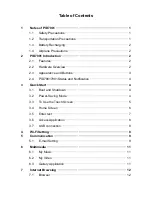
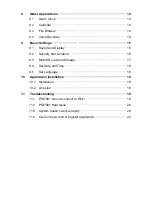
3


