TC-710 - INSTALLATION AND MAINTENANCE MANUAL
TC-710
www.jaypro.com / (800) 243-0533 / 976 Hartford Tpke, Waterford, CT 06385 USA
SUBJECT TO CHANGES IN DESIGN AND MANUFACTURING
COPYRIGHT 2018 JAYPRO SPORTS, LLC. ALL RIGHTS RESERVED
Rev D, Sheet 6 of 9
INNOVATION, PERFORMANCE AND COMMITMENT SINCE 1953
9. Install motor end bracket assembly (TC703MCA) on motor end and end bracket
assembly (TRC703-A) on non-motor end of the drive pipe. Refer to Figure 8. Lubricate
all sliding components with white lithium grease (supplied by others).
10. Install bottom batten into bottom curtain pocket and close the pocket with the
supplied hardware.
11. Set the upper limit: Run the curtain up and set the upper limit. Make sure the
fabric is tracking properly on the drive pipe. Inspect to make sure the gap between
the edge of the curtain and the end brackets is maintained. If the fabric bunches or
walks to one side, check the alignment of the roller cradles. Refer to the wiring
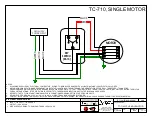
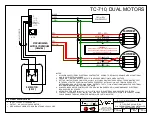
diagram for complete step-by-step instructions.
12. Set the lower limit: Run the curtain down and set the lower limit.
*** IMPORTANT NOTE ***
Do not run the curtain up and down repeatedly as the motor will over heat and may
cause damage. Let the motor cool for 20 minutes between cycles.
Installation is now complete.
PASS ELECTICAL CABLE
THROUGH OPENING IN BRACKET
MOTOR BRACKET
ASSEMBLY (TC703MCA)
INSTALL MOTOR LOCKING
RING (HM6154)
LUBRICATE
SLOTS
COTTER
PIN (HM6344)
1/2" FLAT
WASHER
(HW2044)
LUBRICATE
SLOT
END BRACKET
(TRC703-A)
ALIGN MOTOR
GROOVES INTO
BRACKET
GROOVES
FIGURE 8: INSTALL DRIVE PIPE END BRACKETS
ATTACHMENT
HARDWARE
VARIES PER JOB
ATTACHMENT
HARDWARE
VARIES PER JOB

