TC-710 - INSTALLATION AND MAINTENANCE MANUAL
TC-710
www.jaypro.com / (800) 243-0533 / 976 Hartford Tpke, Waterford, CT 06385 USA
SUBJECT TO CHANGES IN DESIGN AND MANUFACTURING
COPYRIGHT 2018 JAYPRO SPORTS, LLC. ALL RIGHTS RESERVED
Rev D, Sheet 8 of 9
INNOVATION, PERFORMANCE AND COMMITMENT SINCE 1953
APPENDIX B
TUBULAR MOTOR - SETTING THE LIMITS:
*** IMPORTANT NOTE ***
Read directions carefully before starting. Failure to do so may result in damage to the curtain. Motor UP /
DOWN rotations are dependant on both the location of the motor(s) and the orientation of the roll. Therefore, it cannot be
predetermined which direction the red and black wires correlate to. Test the direction of the motor(s) with caution by only
operating the curtain for short durations.
The limit switches are activated when in the OUT (UP) position and deactivated when in the DOWN (IN) position.
STEP 1: Remove the protective cap covering the limit switch buttons on the motor head. Refer
to Detail A.
STEP 2: Depress both limit switch buttons fully. They will automatically lock in the down position,
rendering the limit switches OFF.
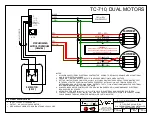
Note: Depending on the overall size of the curtain, there may be two motors (one on each end)
and a synchronizer. IMPORTANT: When a curtain has two motors and a synchronizer, the limit
switches are only activated on one of the motors (MASTER), while the limit switches on the other
motor (SLAVE MOTOR) are deactivated.
STEP 3: On the one motor (MASTER), establish which limit switch controls the UPPER limit and which one controls the LOWER limit.
This will be done by trial and error. Operate the curtain in the up direction to get it off the floor. Select ONE of the limit switches
on the MASTER motor and release it to the OUT position. Try operating the curtain up. If the curtain does not go up, try operating
the curtain down. If it goes down, then reverse the direction of the curtain and operate it up - it should stop at that location the
limit switch was released. This is the UPPER limit switch.
If, the curtain instead went up after releasing the one limit switch, reverse the direction making it go down - it should stop at that
location the switch was released. This is the LOWER limit switch.
Take a permanent marker and identify both limit switches with a U and L . Deactivate both limit switches by pressing them IN.
STEP 4: To set the UPPER limit switch, operate the curtain to the desired raised position. Set the upper limit switch, "U", by
releasing it to the OUT position. Verify the setting by lowering the curtain a couple of feet and then raising it back up until it
stops - USE CAUTION to make sure it does stop where it should. Adjust the setting if necessary.
STEP 5: To set the LOWER limit switch, operate the curtain to the desired lowered position. Set the lower limit switch, "L", by
releasing it to the OUT position. Verify the setting by raising the curtain a couple of feet and then lowering the curtain until it
stops - USE CAUTION to make sure it does stop where it should. Adjust the setting if necessary.
STEP 6: Operate the curtain in both directions to ensure both upper and lower limits are set. Do not overheat the motor.
STEP 7: Replace the protective cap covering the limit switch buttons. Refer to Detail A.
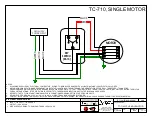
STEP 8 (IF NEEDED): Reverse the black and red wires if the UP and DOWN movement of the curtain do not correspond with the
UP and DOWN of the control device (key switch, etc).
STOP POSITION 1
WHITE PUSH BUTTON
(BLACK WIRE)
STOP POSITION 2
YELLOW PUSH BUTTON
(RED WIRE)
DETAIL A
LIMIT SWITCH
COVER

