background image

33

KO

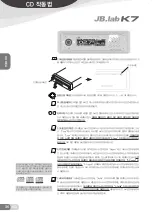
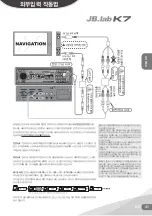
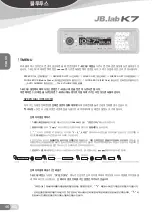
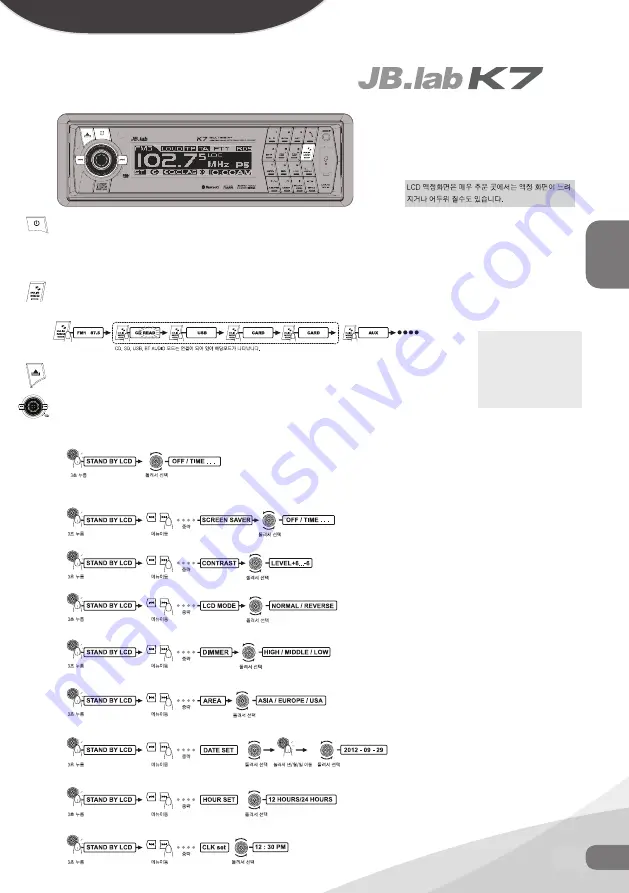
기본조작법

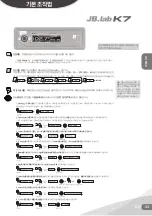
전원버튼

 : 전원버튼을 누르시면 매 시간마다 다른 인사말 문장을 표시 됩니다.

“GOOD MORNING!” “GOOD AFTERNOON!” “GOOD EVENING!”

 기기의 전원이 들어와 있을 때   전원버튼을 길게 누르시면 전원을 꺼집니

다. 그리고 기기가 꺼질 때에는 액정에 

“HAVE A NICE DAY!”

란 문구가 표시 됩니다.


모드전환 버튼 : 

지금 재생중의 미디어를 변경할때 사용하는 키입니다.

기본적으로 기기 작동과 함께 RADIO가 가장 먼저 재생되고, 

CD 

→  

USB 

→  

SD 

→  

BT AUDIO 

→  

AUX 

순으로 재생되며 CD, SD, 

USB는 가장 마지막으로 넣은 미디어가 작동합니다. CD, SD, USB, BT AUDIO는 기기에 연결되어야 모드에서 순서가 나타납니다.

RELEASE 버튼 :

 이버튼을 누르면 전면 패널을  분리가 됩니다. 다시 장착하기 위해서는 패널의 좌측부터 장착하시기 바랍니다.

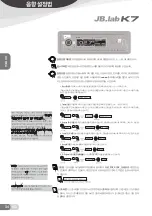
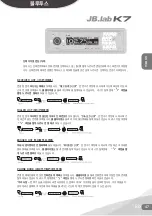
시스템 설정 : 

전면판넬 의 

볼륨다이얼

을 길게 누르시면 

SYSTEM SETTING

 모드로 들어갑니다. 

1. Stand by LCD (대기상태) :

  기기전원이 꺼진후 에  나타나는 에니메이션 (OFF - 효과없음 / Time - 현재시간표시 / Fish Kiss - 키스하는 물고기 / 

Running Car - 달리는 차 / Dolphin - 돌고래)을 설정할 수 있습니다. 

2. Screen Saver (화면보호기 ) :

 화면보호기 설정이 활성화 되어 있다면,

 약 10초동안

 아무런 조작이 없다면 화면보호기가 동작할것입니다.

(OFF - 효과없음 / Time - 현재시간표시 / Fish Kiss - 키스하는 물고기 / Running Car - 달리는 차 / Dolphin - 돌고래)

3. Contrast (대비설정) : LEVEL (-6~+6) : 볼륨키(26)를 사용하시면 LCD밝기를 -6에서 +6까지 조절하실수 있습니다.

4. LCD mode(표시모드) :

 LCD표시모드를 변경하기 위해  

Normal(정상화면)

 또는 

Reserve(반전화면)

을 선택하실 수 있습니다.

5. Dimmer(밝기설정) :

 메뉴상에는 

High(밝음)/Middle(보통)/Low(어두움)

 라고 되어 있으며 볼륨다이얼(26)을 사용하여 선택하실 수 있습니다.

6. Area(지역설정)

 : 

볼륨다이얼(26)

을 돌리면 

Asia/Europe/USA

 중 선택하실 수 있습니다.

7. Date set(날짜설정) : 볼륨다이얼(26)

을 돌려 년/월/일을 설정하실 수 있으며, 년 / 월 / 일 넘김은  

볼륨다이얼(26)

을 눌러 이동이 가능합니다.

8. Hour Set(시간제 설정) :


24시간제/12시간제

 시간표시를 변경하실수 있습니다.

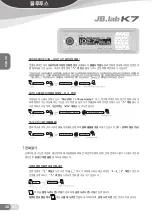
9. CLK Set (시간설정) :


볼륨다이얼(26)

을 좌우로 돌리시면 시간과 분을 변경하실수 있습니다.

KOREA

패널 장착시 패널을 정확히 연
결하지 않을 경우 패널 접정불
량으로 인해 패널의 버튼이 정
상적으로  작동하지  않고  패널
의  조명이  정상적으로  들어오
지 않습니다. 이경우 패널을 정
확히 연결해주시기 바랍니다.

Summary of Contents for K7

Page 1: ...ENGLISH KOREA Operation Manual Please read these instructions carefully before using this product and keep this manual for future reference...

Page 2: ...ecting station 10 Automatic memory storing program scanning 10 Station storing 10 Local distant 10 Mono stereo 10 Scan 10 CD MP3 WMA operation 11 Switching to CD mode 11 Selecting tracks 11 Pausing pl...

Page 3: ...ustrated installation methods TAKE OUT SCREW BEFORE INSTAL LATION Before install the unit please remove thetwo screws DIN FRONT MOUNT Method A Installation Opening This unit can be installed in any da...

Page 4: ...battery s negative ter minal Then replace the outer trim ring and install the unit s front panel see the steps of to install the front panel REMOVING THE UNIT 1 Make sure the ignition is turned off t...

Page 5: ...control button may not function and the display may be missing some segments Press the release button and then reinstall the front panel again Precautions when handling 1 Do not drop the front panel 2...

Page 6: ...VIOLET 12V CONSTANT POWER SUPPLY YELLOW RADIO ANTENNA CONTROL WIRE PINK POWER ANTENNA AMPLIFIER TURN ON BLUE RCA OUTPUT AUX IN LINE OUT Final Check Make use that all wires are properly connected and i...

Page 7: ...6 FOLDER 9 5 FORDER 10 4 SHF 11 1 Play Pause 12 2 SCN 13 3 RPT 14 PWR MUTE 15 Remote sensor 16 USB interface 17 9 LOC 18 SCAN CON 19 0 DISP 20 AS PS 21 7 MON 22 8 EQ 23 AUX IN jack 24 hang up BND LOU...

Page 8: ...er to the following instruction Off Nothing will be displayed Time Time will be displayed Fish kiss Running car Dolphin will play the correspond ing cartoon 2 Screen Save Off Timer Fish kiss Running c...

Page 9: ...ten seconds AUXILIARY INPUT The unit can be connected to a portable audio player through the auxiliary input jack AUX IN 23 on the front panel or AUX IN jack on the back of the unit After finishing th...

Page 10: ...ngth until one cycle search is finished And then 6 strongest stations are stored into the corresponding preset number button Program scanning Press AS PS button 20 shortly to scan preset station And t...

Page 11: ...mode PLAYING ALL TRACKS IN RANDOM Press SHF button 9 to play all tracks on CD in ran dom order and Shuffle will appear on LCD Press again to cancel the function and Shuffle will dis appear When playin...

Page 12: ...in the card and start to play MP3 files or WMA files automatically The operation is the same with the MP3 operation described above If in other mode you can also press MOD button 5 to select SD MMC mo...

Page 13: ...out of range the connection will be lost when you come back to the unit reconnection is necessary 2 When the mobile phone is out of range from the unit and there is an incoming call when you come bac...

Page 14: ...volume knob 26 to adjust the initial talking vol ume level on the loudspeakers of unit side ANSWERING REJECTING AN INCOMING CALL Please refer to the AUTO ANSWER ON OFF para graph in T MENU section MA...

Page 15: ...it to choose the previous next track It is up to the mo bile phone the different mobile phone has the dif ferent define when playing music you can not make any phone call When there is an incoming cal...

Page 16: ...hen playing WMA MP3 disc in searching mode use it to con firm the selection 6 VOL Press it to decrease increase the volume level 7 SCN 2 Press it to scan tracks 8 1 Press it to pause the playback pres...

Page 17: ...respond ing value SPECIFIATION Power Sup ply Requirements DC 12 Volts Negative Ground Chassis Dimensions 178 W x 160 D x 50 H Tone Controls Bass at 100 Hz 10 dB Treble at 10 kHz 10 dB Maximum Output P...

Page 18: ...an 30 degrees The disc is extremely dirty or de fective disc The built in microcomputer is not operating properly due to noise The antenna cable is not con nected The signals are too weak SOPLUTION If...

Page 19: ...nce Fader Beep P Volume 34 EQ LOUD 34 35 35 Local DX 35 35 CD 36 36 36 MP3 WMA 37 37 37 38 38 39 CD 39 SD 39 USB 39 39 39 40 40 ID 3Tag 40 41 42 42 42 42 42 43 43 43 iOS 44 Android 45 46 46 46 46 47 4...

Page 20: ...KOREA 20 KO...

Page 21: ...21 KO KOREA...

Page 22: ...KOREA 22 KO...

Page 23: ...23 KO KOREA...

Page 24: ...KOREA 24 KO...

Page 25: ...25 KO KOREA K7 K7...

Page 26: ...KOREA 26 KO...

Page 27: ...27 KO KOREA...

Page 28: ...KOREA 28 KO...

Page 29: ...29 KO KOREA...

Page 30: ...KOREA 30 KO 1 2 3 1 2 3 1 2 3 4 5 6 7...

Page 31: ...31 KO K7 AUX 15A ACC RCA OUTPUT AUX IN LINE OUT KOREA...

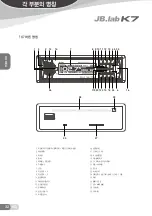
Page 32: ...7 LCD 8 FOLDER 6 9 FOLDER 5 10 4 11 1 12 2 13 3 14 15 16 USB 17 LOCAL DX 9 18 19 0 20 21 7 22 EQ 8 23 AUX 24 BND LOUD CLR 25 26 SELL 27 SD MMC 28 CD 29 CD 1 3 2 14 15 7 8 9 10 11 12 13 4 5 23 26 28 2...

Page 33: ...SB BTAUDIO RELEASE SYSTEMSETTING 1 Stand by LCD OFF Time Fish Kiss RunningCar Dolphin 2 ScreenSaver 10 OFF Time FishKiss RunningCar Dolphin 3 Contrast LEVEL 6 6 26 LCD 6 6 4 LCDmode LCD Normal Reserve...

Page 34: ...99 100 1 Bass 10 10 EQ EQ EQ BASS 2 Treble 10 10 EQ EQ EQ TREBLE 3 Balance 10L 10R L R 4 Fader 10F 10R F R 5 Beep 6 P Volume EQ EQ 4 FLAT POP ROCK CLASSICS EQ EQ EQ BASS TREBLE LOUD LOUD 3 LOUD LOUDNE...

Page 35: ...35 KO BND BAND FM AM FM 3 AM 2 6 MANUALTUNE FM 0 1 5 Autotune ST STEREO MONO LOC LOCAL DX LOC LOCAL LOC DX SCAN SCAN 5 KOREA FM MON...

Page 36: ...KOREA 36 KO CD CD CD CD EJECT CD 0 1 2 99 100 PAUSE SCN SCN Scan Scan MP3 WMA SCN 2 F Scan RPT RPT Repeat MP3 WMA RPT 2 F Repeat F Repeat RPT SHF SHF Shuffle SHF 2 F Suffle K7 CD K7 CD CD CD...

Page 37: ...37 KO MP3 WMA KOREA...

Page 38: ...KOREA 38 KO MP3 WMA 1 ROOT FOLDER 1 FOLDER 3 FOLDER 5 FOLDER 6 FOLDER 7 FOLDER 8 MP3 FOLDER 2 FOLDER 4 MP3 1 01 11 ID3 FOLDER 2 FOLDER 4 MP3...

Page 39: ...39 KO MODE RADIO CD USB SD BTAUDIO AUX CD USB SD RADIO AUX CD USB SD SD SD SD SD SD SD SD SD USB READING USB USB USB USB PAUSE SCN SCN Scan Scan MP3 WMA SCN 2 F Scan RPT RPT Repeat KOREA SD SD...

Page 40: ...KOREA 40 KO MP3 WMA RPT 2 F Repeat F Repeat RPT SHF SHF Shuffle SHF 2 F Suffle 5 6 8 15 8 15 ID 3Tag DISP MP3 ID 3Tag MP3 ID3 TAG ID3 TAG ID3 TAG NO TITLE NO ARTIST NO ALBUM...

Page 41: ...41 KO RCA 3 5 3 PC AUX 3 5 3 AUX PC MP3 AUX AUX RCA PC AUX MODE RADIO CD USB SD BTAUDIO AUX CD USB SD RADIOAUX CD USB SD AUX EQ LOUD KOREA AUX 2 1 2 3 5 ST 3 MP3 PC AUX...

Page 42: ...Group PC 2 45 10 100m 2 II 10m A2DP HSP AVRCP 2 0 EDR HSP Hands Free Profile PBAP Phonebook Access Profile A2DP Advanced Audio Distribution Profile AVRCP Audio Video Remote Control Profile Bluetooth 1...

Page 43: ...43 KO KOREA PAIRING K7 1m K7 1 PAIR Pairing 2 3 CarBT 0000 4 Pairing OK 5 PAIR 6 PAIR CON Connect Connected OK Connecting Failed...

Page 44: ...iOS iPhone iPod iPad iOS Bluetooth iOS 0000 5 LED CarBT 0000 KOREA 44 KO iOS iPhone iPod iPad CarBT iPhone...

Page 45: ...45 KO KOREA S s 0000 LED 5 CarBT S...

Page 46: ...IST DIALED LIST MISSED LIST PHONE BOOK Mobile Phone PHONE BOOK SIM Card AUTO ANSWER TALK VOLUME T MENU T MENU CLR T MENU SPEED DIAL 10 1 T MENU SPEED DIAL 2 Empty 3 _ K7 0 9 BND 4 5 T MENU T MENU T ME...

Page 47: ...47 KO KOREA SEL 26 CLR 24 RECEIVED LIST RECEIVED LIST DIALED LIST 10 DIALED LIST MISSED LIST MISSED LIST PHONE BOOK PBAP...

Page 48: ...PHONE BOOK SIM SIM PBAP READING Empty AUTO ANSWER ANSWER Phone Number TALK VOLUME 01 20 SIM T MENU CALL 0 9 KOREA 48 KO...

Page 49: ...g Voice No Match K7 T MENU Call Transfer T MENU A2DP K7 P 00 A2DP AVRCP PC 1 2 1 A2DP Advanced Audio Distribution Profile 2 AVRCP Audio Video Remote Control Profile 1 K7 p 30 1 A2DP Advanced Audio Dis...

Page 50: ...RADIO CD USB SD CARD AUX BT AUDIO CLR BAND LOU Loudness WMA MP3 2 MP3 WMA 1 5 6 MP3 WMA LOC 9 LOCAL DISTANT MP3 WMA 7 EQ 8 FLAT CLAS POP ROCK DSP OFF 3 MP3 WMA 4 MP3 WMA 0 1 9 SEL Bass Treble Balance...

Page 51: ...Version Y 4 x 120 watts Current Drain Version Y 15 Ampere max For High Power Version CD PLAYER Signal to Noise Ratio More than 55 dB Channel Separation More than 50 dB Frequency Response 40Hz 18 kHz R...

Page 52: ...KOREA 52 KO...

Page 53: ...53 KO KOREA...

Page 54: ...KOREA 54 KO...

Page 55: ...55 KO 051 806 1170 4 ACC 30 ACC 1 30 Reset 051 806 1170 4 KOREA...

Page 56: ...copyright DS interationnal Corporation All right reserved 1470 21 806 051 806 1170 1 A S 051 806 1170 4 http www jblab kr FAX 051 806 1151 Corporation 8th Floor ACE HIGHTECH21 B D Digital Zone Centurn...

Reviews: