ENGLISH
OPERATION
MANUAL
JB SYSTEMS
3/30
BEAT4 Mk2
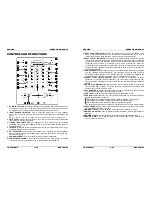
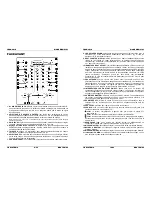
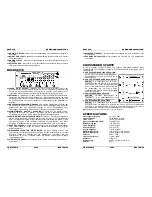
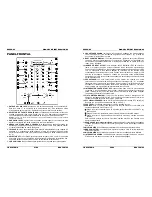
CONTROLS AND FUNCTIONS
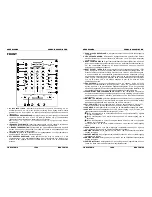
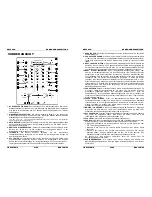
1. DJ MIC INPUT JACK:
Accepts an unbalanced microphone with XLR connector. You
can find the ¼” mono jack on the rear of the mixer (30). This input is mainly used as
DJ-microphone. The talkover does not affect the signal level of this input.
2. INPUT SOURCE SELECTOR:
Used to select the correct input on each channel:
Phono, line, aux or mic. On some channels there are additional input selectors on the
back.
Hint:
Line, Aux, CD, Tuner, etc… are different names for inputs with almost the same signal levels.
3. GAIN LEVEL:
Adjusts the input level on each channel. Use this control to adjust the
level on the VU-meter at about 0dB.
4. 3-BAND TONE CONTROLS:
The frequency of each channel can be controlled
separately over a range from -26dB to +12dB. In the center position the tone control is
flat. (switched off)
5. TALKOVER:
Use this switch to automatically mute the input channels 2 to 4 while you
are talking through the DJ microphone.
6. PFL SELECTOR:
Used to select this channel to be monitored via the headphones
output. Pressing multiple Cue-buttons makes it possible to derive a mixed sound from
the selected sources.
7. CHANNEL FADER:
Used to set the level of each channel separately.
8. CROSSFADER ASSIGN:
Selects the input channels to be used with the crossfader
(11) and beat counters (9). When set to “0” the crossfader is switched off.
ENGLISH
OPERATION
MANUAL
JB SYSTEMS
4/30
BEAT4 Mk2
9. BEAT COUNTER DISPLAY:
Shows the number of beat per minute (BPM) of the
music on the channel selected with the crossfader assign selector (8). To have a
reliable result on the display the music must have a clear and steady beat.
10. BEAT OFFSET INDICATOR:
This indicator has several colored LEDs which indicate
if the beat on both beat counters are well synchronized. When both beat counters are
completely out of sync, the red LEDs will be lit. You will have to adapt the speed of the
connected audio sources so the beats will be nicely synchronized. When the
synchronization becomes better the yellow LEDs will turn on. Finally, when both beats
are in perfect sync, the green led in the center turns on. Now you can mix the beat of 2
audio sources together.
11. CROSSFADER:
With this fader you can mix over between the channels you selected
with the crossfader assign selectors (8). The crossfader only works when you move
the selected channel faders (7) to the desired level! The crossfader also integrates the
optical fader starts. See the next chapter for more information on this issue.
12.
FADER START ON/OFF SWITCH:
When you have a compatible CD-player
connected to the fader control connectors, you can control its start/stop (re-cue)
functions with the cross fader. With this switch you can turn the fader start control on
and off.
13. MASTER1 VU METERS:
Monitors the output level of master1. Make sure the levels
do not exceed 0dB (or 100%). The audio risks to be distorted when the signal level
comes in the red zone of the VU-meter.
14. PFL VU METERS:
Monitors the level of the channel you selected with the PFL-switch
(6). Make sure the levels do not exceed 0dB (or 100%).
15. CUE LEVEL:
Used to control the output level of the headphone output.
16. CUE MIX:
With this fader you can mix the master output and any of the input channels
through the headphone output (17):
•
Put the fader in the extreme left position to monitor a selected PFL signal (6).
•
Put the fader in the extreme right position to hear the master output.
•
Put the fader in any other position to hear a mix of the two signals.
This option makes it possible to check your mix before you put it on the master output.
17. HEADPHONE jack:
You can monitor all inputs/outputs when you connect any modern
stereo headphone to this 6.3mm jack.
18. MASTER1 LEVEL:
Used to adjust the level of the balanced Master1 output.
19. BALANCE MASTER1:
used to adjust the balance between left and right output on
Master1.
20. MASTER2 LEVEL:
Used to adjust the level of the unbalanced Master2 output.
21. POWER switch:
Used to turn the power of the mixer on and off. The blue led is lit
when the mixer is turned on.


