background image

ENGLISH 


OPERATION MANUAL 


JB SYSTEMS

®


3/35 

USB3.1-RDS 

INSTALLATION GUIDELINES:


  Placing  and  using  the  unit  for  long  periods  near  heat-generating  sources  such  as  amplifiers,  spotlights, 

etc. will affect its performance and may even damage the unit. 

  Take care to minimize shocks and vibrations during transport. 

  When  installed  in  a  booth  or  flight  case,  please  make  sure  to  have  good  ventilation  to  improve  heat 

evacuation of the unit. 

  To avoid condensation to be formed inside, allow the unit to adapt to the surrounding temperatures when 

bringing  it  into  a  warm  room  after  transport.  Condense  sometimes  prevents  the  unit  from  working  at  full 
performance. 

  Choose  the  place  where  you  put  your  installation  very  carefully.  Avoid  presence  of  heat  sources.  Avoid 

places with vibrations or places that are dusty and humid. 

  The player will work normally when installed on a surface with max. 15° inclination.  

  Be very careful while handling CDs, do not touch them with wet or dirty hands. 

  Discs that are dirty must be cleaned with special designed cloth and cleaning products. 

  Do not use CDs that are badly damaged (scratched or deformed) they can damage your appliance.  

  To prevent fire or shock hazard, do not expose this appliance to rain or moisture.  

  In order to prevent electric shock, do not open the top cover. If a problem occurs, contact your dealer. 

  Do not place metal objects or spill liquid inside the player. Electric shock or malfunction may result. 

  This  player  uses  the  semiconductor  laser.  To  allow  you  to  enjoy  music  at  a  stable  operation,  it  is 

recommended to use this in a room of 5°C 

– 35°C. 

  The  compact  disc  player  should  not be  adjusted  or  repaired  by  anyone  except  properly  qualified  service 

personnel. 

  This unit may cause interference to radio and television reception. 

 
CLEANING THE PLAYER:


Clean by  wiping  with a polished cloth slightly dipped  with water. Avoid getting  water inside the unit. Do not 
use volatile liquids such as benzene or thinner which will damage the unit. 
 

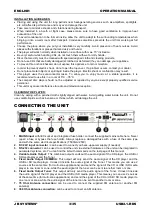
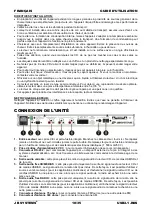
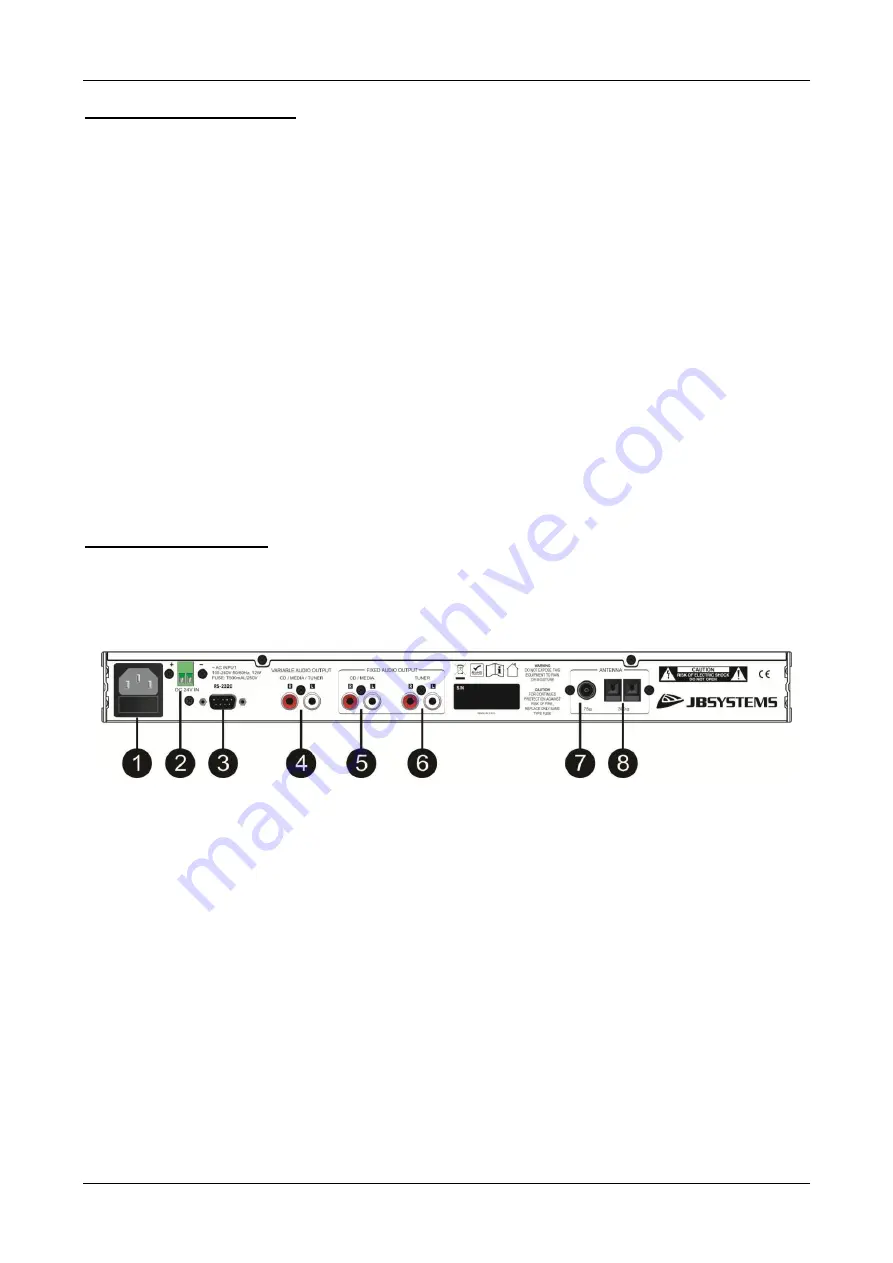
CONNECTING THE UNIT


1.  MAINS input 

with IEC socket and integrated fuse holder: connect the supplied mains cable here. Never 

repair  a  fuse  or  bypass  the  fuse  holder.  Always  replace  a  damaged  fuse  with  a  fuse  of  the  same  type 
and with the same electrical specifications (T500mA /250V) 

2.  DC 24V input connector : 

can be used to connect you back-up power supply (if needed) 

3.  RS-232 connector:

 can be used to control the unit via external hardware so the unit can be integrated in 

automated systems, etc. You can find the list with commands on the last page of this manual. 

4.  Variable Audio Output: 

This combined output sends out the audio signal of the CD player, the USB or 

SD media player and the Tuner 

5.  Fixed  Audio  Output  CD/MEDIA:

  This  output  will  only  send  the  audio  signal  of  the  CD  player  and  the 

USB  or  SD  media  player.  It  doesn’t  include  the  audio  signal  of  the  Tuner.  This means  you  can  use  2 
sources at the same time (for multi-zone applications) and send the signal of the CD or USB / SD media 
player to one room or zone, while the audio signal of the tuner can be sent to another room or zone. 

6.  Fixed  Audio Output Tuner:

 This output will only send th

e audio signal of the Tuner. It doesn’t include 

the audio signal of the CD player and the USB or SD media player. This means you can use 2 sources 
at the same time (for multi-zone applications) and send the signal of the CD or USB / SD media player to 
one room or zone, while the audio signal of the tuner can be sent to another room or zone. 

7.  75  Ohm  Antenna  connection: 

can  be  used  to  connect  the  supplied  FM  antenna  (or  another  FM 

antenna)


8.  300 Ohm Antenna connection:

 can be used to connect an AM antenna


Summary of Contents for USB3.1-RDS

Page 1: ......

Page 2: ......

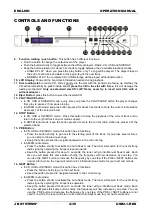
Page 3: ...eparate outputs o For simple installations a combined tuner media CD player output with volume control is available The RS 232 input makes remote control by for example home automation systems possibl...

Page 4: ...om the mains The power cord should always be in perfect condition Switch the unit immediately off when the power cord is squashed or damaged It must be replaced by the manufacturer its service agent o...

Page 5: ...cause interference to radio and television reception CLEANING THE PLAYER Clean by wiping with a polished cloth slightly dipped with water Avoid getting water inside the unit Do not use volatile liqui...

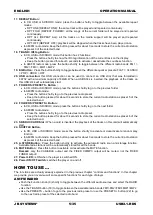
Page 6: ...first track on your media support In AM FM radio mode keep the button pressed to store the current radio station as preset 2 of the selected band 15 PRE Button In CD USB or SD SDHC mode this button ha...

Page 7: ...tton pressed for about 3 seconds to store the current radio station as preset 5 of the selected band 22 FOLDERS PRESETS Button In CD USB or SD SDHC mode press the button shortly to go to the next fold...

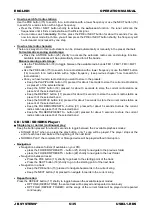
Page 8: ...ion as preset 2 of the selected band Keep the REPEAT button 17 pressed for about 3 seconds to store the current radio station as preset 3 of the selected band Keep the SHUFFLE button 24 pressed for ab...

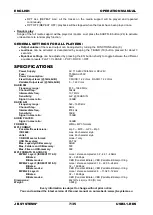
Page 9: ...annel Step 50kHz Intermediate freq 10 7 MHz Sensitivity 2uV 30dB S N Signal noise ratio 60dB RADIO AM Frequency range 522 1620 kHz Channel Step 9kHz Intermediate freq 455 kHz Sensitivity 30dB Signal n...

Page 10: ...peuvent fonctionner simultan ment et permettent de reproduire diff rentes musiques sur des sorties s par es o Pour les installations simples une sortie mix e radio et lecteur CD m dias avec sa comman...

Page 11: ...il La prise d entr e doit rester accessible pour le d branchement du secteur Le cordon d alimentation doit toujours tre en parfait tat teignez imm diatement l appareil d s que le cordon d alimentation...

Page 12: ...5 et 35 C Le lecteur de disque compact ne doit pas tre r gl ou r par par une personne non qualifi e Cet appareil peut produire des interf rences la r ception radio et t l vis e NETTOYAGE DU LECTEUR Ne...

Page 13: ...la piste actuelle et de revenir la toute premi re piste de votre support de m dias En mode radio AM FM appuyer longuement sur la touche permet de m moriser la station radio actuelle comme station pr...

Page 14: ...sier pr c dent En mode radio AM FM Appuyer bri vement sur la touche permet d aller la station radio pr r gl e pr c dente Appuyer longuement sur la touche pendant environ 3 secondes permet de m moriser...

Page 15: ...ion pr r gl e Appuyer longuement sur la touche PLAY PAUSE 13 pendant environ 3 secondes permet de m moriser la station radio actuelle comme station pr r gl e 1 de la bande s lectionn e Appuyer longuem...

Page 16: ...u de sortie variable 1 kHz 0 dB de 0 1 22 V rms RADIO FM Plage de fr quence de 87 5 108 0 MHz Incr ment de fr quence 50 kHz Fr quence interm diaire 10 7 MHz Sensibilit 2 V 30 dB S B Rapport Signal Bru...

Page 17: ...sturen o Voor eenvoudige installatie is een gecombineerde uitgang voor tuner en media CD speler met volumeregeling beschikbaar De RS 232 ingang maakt afstandsbediening met bijvoorbeeld automatisering...

Page 18: ...nnen ontkoppelen Het netsnoer dient altijd in perfecte staat te zijn Schakel het apparaat onmiddellijk uit als het netsnoer is geplet of beschadigd Het moet door de fabrikant zijn vertegenwoordiger of...

Page 19: ...tie met radio en televisieontvangst veroorzaken HET REINIGEN VAN DE SPELER Reinig het apparaat met een licht vochtige poetsdoek Zorg ervoor dat er geen water in het apparaat terechtkomt Gebruik geen v...

Page 20: ...HC modus Druk deze toets om het afspelen van het huidige nummer te stoppen en terug te keren naar het allereerste nummer op de media ondersteuning In de AM FM radiomodus houd de knop ingedrukt om het...

Page 21: ...stick automatisch 21 MAPPEN VOORKEUZE toets In CD USB of SD SDHC modus druk kort op de toets om naar de vorige map te gaan In AM FM radiomodus Druk kort op de toets om naar het vorige voorkeuzestatio...

Page 22: ...electeerde band op te slaan Houd de STOP toets 14 gedurende ongeveer 3 seconden ingedrukt om het huidige station als voorkeuzestation 2 van de geselecteerde band op te slaan Houd de REPEAT toets 17 ge...

Page 23: ...5 108 0 MHz Stap per kanaal 50 kHz Tussenliggende frequentie 10 7 MHz Gevoeligheid 2 uV bij 30 dB S R Signaal ruisverhouding 60 dB AM RADIO Frequentiebereik 522 1620 kHz Stap per kanaal 9 kHz Tussenl...

Page 24: ...ale an ihren getrennten Ausg ngen aus o F r eine einfache Installationen ist ein kombinierter Tuner Medien CD Player Ausgang mit Lautst rkeregler vorhanden Der RS 232 Eingang erm glicht eine Fernbedie...

Page 25: ...ch digten Netzkabel in Betrieb nehmen Wenn das Netzkabel gequetscht oder besch digt wurde schalten Sie das Ger t sofort aus Im Falle von Besch digungen muss das Netzkabel vom Hersteller einem autorisi...

Page 26: ...bei Radio und Fernsehempfang St rungen verursachen REINIGUNG DES PLAYERS Wischen Sie das Ger t mit einem weichen und leicht angefeuchteten Tuch ab Achten Sie darauf dass keine Fl ssigkeiten in das Ge...

Page 27: ...t die Wiedergabe des aktuellen Tracks und kehrt zum ersten Track auf Ihrem Medium zur ck Im MW UKW Radiomodus Halten Sie die Taste gedr ckt um den aktuellen Radiosender des ausgew hlten Frequenzbands...

Page 28: ...um zum vorigen Ordner zu springen Im MW UKW Radiomodus Dr cken Sie kurz die Taste um zum n chsten Senderspeicher zu springen Halten Sie die Taste f r ca 3 Sekunden gedr ckt um den aktuellen Radiosende...

Page 29: ...dr ckt um den aktuellen Radiosender des ausgew hlten Frequenzbands in Senderspeicher 1 zu speichern Halten Sie die Taste STOP 14 f r ca 3 Sekunden gedr ckt um den aktuellen Radiosender in Senderspeich...

Page 30: ...10 W Fester Ausgangspegel bei 1 kHz 0 dB CD USB 1 22 Vrms RADIO 1 22 Vrms Variabler Ausgangspegel bei 1 kHz 0 dB 0 1 22 Vrms UKW RADIO Frequenzbereich 87 5 108 0 MHz Kanalschrittweite 50 kHz Zwischenf...

Page 31: ...encillas tiene disponible una salida combinada radio reproductor multimedia CD con control de volumen La entrada RS 232 hace posible el uso de un mando a distancia mediante por ejemplo sistemas dom ti...

Page 32: ...n est aplastado o da ado Debe ser sustituido por el fabricante por su representante de servicio t cnico o por una persona de cualificaci n similar para evitar riesgos Nunca permita que el cable de ali...

Page 33: ...agua Evite la entrada de agua en el interior de la unidad No utilice l quidos vol tiles como benceno o disolventes que da ar an la unidad CONECTAR LA UNIDAD 1 Entrada de alimentaci n con recept culo...

Page 34: ...ctual y regresar a la primera pista del soporte multimedia En el modo radio AM FM mantenga el bot n pulsado para almacenar la emisora actual como presintonizada en la memoria 2 de la banda seleccionad...

Page 35: ...la memoria 5 de la banda seleccionada 22 Bot n CARPETAS MEM PRESINTONIZADAS En modo CD USB o SD SDHC pulsaci n corta para ir a la carpeta siguiente En el modo radio AM FM Pulsaci n corta para ir a la...

Page 36: ...nda seleccionada Mantenga pulsado el bot n REPEAT 17 durante 3 segundos para almacenar la emisora presintonizada en la memoria 3 de la banda seleccionada Mantenga pulsado el bot n SHUFFLE 24 durante 3...

Page 37: ...kHz Frecuencia intermedia 10 7 MHz Sensibilidad 2 uV 30 dB S R Relaci n se al ruido 60 dB RADIO AM Margen de frecuencias 522 1620 kHz Paso entre canales 9 kHz Frecuencia intermedia 455 kHz Sensibilida...

Page 38: ...0010010B All DIR 0A0H 10100000B Off 0A1H 10100001B On 0B0H 10110000B Off 0B1H 10110001B All 0B2H 10110010B DIR 0C0H 11000000B Freq Set Data 1 Data 2 Data 5 0C1H 11000001B Radio Freq Up 0C2H 11000010B...

Page 39: ...Freq 5 Track No 1 Track No 2 Data 17 Track No 3 Examples 55H 31H 0AAH 55H 60H 0AAH 55H 0D1H 01H 10H 21H 42H 60H Start Status Power on USB Volume max Pop Play 90H 0A0H 0B0H 0C3H 00H 08H 07H Repeate of...

Page 40: ......

Reviews: