background image

Summary of Contents for Control 19CS

Page 1: ...UBI PROFESSIONAL Control Contractor Ceiling Loudspeakers Owner s Manual RevE...

Page 2: ...t Description 2 Product Feature Identification 3 Installation Preparations 4 Step By Step Installation and Wiring 6 Painting the Speaker 15 Safety Agency Compliance 16 Maintenance 16 Replacement Parts...

Page 3: ...rage area The optional Control 24CT includes a multi tap transformer for 70V or 1OOV systems CONTROL 26C 26CT The Control26C is a powerhouse ceiling speaker containing a coaxially mounted 6 5 woofer a...

Page 4: ...Product Feature Identification Control 24C Shown steel Backcan Attachment Screws Strain Relief Fitting Terminal Cover Plate Assembly Rotating Mounting Tabs JBL Logo 3...

Page 5: ...be facilitated by the use ofJBL s optional preinstallation brackets before the sheetrock is installed The preinstallation bracket provides a bracket to which wiring can be tied behind the sheetrock a...

Page 6: ...n Brackets New Model Construction Plaster R ing Bracket Bracket Control 24C 24CT MTC 24NC MTC 24MR Control 26C 26CT MTC 26NC MTC 26MR Control 19CS 19CST MTC 19NC MTC 19MR USING INCLUDED C BRACKET WITH...

Page 7: ...rt Backing Hardware Through the Hole Packaged with the speakers are two types ofbacking hardware a C shaped backing plate bracket and two tile rails Suspended Ceilings Insert the C plate through the h...

Page 8: ...dampening material under the tile rails or the edges ofthe tiles to eliminate rattles Cutout Placement The tile rails are pre punched with attachment holes along their length Placement is not limited...

Page 9: ...eakers determined by the desired result from the circuit whenever this speaker s connector gets disconnected during troubleshooting Paralleling Input Terminals Connect the wire pair ofthe subsequent s...

Page 10: ...tion of the distributed line while leaving the wires attached to the connector Figure 9 Terminals f l rhrough W i From Amplifier or To Subsequent Previous Speaker _ Soeakers Figure 10 Loop Through Sys...

Page 11: ...w indicated in the drawing below Figure 12 Opening the Strain Relief Fitting Next loosen the screws holding the fitting s sliding pieces onto the input terminal cover by about a halfturn Run the wires...

Page 12: ...le strain reliefforce by simply tightening the screws holding the sliding strain relief onto the terminal cover plate To achieve a tight fit use a clamping mechanism such as slipjoint pliers to hold t...

Page 13: ...rnate Fitting The existing strain relief fitting accommodates many common fitting requirements Sometimes alternate fittings are required such as for larger diameter conduit or to meet specific code re...

Page 14: ...the following directions IMPORTANT For each attachment screw FIRST tum iS tum COUNTER CLOCKWISE to release the mounting tab from its guide Then tighten the mounting tabs by turning the screw CLOCKWIS...

Page 15: ...point Consult construction codes in your region IMPORTANT Control Contractor ceiling speakers can generate substantial vibration It is HIGHLY RECOMMENDED to use the seismic tab as a secondary support...

Page 16: ...ainted after attaching into the ceiling Type of Paint The speaker s polystyrene rim accepts almost any type of latex or oil based paint Two coats are recommended Painting Process For best results it i...

Page 17: ...ve Signaling Systems and CSA C22 2 No 205 Signal Equipment For installation instructions refer to this JBL manual CEILING SPKR MANUAL Rev D SUITABLE FOR USE IN AIR HANDLING SPACES E These products are...

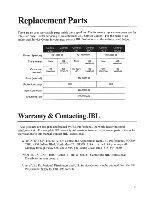
Page 18: ...129 20047 129 129 129 00 20048 00 10037 00 10038 00 453 80000 00 SK3 424 00092 00 885 00050 00 Warranty Contacting JBL These products are designed and backed by JBL Professional the world leader in s...

Page 19: ...II a JBL Professional 8500 Balboa Blvd P O Box 2200 Northridge CA 91329 U S A H A Harman International Company CEILING SPKR MANUAL Rev E...

Reviews: