background image

7

NEW CONSTRUCTION

PAINTING THE SPEAKER 
FRAME AND GRILLE

JBL HTI Series loudspeakers
can be painted to match any
decor. If you wish to change
their color, the satin finish on
the grille and frame will func-
tion as a primer coat. Before
painting, install the paint shield
(in the assembly kit) securely
into the recess in the baffle. 

This will protect the speaker
components and baffle from
paint residue.
Use a high-quality spray paint,
and apply a thin coat of color. 

Be certain the grille per-
forations remain free of paint.
Filling them with paint will
diminish the sound quality.

Note:

Gently remove the

acoustical foam blanket from
the grille before painting. Reat-
tach the blanket after the paint
has dried.

You will need to purchase the correct rough-in frame kit for your model:

Speaker Model

Rough-in Frame Kit

HTI6

RIF6

HTI8

RIF8

HTI55

RIF55

HTI6C

RIF6C

Detailed installation instructions are supplied with the rough-in kit.

TROUBLESHOOTING

IF THERE IS NO SOUND
FROM ANY OF THE 
SPEAKERS:

• Check that receiver/amplifier 
is on and a source is playing.

• Check all wires and connec-
tions between receiver/ampli-
fier and speakers. Make sure
all wires are connected. Make
sure none of the speaker wires
are frayed, cut or punctured.

• Review proper operation of
your receiver/amplifier.

IF THERE IS NO SOUND
COMING FROM ONE
SPEAKER:

• Check the “Balance” control 
on your receiver/amplifier.

• Check all wires and connec-
tions between receiver/ampli-
fier and speakers. Make sure
all wires are connected. Make
sure none of the speaker wires 
are frayed, cut or punctured.

In multichannel applications,
make sure that your receiver or
processor has been configured
to enable all channels that you
are using.

IF THERE IS LOW (OR
NO) BASS OUTPUT:

• Make sure the connections 
to the left and right “Speaker
Inputs” have the correct polar-
ity (+ and –).

• Consider adding a powered
subwoofer to your system.

• In Dolby Digital or DTS modes,
make sure your
receiver/processor is correctly
configured. When using a sub-
woofer, make sure the sub-
woofer output of the receiver/
processor has been enabled. If
no subwoofer is being used,
make sure the left and right
front and rear speakers have
been config-ured as “LARGE.”

See your receiver/processor’s
owner’s manual for futher infor-
mation on correct speaker con-
figuration in Dolby Digital, DTS
and other surround-sound
modes.

IF THE SYSTEM PLAYS
AT LOW VOLUMES BUT
SHUTS OFF AS VOLUME
IS INCREASED:

• Check all wires and connec-
tions between receiver/ampli-
fier and speakers. Make sure
all wires are connected. Make
sure none of the speaker wires
are frayed, cut or punctured.

• If more than one pair of main
speakers is being used, check
the minimum-impedance
requirements of your receiver/
amplifier.

English

Summary of Contents for HT155

Page 1: ...HTI6 HTI8 HTI55 and HTI6C HOME THEATER IN WALL SERIES OWNER S GUIDE English ...

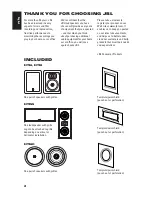
Page 2: ...udspeakers you have chosen will provide every note of enjoyment that you expected and that when you think about purchasing additional audio equipment for your home car or office you will once again choose JBL Please take a moment to register your product on our Web site at www jbl com It enables us to keep you posted on our latest advancements and helps us to better under stand our customers and b...

Page 3: ... may also be used as a side surround or surround back speaker It may be mounted horizontally or verti cally but make sure to position it so that the tweeters for all of the front speakers are at the same height or differ by no more than 2 feet You may rotate the tweeter to correctly orient the JBL logo In a home theater configura tion the two surround speakers should be placed slightly behind the ...

Page 4: ...entically on the speaker to on the amplifier and on the speaker to on the amplifier Wiring out of phase results in thin sound weak bass and a poor stereo image With the advent of multi channel surround sound systems connecting all of the speakers in your system with the correct polarity remains equally important in order to preserve the proper ambience and directionality of the program material CO...

Page 5: ...wivel into place 1 2 1 2 1 2 Cut the drywall Connect the speaker wires to the speaker Replace the metal grille For the HTI55 only attach the JBL logo to the grille to correspond to vertical or horizontal installa tion Place the frame assembly in the wall Screw down each of the four six for HTI55 Phillips head screws The locking tabs will swivel into place and secure the unit to the rear surface of...

Page 6: ...s The lock ing tabs will swivel into place and secure the unit to the rear surface of the drywall Replace the metal grille Determine the correct speaker location Note Remove the inner tem plate which is the paint shield at the perforation Use the outer template when cutting the drywall The HTI speakers feature unique swivel mounts for the tweeters that enable you to aim the very directional high f...

Page 7: ...of your receiver amplifier IF THERE IS NO SOUND COMING FROM ONE SPEAKER Check the Balance control on your receiver amplifier Check all wires and connec tions between receiver ampli fier and speakers Make sure all wires are connected Make sure none of the speaker wires are frayed cut or punctured In multichannel applications make sure that your receiver or processor has been configured to enable al...

Page 8: ...aveguide andswivelmount Plate Size 391x191mm 15 3 8 x7 1 2 Mounting Cutout Size 56x152mm 14 x6 3 Mounting Depth 98mm 3 7 8 Weight per Speaker 2 6kg 5 7lb HTI6C Frequency Response 40Hz 20kHz 10dB Recommended Maximum Amplifier Power 100watts Impedance 8ohmsnominal Sensitivity 88dB 2 83V 1m Crossover Frequency 2 000Hz Woofer 6 1 2 Polymer coatedaluminum conew rubbersurround Tweeter 1 Pure titaniumdom...

Reviews: