background image


Page 8


6.0 Using the Microscope


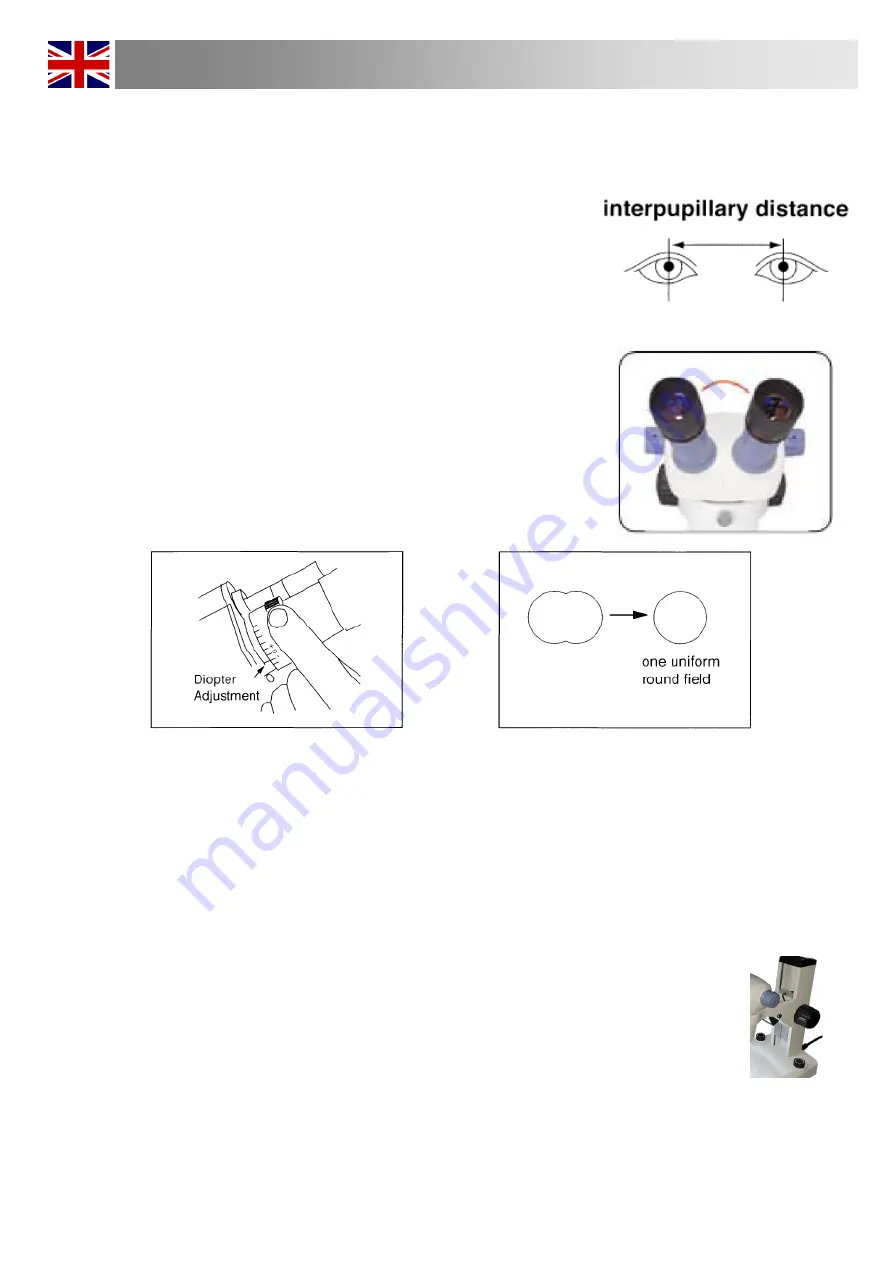
6.1 Adjusting Interpupillary Distance 

The Interpupillary Distance is essentially the distance between 
your two pupils expressed in millimeters. When set correctly, 
one will see one uniform round field of view or FOV. The 
adjustment is made by simply pulling apart or pushing together 
the eyetubes until a uniform round field is achieved. Make note 
of the number marked on the viewing head so you can repeat 
the setting later. 

6.2 

When you place a specimen on the stage, get it into focus 

with the right eye while your left eye is closed. Once the right side 
is in focus by using the fine focus knob on the microscope, open 
your left eye and use the diopter on the left eyetube to bring the 
left side in focus. 

Once this is done, the microscope is adjusted to this user. Other 
users will have different IP's and different focusing abilities. 


6.3 Operation 

Once the microscope has been setup in its working location with all of the 
components correctly installed, it is ready for use. 

Your BIMC-04NS05 is a precision instrument designed to last a lifetime. always 
handle your microscope with care and avoid abrupt motion vibration and hock. 

6.4 Focusing the Microscope  

1. To focus the sample, use the focusing knobs located on both sides of the 
head holder. By turning these knobs, the microscope can be moved up or 
down a certain distance to focus the sample. This movement is enabled by a 

“rack and pinion” 

mechanism. The tension of the focusing knob can be 

adjusted using the tension knob located in the inner region of the focusing 
knob on the right. 

If a sharp focus cannot be achieved using this knob, release the locking screw 
and support collar and move the whole microscope up or down.


(

Fig.4)


Summary of Contents for Bimc-04ns05

Page 1: ...GUIDA UTENTE MANUAL DE INSTRUCCIONES MANUEL D INSTRUCTIONS BEDIENUNGSANLEITUNG Ver 2 1 6 I N T E R N A T I O N A L JC LAB Microscope JAPAN www jc lab jp info jc lab jp Solo versione PDF Nur PDF Versi...

Page 2: ...Page 4 3 0 Introduction Page 5 4 0 Unpacking and Assembly Page 5 5 0 Microscope Accessories Page 6 7 6 0 Using the Microscope Page 8 9 7 0 Maintenance Page 10 8 0 Troubleshooting Page 11 9 0 Electrics...

Page 3: ...ges incurred directly or indirectly from error omissions or discrepancies between the wifi microscope and the manual Trademarks JC CAM logo are registered trademarks of JC LAB Corporation Wi Fi is reg...

Page 4: ...d by wire device like for example mobile phones Because Wireless products operate within the guidelines found in radio frequency safety standards and recommendations JC LAB believes Wireless products...

Page 5: ...if you are having problems operating devices you may need to contact JC LAB for additional technical assistance Before you call Some problem you experience may be related to software apps or the oper...

Page 6: ...our local distributor to ensure the features 1 Zoom Adjustment Knob 2 Focus Adjustment Knob 3 Reflected LED 4 Transmitted Reflected LED light intensity switch 5 Standard Base 6 Power Cable 7 Stage Pla...

Page 7: ...y the optical parts avoid touching any lens surfaces with bare hands or fingers as fingerprints and grease stains affect image quality 2 After unpacking the stand put it on a stable and flat table Loo...

Page 8: ...nsor Optical Format 1 2 5 5 90mm x 4 5mm H x V Diagonal 7 0mm Pixel Size 2 2 m x 2 2 m Dynamic Range 74 3dB SNRmax 40dB Exposure 3 9ms 320ms Automatic and Manual White Balance Real time auto single au...

Page 9: ...NIST certification Lens Cleaning Tissue for slide cleaning 5 0 Microscope Accessories BIMC S09A TOO 155E MiniPC for JC Cam series Wifi eyepiece to screen on the TV BIMC MIPC06 Digital Drying Cabinet C...

Page 10: ...he microscope is adjusted to this user Other users will have different IP s and different focusing abilities 6 3 Operation Once the microscope has been setup in its working location with all of the co...

Page 11: ...ion Adjust the right eyepiece diopter until the image seen through the right eyepiece is clear and sharp 5 Repeat the procedure for the left eyepiece Next check the image focus for the entire zoom ran...

Page 12: ...ying voltage of your region matches with the operation voltage of the equipment and that the lamp switch is in off position Users should observe all safety regulations of the region The equipment has...

Page 13: ...is not good Contrast is poor Details are indistinct Image glares Dust or dirt on lenses objectives eyepieces Clean thoroughly Focus is not even Slide holder is not flat Move the specimen to a flat po...

Page 14: ...nd of its useful life should be collected separately from other waste The separate collection of this equipment at the end of its lifetime is organized and managed by the producer The user will have t...

Reviews: