Chapter 7
File management
Creating a report
User Manual
790000002/00
57
2
Select
Settings
icon to reach the
System Settings
page.
3
In the
Report
box, on the line
Mode
, select
Report
.
Choosing this option, you can save the open file in a JPG, PNG or
PDF file report, exactly as if the file was printed on paper.
Therefore, if the file is too large for one A4 page, several JPG, PNG
or PDF files will be created.
4
On the line
File format
, select if the report file will be a
JPG
,
PNG
or
file.
5
To display a Logo on the upper right of the report pages, click on
Logo
line and select the Logo to be displayed on the upper right of
the page:
a
Press
to open the edition keypad
b
Enter the path of the logo file (example:
disk/jdsu logo.jpg
)
c
Press
Enter
to validate.
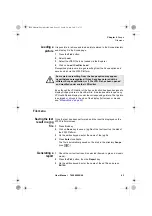
Creating the
report
1
Open the file to be saved in a report in JPG, PNG or PDF format
2
If necessary, make the modifications on the file/trace (see user
manual of the 2100 OTDR Modules for OTDR trace files).
3
Set the trace view as wished.
For OTDR traces
–
if the function is set to the
Trace
mode (
Trace
is selected on the
menu key
Trace/Table/Summary
), the JPG/PNG/PDF file will
countain the header and the trace (in one page).
–
If the function is set to
Table
mode (
Table
is selected on the
menu key
Trace/Table/Summary
), the JPG/PNG/PDF file will
countain the header, the trace and the entire results table
(several pages may be required)
–
If the function is set to
Summary
mode (
Summary
is selected
on the menu key
Trace/Table/Summary
), the JPG/PNG/PDF
file will countain the header and the summary page, with either
the Bend table or the Alarm Table according to the selected item
with the menu key.
This view is only available with OTDR traces.
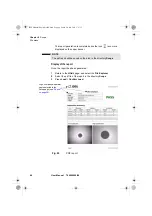
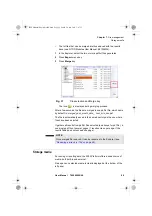
Fig. 35
Example of Report configuration
2000 Platform English rev00.book Page 57 Lundi, 20. juin 2011 1:47 13

