5.
Réalisation pas à pas d’une excavation
Excavation step by step
DIALOG TLK
39
Appuyer sur l’icône
puis touche
A-Programmation
menu
A3-Capteurs
menu A3.3 - Spéciaux
faire les réglages
nécessaires.
3.
L’appareil est prêt pour commencer un pieu. Appuyer
sur la touche
Demarrer
: l’appareil passe en
mode MESURE,
4.
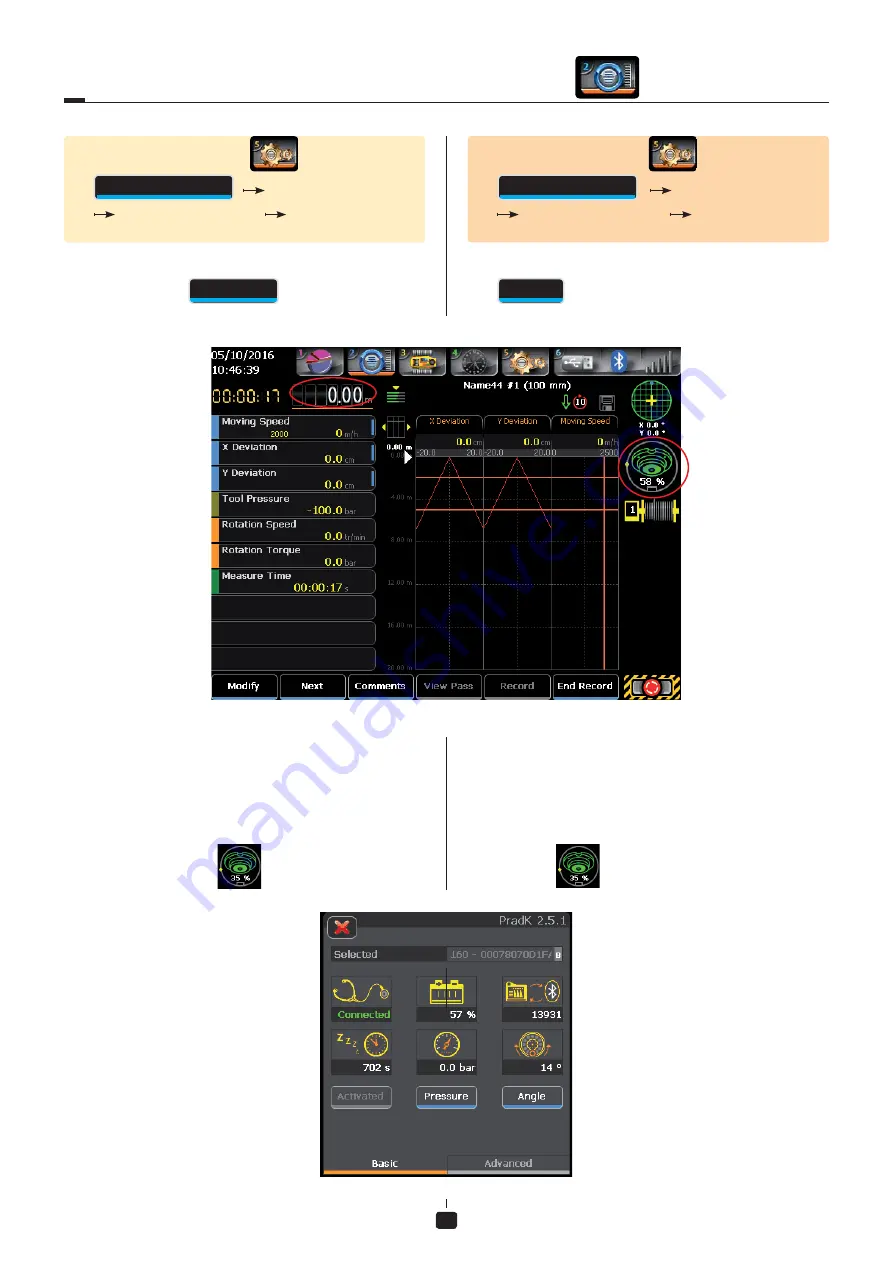
ETALONNAGE DU CAPTEUR PRAD
Faire tourner 3 fois la tête de rotation à vitesse
constante.
Vérifi er que le point jaune du PRAD tourne.
5.
Placer la membrane du capteur face à l’opérateur puis
appuyer sur l’icône
. L’écran suivant s’affi
che :
Press the ico
then key
A-Programming
menu
A3-Sensors
menu A3.3 - Special
make necessary
adjustments.
3.
The device is ready to start a new pile. Press the key
Start
: the measurement screen is displayed,
4.
PRAD SENSOR CALIBRATION
Rotate 3 times the head rotation at constant speed.
Check that the yellow point of the PRAD sensor
turns.
5.
Place the sensor membrane front of the operator. Press
this ic
on
. The following screen is displayed :
Le capteur PRAD n’est
pas encore étalonné
PRAD sensor is not yet
calibrated
La profondeur est nulle
Depth has a null value


