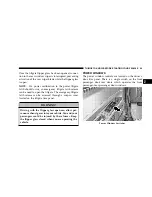
3. To reassemble the transmitter case, snap the two
halves together. Make sure there is an even “gap” be-
tween the two halves. Test transmitter operation.
SECURITY ALARM SYSTEM — IF EQUIPPED
This system monitors the vehicle doors, liftgate, liftgate
flipper glass, and ignition for unauthorized operation.
When the alarm is activated, the system provides both
audible and visual signals. The horn will sound repeat-
edly for three minutes and the headlights and taillights
will flash for an additional 15 minutes.
To Set the Alarm
The alarm will set when you use the remote keyless entry
transmitter to lock the doors and liftgate or when you use
the power door lock switch while the door is open. After
all the doors are locked and closed, a red light (located in
the instrument cluster) will flash rapidly for about 16
seconds to signal that the system is arming. During this
16 second pre-arm period, opening any door or the
liftgate will cancel the arming. If the system successfully
arms, the red light will flash at a slower rate to indicate
the alarm is set. A manual lock of the doors, either with
the door lock plunger located on the inside of the doors
or with the driver’s door key lock cylinder, will not set
the alarm.
To Disarm the System
To disarm the system, use the remote keyless entry
transmitter or the key to unlock the driver’s door. If
something has triggered the system in your absence, the
horn will sound three times when you unlock the doors.
Check the vehicle for tampering.
The Security Alarm System is designed to protect your
vehicle; however, you can create conditions where the
system will arm unexpectedly. If you remain in the
vehicle and lock the doors with the transmitter, once the
system is armed (after 16 seconds), when you pull the
door handle to exit the alarm will sound. If this occurs,
22
THINGS TO KNOW BEFORE STARTING YOUR VEHICLE
Summary of Contents for 2005 Grand Cherokee
Page 2: ......
Page 96: ...96 UNDERSTANDING THE FEATURES OF YOUR VEHICLE ...
Page 97: ...UNDERSTANDING THE FEATURES OF YOUR VEHICLE 97 3 ...
Page 98: ...98 UNDERSTANDING THE FEATURES OF YOUR VEHICLE ...
Page 162: ...INSTRUMENT PANEL AND INTERIOR CONTROLS 162 UNDERSTANDING YOUR INSTRUMENT PANEL ...
Page 163: ...INSTRUMENT CLUSTER UNDERSTANDING YOUR INSTRUMENT PANEL 163 4 ...
Page 217: ...Operating Tips UNDERSTANDING YOUR INSTRUMENT PANEL 217 4 ...
Page 221: ...UNDERSTANDING YOUR INSTRUMENT PANEL 221 4 ...
Page 226: ......
Page 262: ...262 STARTING AND OPERATING ...
Page 294: ......
Page 310: ...3 7L ENGINE 310 MAINTAINING YOUR VEHICLE ...
Page 311: ...4 7L ENGINE MAINTAINING YOUR VEHICLE 311 7 ...
Page 312: ...5 7L ENGINE 312 MAINTAINING YOUR VEHICLE ...
Page 360: ......
Page 382: ......
Page 387: ...U S ONLY IF YOU NEED CONSUMER ASSISTANCE 387 9 ...
Page 391: ...INDEX 10 ...


