


13
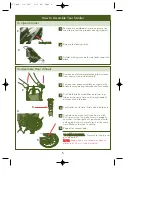
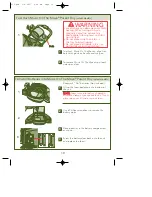
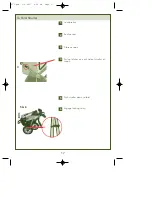
To Operate Music On The Move
®
Parent Tray
(select models)
1
Connect the
Music On The Move plug to the
headphone jack of your personal sound
system (iPod
®*
, radio, cassette, CD, MP3 or
mini disk player).
Turn on
Music On The Move by locating the
power switch as shown. A red light will indi-
cate that the power is on. Be sure to turn off
unit after use so not to drain the batteries.
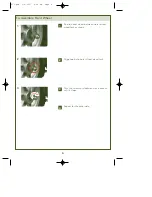
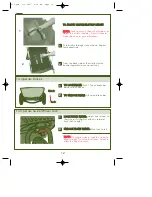
To avoid startling your child, adjust volume
on your personal sound system to its lowest
level. Turn on your personal sound system
and slowly increase volume to a comfortable
listening level for you and your child.
N
NO
OT
TE
E:: If sound cuts out or becomes
distorted, check your personal sound system
battery level. If battery level is okay and
sound is still distorted, replace
Music On The
Move’s batteries.
D
DO
O N
NO
OT
T leave Music On The Move in a hot
car or outside in the rain.
2
3
1
2
O
Offff
O
On
n
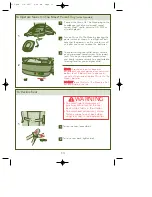
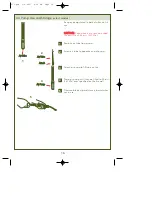
To Recline Seat
To recline seat, loosen belt.
To raise seat back, tighten belt.
1
WARNING
• To avoid finger entrapment or
pinching, do not adjust the seat
back while child is in the stroller.
• To avoid head entrapment, always
fasten canopy to seat back when
using rear seat in reclined position.
2
1
T
Tiig
gh
htte
en
n
S73.qxd 1/8/2007 9:24 AM Page 13


