P O B OX 7 2 3 1 , C O LO R A D O S P R I N G S , C O LO R A D O 8 0 9 3 3 U S A E - m A I L : j R D G @ j E f f R Ow L A N D . C O m w w w. j E f f R Ow L A N D . C O m T E L E P H O N E ( 7 1 9) 47 3 -1 1 8 1
24
O P T I O N A L A d j u s T m e N T s
OW N E R ’ S M A N UA L
C A P R I /C A P R I S S T E R EO P R E A M P L I F I E R
PHONO CARD ADjUSTMENTS
If the Phono Card option has been factory
in stalled, so that INPUT 1 on the rear of the CAPRI
is dedicated for phono operation only, the
following adjustments can be made to optimize
the performance of a particular phono cartridge.
These adjustments include both cartridge
loading and overall phono amplifier gain.
STEP 1:
Unplug the CAPRI Stereo Preamplifier
power cable from the wall AC outlet.
STEP 2:
Place the unit upside-down on a soft,
clean surface. Using a 5/64" hex wrench, remove
the nine screws that secure the bottom cover of
the unit.
STEP 3:
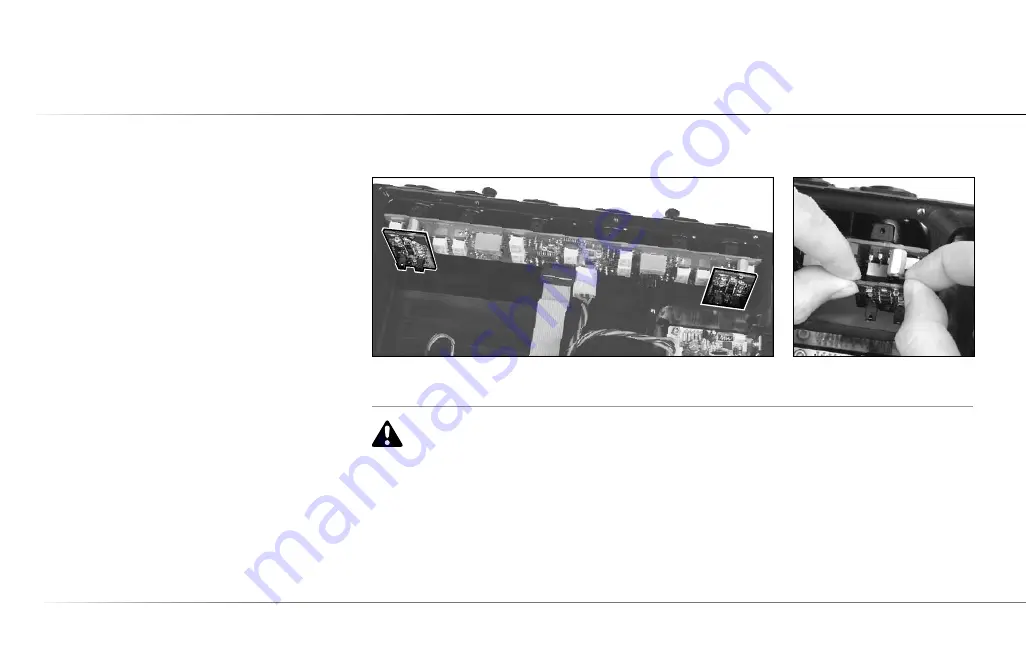
Locate and remove the phono card
from the back panel by easing it gently back
and forth until it separates from the unit. (See
FIGURES 7 and 8)
CAUTION:
Do not select the 47K ohm Load Switch Position unless a turntable, phono cartridge or RCA “shorting”
plug is connected to INPUT1! If a phono turntable or RCA “shorting” plug is not connected to INPUT 1/and the
card is installed, set the Load Switch Position to any position except 47K. The 47K ohm Load Switch Position is used for
Moving Magnet or High Output Moving Coil phono cartridges only!
FIGURE 7:
Location of both Phono Cards within the CAPRI chassis
FIGURE 8:
Detail of Phono Card PCB


