background image

OW N E R ’ S M A N UA L   

CO N C E R TO S T E R EO P R E a m P l i f i E R

Summary of Contents for CONCERTO

Page 1: ...OWNER S MANUAL CONCERTO Stereo Preamplifier...

Page 2: ...uction 2 Product Features 3 Package Contents 4 Initial Inspection 5 Maintenance Cleaning 6 7 Protection Systems 7 Installation Use Care 8 9 Remote Transmitter Operation 10 11 Front Panel Functions 12...

Page 3: ...e include this number with any corre spondence regarding your CONCERTO Stereo Preamplifier It has been my joy to create an audio component of enduring value that reflects the highest ideals of musical...

Page 4: ...nd distortion artifacts under all operating and line conditions Low power consumption permits constant power up operation to eliminate warm up time Optical encoder type volume control maintains quiet...

Page 5: ...nd com WWW JEFFROWL AND COM TELEPHONE 7 19 473 1181 4 PA C K A G E C O N T E N T S OWNER S MANUAL CONCERTO STEREO PREAMPLIFIER WARRANTY REGISTRATION WARRANTY CARD INPUT MUTE BAL L BAL R VOL VOL AC POW...

Page 6: ...ections and a minimum 72 hour burn in period prior to shipment and should therefore be in perfect operating condition upon delivery If the preamplifier does not operate correctly please notify your de...

Page 7: ...cal fashion of most audio and video equipment there are a few rules that must be kept in mind when cleaning the equipment Please allow the front panel which is coated with an automotive grade polyure...

Page 8: ...should be unplugged from the AC mains to avoid potential damage to the internal circuitry All other audio video system components should also be disconnected from AC mains power as hazardous voltages...

Page 9: ...pical two channel stereo system please see page 15 of this manual For instructions regarding the use of the BYPASS INPUTS for surround sound or home theater system use please see page 15 of this manua...

Page 10: ...ry warranty will be immediately voided Be sure the preamplifier is muted red front panel indicator light on before connecting or disconnecting any interconnect cables When operating the CONCERTO a pro...

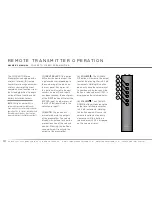
Page 11: ...il the button is released or until 99 5 is displayed on the volume display 4 VOLUME The VOLUME DOWN button will decrease the output level of the preamplifier in 0 5 dB increments Holding this button d...

Page 12: ...the level of the right channel by 0 5 dB A total shift of 6 dB is possible The balance control is not continuous holding the button down will not continue to shift the balance The button must be repea...

Page 13: ...n input source CD tuner phono etc connected to the associated rear panel inputs see Rear Panel Signal Connections on page 14 To select a desired input press the corresponding Input Selector Button Whe...

Page 14: ...the light and return the phase to uninverted polarity 5 MUTE MODE Pressing the MUTE button will mute the speaker and line outputs of the CONCERTO and illuminate the red indicator light above the MUTE...

Page 15: ...UT 2 For more information about the phono option please contact your dealer NOTE An RCA shorting plug must be installed into PHONO INPUT 2 if phono cards are installed and your phono turntable is not...

Page 16: ...S If you are using balanced XLR interconnects from your source components they should be connected to balanced INPUTS 4 and 5 A slight mechanical click may be heard when the balanced XLR interconnect...

Page 17: ...range listed on the back panel serious damage to internal circuitry will result and will void the warranty STEP 1 Verify that the VOLTS AC input A identified on the rear panel near the AC input socke...

Page 18: ...recommend any particular type or brand for use with the CONCERTO Please use your dealer s help and knowledge as a resource to select the proper accessories for your individual system needs NOTE Due t...

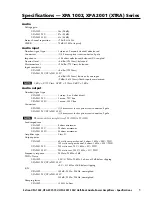
Page 19: ...istortion 19 20 kHz 002 Output Noise Level 43 Microvolts Unweighted 20 Hz 20 kHz Bandwidth 0 dB Gain Common Mode Rejection Ratio 90 dB 20 Hz 20 kHz Input Impedance 40K ohms Balanced or Unbalanced Chan...

Page 20: ...Jeff Rowl and Design Group 2007 All Rights Reserved 19 OWNER S MANUAL CONCERTO STEREO PREAMPLIFIER 12 9 in 328 mm 3 2 in 80 mm 11 5 in 292 mm 2 6 in 67 mm 17 3 in 440 mm D I M E N S I O N S...

Page 21: ...sing a small flat blade screwdriver compress the spring clips on each side of the AC Receptacle while pushing the Receptacle outward Push the Receptacle out as shown in FIGURE 1 to expose the jumpers...

Page 22: ...liers move the jumper from between pins 2 and 3 to pins 1 and 2 DISPLAY BLANKING ON See FIGURES 2 and 3 STEP 5 Replace the bottom cover Using a 2 Phillips screwdriver reinstall the twelve screws that...

Page 23: ...C Receptacle while pushing the Receptacle outward Push the Receptacle out as shown in FIGURE 1 to expose the jumpers below Remote Control Frequency A second remote control operational fre quency may b...

Page 24: ...FIGURES 4 5 STEP 5 Replace the bottom cover Using a 2 Phillips screwdriver reinstall the twelve screws that secure the bottom cover to the chassis STEP 6 Using a 1 Phillips head screw driver remove t...

Page 25: ...EP 2 Place the unit upside down on a soft clean surface Using a 2 Phillips screwdriver remove the twelve screws that secure the bottom cover of the unit STEP 3 Carefully remove the phono card from the...

Page 26: ...T MC 1 OFF 2 ON 62 Default MC ONLY 1 ON 2 ON 64 5 MC ONLY FIGURE 11 Table 1 Load Resistance Settings FIGURE 12 Table 2 Gain Settings CAUTION Do not select the 47K ohm Load Switch Position unless a tur...

Page 27: ...PO BOX 7231 COLOR ADO SPRINGS COLOR ADO 80933 USA E mail jrdg jeffrowland com WWW JEFFROWL AND COM TELEPHONE 7 19 473 1181...

Reviews: