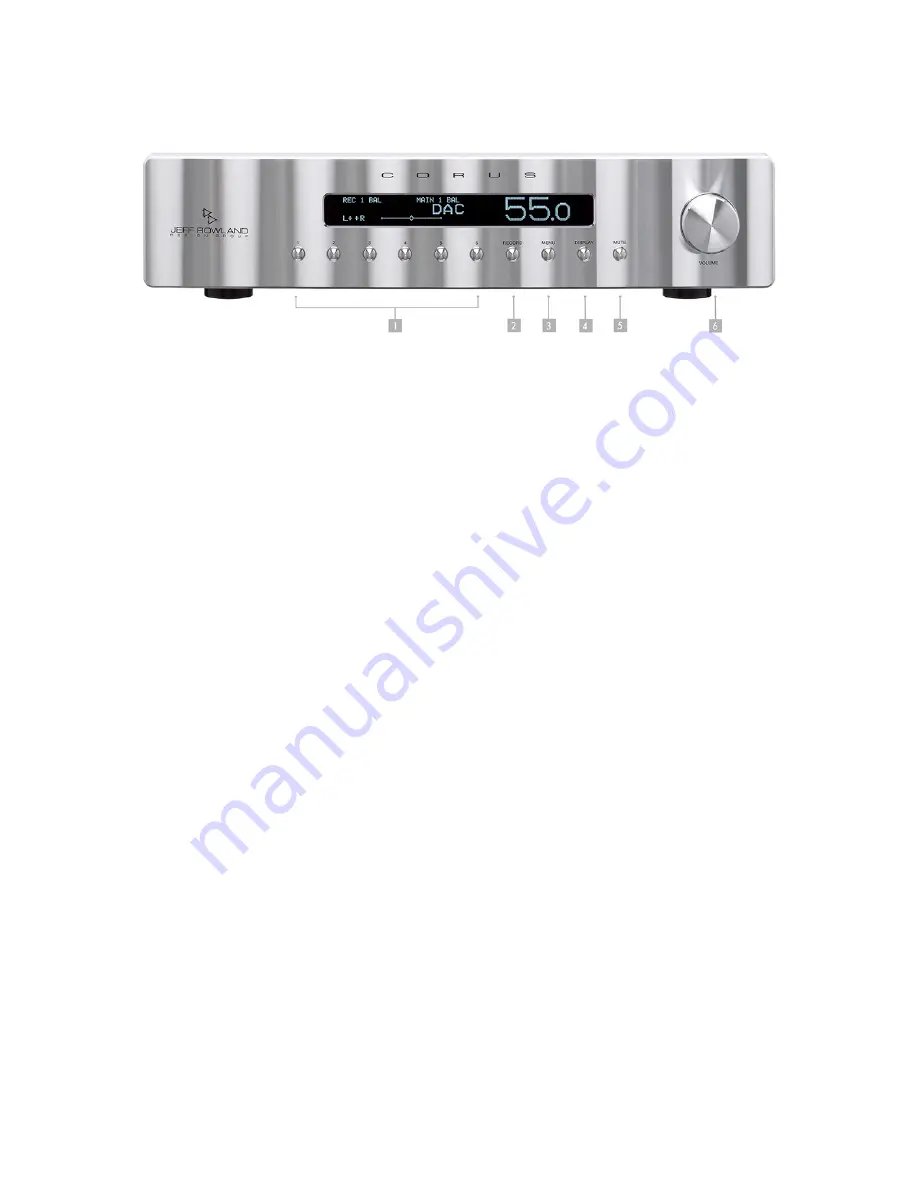
FRONT PANEL CONTROLS
Figure 3:
Front Panel Controls
1.
INPUT BUTTONS 1-6.
The main input number is selected by pressing the desired
input button.
2.
RECORD PUSHBUTTON.
Enters the
RECORD SELECT
mode
. The record input number is
selected by pressing the front panel’s
RECORD
button and then pressing the desired input
button. This can also be done by choosing
RECORD SELECT
from the
MENU
. The
RECORD
SELECT MODE
persists until a main input number is selected.
3.
MENU PUSHBUTTON.
Enters
MENU
mode. Also used to select the
MENU
option and exit
the
MENU
mode.
4.
DISPLAY PUSHBUTTON.
Turns display off and mutes the preamplifier. Typically used to
extend the life of the display while maintaining the preamplifier circuitry in a powered status.
5.
MUTE PUSHBUTTON.
Depressing the
MUTE
button once will reduce the volume by 20 dB.
Depressing the
MUTE
button a second time will fully mute the volume. Depressing the
MUTE
button a third time will return the volume to the original unmuted condition. Depressing and
holding the
MUTE
button for approximately 10 seconds forces a hardware reset.
6.
VOLUME CONTROL KNOB.
Rotation of the volume control knob clockwise will increase the
output level of the
CORUS PREAMPLIFIER
. Rotation of the knob counter-clockwise will
decrease the output level. The
CORUS PREAMPLIFIER
features a dual-range volume control
system. Rotating the volume knob slowly will cause the volume to increase or decrease in
small, precise steps. Rotating the knob abruptly will result in large, immediate changes to the
output level.
In
MENU
mode, rotating the volume knob will scroll through the
CORUS PREAMPLIFIER
’s
menu and submenus.
13


