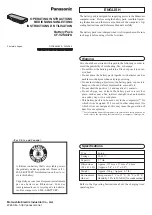
Specifications
Input
120VAC, 60Hz, 0.25A
Rated Output
0.75 A /12 VDC
Maximum Output
13.2 VDC
Battery Capacity
5
– 125 Ah
Cable Length
12 ft.
Fuse
7.5A Blade-type
Operation Instructions
Read the
ENTIRE
IMPORTANT SAFETY INFORMATION section at the beginning of this document including
all text under subheadings therein before set up or use of this product.
Note:
This Float Charger is intended only to keep a fully charged battery from losing its charge. It will not work to
charge a battery that is discharged or damaged.
Notice
TO PREVENT BATTERY DAMAGE: Do not use on gel lead-acid type batteries.
Note:
Check battery voltage with a multimeter before use.
The Battery MUST be fully charged to at least 12 Volts.
The Float Charger prevents self-discharge of the battery, while maintaining the life of rechargeable 12 volt lead-acid
batteries. It maintains a battery charge for batteries rated from 5
– 125 Ah (amp-hours), by providing a 13.2 VDC
maximum output. Other types of chargers provide a strong, rapid charge but tend to boil out liquids and decay
electrodes.
Connection
A SPARK NEAR BATTERY MAY CAUSE BATTERY EXPLOSION.
TO REDUCE RISK OF A SPARK NEAR BATTERY follow these instructions exactly.
TO PREVENT SERIOUS INJURY:
Wear ANSI-approved splash-resistant safety goggles and heavy-duty rubber work gloves whenever
connecting, disconnecting, or working near battery. Battery acid can cause permanent blindness.
1.
Place Float Charger within 3 feet of battery. Disconnect the Quick-Connectors from each other.
2.
Select the Connector appropriate to the battery.
3.
To permanently attach the Ring Terminal Connector to the battery:
a.
Bolt POSITIVE (RED) Ring Terminal Connector to POSITIVE (POS, P, +) post of battery.
b.
Bolt NEGATIVE (BLACK) Ring Terminal Connector to NEGATIVE (NEG, N,
–) post of battery.
4.
To temporarily attach the Clip Connector to the battery,
a.
Connect POSITIVE (RED) Clip Connector to POSITIVE (POS, P, +) post of battery.
b.
Connect NEGATIVE (BLACK) Clip Connector to NEGATIVE (NEG, N,
–) post of battery
WARNING! TO PREVENT SHORT CIRCUIT AND FIRE: Do not leave Clips attached indefinitely.
WARNING! Do not connect Connector to carburetor, fuel lines, or sheet-metal body parts.
5.
The LED (Light Emitting Diode) will not light while cables are disconnected.
6.
Join the Connector’s Quick-Connector plug with that of the AC Adapter.
7.
If cables are connected improperly, disconnect the Quick-Connector plugs, correct the battery connections,
and re-connect the Quick-Connector plugs.
1-800-345-4545 jegs.com


