background image

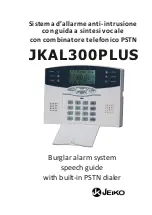
 Sistema d’allarme anti-intrusione


con guida a sintesi vocale

 con combinatore telefonico PSTN

Burglar alarm system

speech guide

with built-in PSTN dialer 

JKAL300PLUS 

Summary of Contents for JKAL300PLUS

Page 1: ...Sistema d allarme anti intrusione con guida a sintesi vocale con combinatore telefonico PSTN Burglar alarm system speech guide with built in PSTN dialer JKAL300PLUS ...

Page 2: ......

Page 3: ...veloce senza rompere muri spostare mobili o sporcare Nel seguente manuale vengono fornite le indicazioni e consigli per una corretta messa in funzione del sistema sono necessarie1o2oreperlacompletainstallazione Contenutodellaconfezione 1XCentralediAllarme inclusobatteriericaricabiliinterne 1XSensoredimovimento batteriainclusa 1XRilevatorediaperturaportaraconcontattomagnetico batteriainclusa 1XTele...

Page 4: ...ttrica Protocollo di comunicazione CONTACT ID con centrali di vigilanza Riconoscimento tipo di allarme in allarme il display indica la zona in allarme il tipo di allarme e l icona Controllo remoto interagibilita a distanza tramite telefono Sistema di supervisione per manomissione e livello batteria dei sensori senza fili Intervento sirena personalizzabile in funzione del tipo di allarme Report all...

Page 5: ...etico e la centrale di allarme la distanza di trasmissione diminuirà a secondo del tipo di barriera esempio muri in cemento soffitti porteinPVC rinforzateecc riduconoladistanzaditrasmissione Tipodibarrieraedistanzadiriduzione Pareteincartongesso 10 30 Pareteinmattoniconintonaco 20 40 Paretedimattonidoppiostrato 30 70 Pareteinmetallo radiatore 90 100 Sistemadisicurezza Questosistemaèstatoprogettato...

Page 6: ...ria sirena incorporata ed i dispositivi di allarme sirene esterne combinatore telefonico incasodiallarmeintrusione emergenza La centrale JKAL3BR conferma tramite il display LCD e spie luminose la buona ricezione dei comandi di accensione o spegnimento inviati da telecomandootastiera La sirena incorporata nella centrale JKAL3BR del sistema antiintrusione disoriental intruso La sirena esterna opzion...

Page 7: ...Sensore GAS JKAL3GAS Sirena ottico di FUMO JKAL3FUM Sirena ricaricabile monodirezionale JKAL3ES Sirena ricaricabile bidirezionale JKAL3EXT Sirena superpower senza fili con pannello solare JKAL3ESB Telecomando JKAL3RC Tastiera ausiliare di comando senza fili JKAL3EKP SISTEMI DI PROTEZIONE Il sistema di allarme JKAL300PLUS permette di proteggere totalmente l abitazione oppure di rimanere all interno...

Page 8: ...do d inserimento dell attivazione dei sensori di movimento e contatti magnetici delle zone selezionate per la protezione Durante il count down nessuna intrusione viene rilevata questo vi permette di uscire comodamente dalla vostra abitazione senza provocare allarmi indesiderati La sirena esterna confermerà l inserimento ed il disinserimento dell allarme con 2 Bip solo con funzione abilitata Se il ...

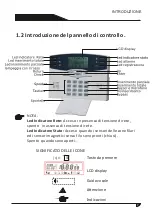
Page 9: ...da vocale LCD display 1 Tasto da premere O Indicazioni NOTA Led Indicatore Rete Acceso in presenza di tensione di rete spento in assenza di tensione di rete Led Indicatore Stato Acceso quando i sensori delle zone filari ed i sensori magnetici senza filo sono pronti chiusi Spento quando sono aperti ...

Page 10: ...deve essere installata e fissata su una parete oppureinorizzontalesuunripiano importantenoncoprire la centrale in quanto questa ė dotata di una sirena interna ed in caso di intrusione i suoni della sirena esterna e di quella interna confonderannol intruso La centrale di allarme deve essere installata ad un altezza conveniente tra 1 5 e 1 7m accessibile per le varie operazioni giornaliere Individua...

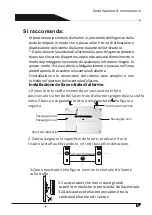
Page 11: ...do da proteggere la centrale da qualunque intrusione illegale In questo modo l intruso dovrà obbligatoriamente passare nell area protettaprimadi accedereallacentralediallarme L iinstallazione e le connessioni del sistema sono semplici e non richiedonol aperturadellacentraled allarme Installazione della centrale di allarme 2 Contrassegnare la superficie da forare praticare i fori e fissare la staff...

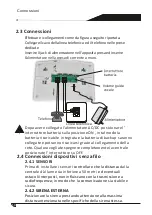
Page 12: ...la sirena stessa Effettuare i collegamenti come da figura a seguito riportata Collegareil cavo della linea telefonica ed il telefono nelle prese dedicate Inserire il jack di alimentazione nell apposita presa ed inserire l alimentatore nella presa di corrente a muro 10 Dopo avere collegato l alimentatore AC DC posizionare l interruttore batteria sulla posizione ON in tal modo la batteria ricaricabi...

Page 13: ... o tastiera finchè l anomalia non è risolta Richiedono il collegamento delle resistenze da 10K in serie 2 5 2 La corrente max erogabile sui terminali d uscita e 100mA 12V Qualora necessitiate di una corrente superiore collegare un alimentatore dedicato In caso di black out l uscita dei 12Volt dalla centrale verra interrotta pertanto i sensori di movimento NC potrebbero segnalare un allarme Conness...

Page 14: ...irena attiva suona intrusione perimetrale ritardata manomissione incendio gas Tipi di allarme con Sirena disattivata non suona emergenza Nessun numero telefonico e codice sistema memorizzati Zone filari disattivate Cicli di composizione numeri memorizzati per allarme 5 fissi Tempo di ascolto ambientale 10 secondi fissi 10 s Controllo mancanza rete attivo 3 1 Impostazioni di fabbrica Programmazione...

Page 15: ...enti pertanto all utente e richiesta una programmazione molto semplice Indicazioni di anomalia nella zona disponibili solo con controllo sensori magnetici e test presenza sensori rif par 4 66 attivati Zona C Problema su zona filare 33 40 circuito aperto Zona O Problema su zona filare 33 40 cortocircuito Zona Icona batteria sensore con batteria scarica Zona L perdita del segnale del sensore della z...

Page 16: ...e selezioni nel menu e sottomenu di impostazione sistema Premendo i tasti up e check vi sposterete nell opzione vicina Impostazioni di base Il telecomando incluso nella confezione è già registrato nella centrale d allarme e pertanto pronto per il funzionamento Premere il tasto per 3 secondi poi digitare la password amministratore 9876 accedere alle impostazioni del sistema Per ciascun menu premere...

Page 17: ...llegherà dopo gli squilli programmati default 7 squilli 15 Disattiva funzione controllo linea telefonica 747410 Attiva funzione controllo linea telefonica 747411 Disattiva funzione controllo sensori magnetici 747413 Attiva funzione controllo sensori magnetici 747412 Disattiva settaggio solo campanello in zona 32 858510 Attiva settaggio solo campanello in zona NO allarme 858511 Disattiva Sirena per...

Page 18: ... la vostra password 1 Premi 1 per inserire il sistema Premi 2 per disinserire il sistema Premi 3 per richedere lo stato del sistema Ascolto ambientale Premi 0 per terminare 2 3 4 X X X X 4 digital password utente 3 6 Procedure d allarme Le zone tipo intrusione e perimetrale sono attivate disattivate dallo stato di inserimento disinserimento del sistema Totale Parziale altre zone tipo Gas Incedio s...

Page 19: ...e 2 La centrale d allarme chiama i numeri telefonici programmati e nel contempo aziona la sirena 3 La centrale d allarme chiama ed invia tracciati alla centrale di vigilanza 1 Il numero di zona e visualizzata dai primi due digit 1 32 zone senza fili 33 40 zone filari 00 panico 41 sirena esterna 2 I digit seguenti indicano il codice tipo allarme 3 L icona visualizzata indica lo stato del sistema 4 ...

Page 20: ...la sirena verrà attivata Quando la linea telefonica ritorna alla normalità Il display visualizza le seguenti informazioni solo se la funzione è abilitata vedi pag 15 COMANDI 3 8 1 Quando la centrale d allarme riceve il segnale di manomissione la centrale attiva immediatamente la sirena ed il combinatore telefonico che provvede a chiamare l istituto di vigilanza ed i numeri memorizzati Dopo aver re...

Page 21: ...ecedenti premere CHECK per i successivi L esempio a seguito mostra un allarme intrusione rilevato dalla quinta zona filare all 8 30 del 3 aprile 2009 Nel caso di mancanza rete a centrale dopo 30 minuti avverte telefonicamente l istituto di vigilanza IDV e l utente telefonicamente avvisandolo della mancanza rete indicatore power lampeggia di rosso L Premere il tasto CHECK Premere il tasto UP per vi...

Page 22: ...lla centrale Premere il tasto telecomando o il tasto della tastiera per 3 secondi le sirene suoneranno mentre il combinatore chiamerà i numeri di telefono programmati sul Premere il tasto sulla centrale o sul telecomando la guida vocale conferma l inserimento dopodiche il suono dee dee segnala il tempo di ritardo prima dell inserimento del sistema 3 10 Funzioni di base 20 Settaggi e funzioni di ba...

Page 23: ...r terminato l intera programmazione premere il tasto RETURN per uscire Durante la programmazione se il sistema non ricevera alcun comando per 5 minuti consecutivi il sistema uscira dal menu di programmazione Nel caso di errate digitazioni premere il tasto per cancellare la digitazione precedente Impostazioni di sistema Questo paragrafo descrive come impostare le singole funzioni e caratteristiche ...

Page 24: ...pio Modificare la password utente in 1111 1 2 3 4 Digitare la password 2 1 1 1 1 Digita password utente Premi il tasto return per uscire Premi il tasto ENTER per salvare Impostazioni memorizzate ENTER ENTER Tempo da impostare 1giugno 2009 20 09 Operare come segue password utente BYPASS 1 ENTER ANNO MESE GIORNO ORA MINUTI ENTER 4 3 2 1 1 Inserire orario pre premi ENTER per salvare mi return per usc...

Page 25: ... Il sistema torna al menu precedente 5 3 3 Programmazione dei numeri telefonici Digitare numero premere return per uscire premi ENTER per salvare premi per cancellare Digita numero telefonico premi return per uscire premi per salvare premi per cancellare 1 imposta primo numero telefonico 2 imposta secondo numero telefonico 3 imposta terzo numero telefonico 4 imposta quarto numero telefonico premi ...

Page 26: ...tivare zona Digita posizione della zona da modificare da uno a quaranta premi return per uscire premi ENTER per confermare Premi uno per ON zona attivata 0 per OFF disattivata premi return per uscire premi ENTER per confermare ENTER ENTER ENTER Impostazioni di sistema Menu UTENTE 0 9 Impostazione memorizzate Impostazione memorizzate ...

Page 27: ...asto return per uscire Premi il tasto ENTER per salvare Premere per 3 secondi Impostazioni di sistema 25 Questo sistema e dotato di Password amministratore di sistema e Password utente Gli utenti possono utilizzare la pasword utente per disinserire l allarme da tastiera o da accesso remoto tramite telefono cellulare La password di sistema e utilizzata per accedere al menu di programmazione della c...

Page 28: ...rammazione di fabbrica della password amministratore e 9876 Nel caso in cui la password e stata modificata digitare la nuova password 9 Premere il tasto e mantenere premuto per 3 secondi 8 7 6 1 Digita la password 1 1 imposta la password 1 1 1 1 26 1 modifica password amministratore Digita la password amministratore Premi il tasto return per uscire Premi il tasto ENTER per salvare Impostazioni mem...

Page 29: ...o di trasferimento allarme ad una centrale d allarme dello stesso modello per l istituto di vigilanza Dopo aver impostato il numero dell istituto di vigilanza dovete impostare il codice di sistema Il codice di sistema utilizzabile può essere di 4 6 o 8cifre questo per soddisfare a pieno le esigenze dei vari utilizzatori Utilizzando Il codice sistema 4 5 cifre il messaggi di inserimento e disinseri...

Page 30: ...elefono ricevente l allarme 87654321 9 8 7 6 8 7 6 5 4 3 2 1 Il sistema torna al menu precedente 5 3 3 4 5 Programmazione dei numeri telefonici 28 Digitare numero premere return per uscire premi ENTER per salvare premi per cancellare Digita la password Digita numero telefonico premi return per uscire premi per salvare premi per cancellare 1 imposta primo numero telefonico 2 imposta secondo numero ...

Page 31: ...pio impostare data e orario 1giugno 2009 20 09 6 7 8 9 4 1 inserire orario mi return per uscire premi ENTER per salvare pre Seguendo le cifre lampeggianti dell anno mese giorno ora minuti sul display digitare 09 06 01 20 09 in sequenza 0 9 0 6 0 1 2 0 0 9 Impostazioni salvate 4 6 Impostazioni opzioni di sistema Y M D 29 Premere per 3 secondi 9876 4 ENTER indicazioni della guida vocale poi operare ...

Page 32: ...di 4 6 3 Imposta ritardo d uscita Quando l allarme viene inserito la guida vocale vi informa dell inserimento in corso ed emette dei Bep di avviso della durata di 10 secondi tempo programmato dalla fabbrica segnalando il count down del tempo di ritardo d inserimento dell attivazione dei sensori di movimento e contatti magnetici delle zone selezionate per la protezione Durante il count down nessuna...

Page 33: ...azione di fabbrica 7 squilli 6 7 9 8 4 5 0 8 Digita squilli alla risposta inserendo 0 il sistema non risponde premi return per uscire premi ENTER per salvare Consigliamo di impostare un numero superiore a 5 Impostando 0 sara impossibile accedere alla centrale in remoto via telefono 31 Premere mantenere premuto per 3 secondi Digita 2 cifre da 0 30 aggiungi 0 se inferiore a 10 Esempio 9 digita 09 Im...

Page 34: ...i fabbrica e 00 6 7 8 9 4 7 0 4 digita 0 24 ore intervallo test presenza segnale sensori inserendo 0 nessun test premi return per uscire premi ENTER per salvare digita 0 24 ore intervallo test di comunicazione inserendo 0 nessun test premi return per uscire premi ENTER per salvare 32 Premere mantenere premuto per 3 secondi Impostazione memorizzate Impostazione memorizzate Digita 2 cifre da 0 24 ag...

Page 35: ...azione memorizzate per inserimento disinserimento premi 1 no report 2 report premi return per uscire premi ENTER per salvare Attiva report ENTER ENTER ENTER ENTER ENTER ENTER Impostazioni di sistema Menu AMMINISTRATORE 4 6 8 Imposta annuncio sirena inserimento disinserimento Scegliere attivazione annuncio per inserimento disinserimento per avere la segnalazione tramite la sirena esterna Il doppio ...

Page 36: ...igita codice sensore 5 Cancella telecomando 6 Cancella sensore 7 Registra sirena 4 7 1 Registrazione cancellazione telecomando Qualora riscontraste problemi registrando i sensori in modo automatico suggeriamo di registrare sensori e telecomandi manualmente inserendo i rispettivi codici Aziona telecomando 342 Premere mantenere premuto per 3 secondi Premere mantenere premuto per 3 secondi Impostazio...

Page 37: ...ENTER per salvare Premere mantenere premuto per 3 secondi Premere mantenere premuto per 3 secondi Digita la posizione del sensore da1 a 32 premi return per uscire premi ENTER per salvare Digita la posizione del sensore da1 a 32 premi return per uscire premi ENTER per salvare aziona il sensore registrazione riuscita Digita il codice del sensore premi return per uscire premi ENTER per salvare Il cod...

Page 38: ...TRATORE Attenzione Non e possibile registrare il medesimo sensore in più zone Se il sensore è già registrato la centrale rifiuta il 2 tentativo di registrazione Cancellare il sensore precedentemente registrato ed eseguire la registrazione del sensore nella nuova zona Per poter cancellare un sensore su sui la centrale ha rilevato un anomalia zona L è necessario disabilitare la zona vedi par 4 8 dop...

Page 39: ...mpanello Riservata solo alle la zone sensori senza filo nr 01 32 Ad allarme disinserito la zona agisce da campanello ad allarme inserito la zona prende la caratterisca di zonaperimetrale Zona 32 speciale campanello Dopo aver impostato la zona campanello digitando il comando 858511 alla rilevazione del movimento apertura indipendentemente dallo stato della centrale inserito disinserito il sensore a...

Page 40: ...nza Nota Zona Chiave Riservata solo alle la zone sensori filari nr 32 40 Da utilizzare per controlli d accesso La selezione zona chiave disabilita la rilevazione d intrusione in caso contrario la centrale è normalmente disinserita Lo stato della chiave non rappresenta lo stato della centrale in quanto il telecomando e le tastiere operano parallelamente alla zona chiave Quando viene rilevato un int...

Page 41: ...azione memorizzate Digita orario di disinserimento inserendo 00 per ore e minuti il comando e disabilitato 2 2 5 4 Minuti ÉÖŅ Premere per 3 secondi 9 8 7 6 7 seguendo le indicazioni della guida vocale poi operare 4 9 Imposta autoinserimento autodisinserimento 3 imposta il 3 periodo autoinserimento autodisnserimento 4 imposta il quarto periodo autoinserimento autodisnserimento Impostazione memorizz...

Page 42: ...vate 6 5 0 0 3 5 Nota 4 periodi di inserimento disinserimento possono essere impostati in funzione delle esigenze dell utente 2 Premere mantenere premuto per 3 secondi Impostazione memorizzate Digita orario inserimento inserendo 00 per ore e minuti il comando e disabilitato Impostazione memorizzate Digita orario di disinserimento inserendo 00 per ore e minuti il comando e disabilitato ENTER ENTER ...

Page 43: ...rodotto 7 Sette riproduci messaggio Riproduci messaggio Ripristino programmazione fabbrica premere return per uscire premere per confermare ENTER ENTER ENTER ENTER ENTER ENTER Nota Il test di comunicazione è da utilizzare solo ed unicamente nel caso di collegamento all Istututo di Vigilanza IDV Nota Il Test sensori è utile per il controllo del corretto funzionamento dei sensori con la centrale d a...

Page 44: ...di vigilanza CONCTACT ID Quando la centrale d allarme riceve un segnale di allarme da una zona ritardata genera due toni sonori dee dee poi inizia il count down del tempo di ritardo indicato con la medesima tonalita ma frequenza più elevata Se il sistema d allarme non viene disinserito in tempo debito viene attivata la sirena e nel contempo il combinatore telefonico inizia la routine di chiamate a...

Page 45: ...oni dee quindi si interrompe la chiamata Se la password è corretta la guida vocale indichera come interagire rcon la centrale premendo il tasti del telefono come da figura a seguito riportata phone Chiamata telefonica Per esempio il telefono squilla 7 volte Dopo 7 squilli il sistema risponde Digitare la password seguendo la guida vocale State accedendo al vs sistema d allarme Jeiko prego digitare ...

Page 46: ...e e nel contempo a ricarica la batteria 6 In caso di mancanza rete se la batteria integrata e scarica o nel caso di sostituzione batteria ricaricabile la centrale d allarme non mantiene l orario corretto e pertanto la programmazione deve essere eseguita nuovamente L accensione della centrale d allarme è subordinata al collegamento dell alimentatore e dalla presenza di rete 7 Quando sostituire le b...

Page 47: ...e Tipo allarme Zone filare Zone senza fili Intrusione Intrusione 02 02 02 Non attive Non attive Non attive Attiva Attiva 03 1 9 2 8 33 40 03 Perimetrale Perimetrale Perimetrale Perimetrale Ritardata TIPO allarme Codice tipo Codice tipo TIPO allarme Emergenza Intrusione Inserimento TOTALE Inserimento PARZIALE Disinserito Tabella 3 Corrispondenza tipo allarme 10 32 Gas Incendio Manomissione 01 02 03...

Page 48: ...Consumo in allarme 250mA 12V alimentazione a zone filari esclusa Tempo di funzionamento in mancanza rete 10 ore in St by Massima corrente erogabile alle zone filari 100mA 15 secondi di messaggio d allarme registrabile Tempo di reazione delle zone filari 100ms Modalita di chiamata toni DTMF Protocollo di comunicazione Ademco Contact ID 9 2 Specifiche generali T a d esercizio Umidita relativa i Peso...

Page 49: ...dellagaranzia La garanzia non copre in nessun caso guasti derivanti da negligenza imperizia imprudenza e trascuratezza nell uso inosservanzadiquantoprescrittonellibrettodelle istruzionid uso manutenzioninonprevistenellibrettodelle istruzionid uso oeffettuatedapersonalenonautorizzato manomissioniointerventiperincrementarelapotenzaol efficaciadelprodotto errata installazione alimentazione con voltag...

Page 50: ...i prodotti giunti a fine vita agli idonei centri di raccolta differenziata oppure riconsegnarli al rivenditore nel caso di apparecchiatura al momento dell acquisto di una nuova di tipo equivalente in ragione di uno a uno L adeguata raccolta differenziata per l avvio successivo dell apparecchiatura e delle pile accumulatori dismessi al riciclaggio al trattamento e allo smaltimento ambientalmente co...

Page 51: ...ata 2 Ricontrollarelapasswordannotatasull agendasegretaeinserirla 3 Nel caso avete dimenticato pa password la centrale deve essere riprogrammata in Centralecontinuamenteinallarmeancheconsistemadisinserito 1 Verificare il sistema di antianomissione dei vari sensori e sirene controllare che l installazione sia stata eseguita a regola d arte e tutti coperchi batterie dei sensori ed assicuratevichesia...

Page 52: ...agneteedilsensorenonsianotroppodistanti inferiorea10mm SensorecontattomagneticoDWgeneradeifalsiallarmi 1 Assicuratevichelacomunicazionetrailsensoreelacentralesiastabile 2 Assicuratevi che il magnete del sensore sia stato installato nella corretta posizione e che il magneteedilsensorenonsiantroppodistanti inferiorea10mm Vedi pagina50 Falsoallarme sensoredimovimentoPIR PIT POU 1 Verificare che il se...

Page 53: ...ato SdoppiatoreRJ11 CollegamentolineatelefonicaconpresamuroRJ11 Centralenonchiamainumerimemorizzatiadallarmeincorso 1 La linea telefonica non è collegata o non funziona controllare la linea telefonica con un telefono 2Inumeritelefonicinonsonostatimemorizzaticorrettamente 3messagiodiallarmenonmemorizzato TROUBLE SHOOTING cavi aduefili RJ11 Collegamentolineatelefonicaconpresatripolare cavo aduefili ...

Page 54: ...52 ...

Page 55: ...53 ...

Page 56: ... packed with the greatest care Please familiarize yourself with these instructions before attempting to in stall the JEIKO security system because prolonged reliable and trouble free operation will only been sure if it is fitted properly We hope your new JEIKO security system will bring you lasting pleasure ALLGUARD JKAL30OPLUS Intruder Alarm System two areas 32 wireless zones and 8 wired zones e0...

Page 57: ... 1X Wireless PIR Motion Sensor battery included 1X Wireless Detector magnetic contact battery included 1X Remote control battery included Accessories 1 X phone cable 1X 3V battery for motion sensor 1X AC DC control unit 1X Instruction Manual 1X Swivel bracket muonting the motion sensor 1X bracket for control unit 1X kit screws and bolts for installing alarm systems 2XScrew kit a for mounting magne...

Page 58: ...grammable Last 120 events record Memory status and recovery in case of power failure Communication Protocol CONTACT ID with monitoring stations Alarm type information in alarm the display indicates the zone in alarm the alarm type and icon Remote Control remote Interaction available via telephone and SMS Supervision System for tamper and battery level of wireless sensors Siren sound customizable a...

Page 59: ...is manual should be kept in a safe place for future reference Working distance The operating range of the sensors of this system described in the technical specifications of this manual is measured under ideal conditions without any obstacles If there is a barrier in between the motion sensor door magnetic sensor and the control unit the transmission distance will decrease depending on the type of...

Page 60: ...are of the appropriate type concrete or wood especially checked before drilling confirmed that the location you do not pass electrical wires or water pipes When using ladders make sure the correct angle of opening and above all that the ground plane is correct and the scale is staggering During the installation of the siren optional take care not to cause false alarms close to your ear not to caus...

Page 61: ... panel receives a command from the called number The intruder alarm system wireless ALLGUARD JKAL30OPLUS has two indipendent areas partial and total which can be activated at your choice The 32 zones wireless sensors and 8 wired sensors can be set according in various ways The additional sensors are available at any authorized Jeiko retailer the models available are listed hereunder Motion Sensor ...

Page 62: ...ROTECTION Perimeter area armed The control unit allows you to arm the zones sensors enrolled in the perimeter area only Therefore during the night by arming the perimeter area you can occupy the premises without the motion sensors placed inside trigger the alarm system In contrary if the perimeter sensors detect an intrusion will trigger the alarm systems JKAL300PLUS The alarm system is designed t...

Page 63: ...arm ON OFF with 2 beeps only is function is enable If the delay exit time is set to 0 seconds if the sensors will be triggered while leaving your home the alarm system will be activated The above is also valid for the entry delay time after the entry delay time expired if the system is not disarm the alarm system will be activated The entry and exit delay times can be adjusted from 0 to 99 seconds...

Page 64: ...play 1 Button to push O Indication e09 INTRODUCTION UP CHECK NOTE Power LED indicator Lights up when AC power available up turned OFF when AC power is missing Status Led Indicator Lights up whn wired detector zone and wireless magnetic zone are ready lights OFF when not ready ...

Page 65: ...the daily operations access Locate a position close to a power socket 220Volt for connecting the AC DC adapter to the control panel and near to a telephone socket in order to connect the cable to the built in telephone dialer Note It is recommended in case of families with children install the unit at recommende height or somewhere far away from any possible tampering in order not to provoke fake ...

Page 66: ...l panel on the bracket Metal 3 1 Make sure that there are no large metal surfaces close to the control unit 3 2 Make sure that communication between the alarm control panel and sensors is stable INSTALLATION WIRING 1 Remove the bracket on the back of the panel insert a screwdriver in the hole located at the bottom of the panel Pull down the bracket as shown release the bracket e11 ...

Page 67: ...built in battery and can be recharged by connecting the net position the switch to OFF 2 4 Connecting Wireless Devices 2 4 1 SENSORS DETECTORS Before installing the sensors make sure the distance between the control panel and the sensor is less than 50 meters and any obstacle in between do not interfere with the radio frequency transmission so that the communication is stable and secure Please tes...

Page 68: ...y is detected on a wired zone the voice guide will tell you operazione fallita zona problema with NC wiring connection the display will show the zone number with anomaly followed by the symbol C with NOwiring connection the display will show the zone number with anomaly followed by the symbol O Wire external device to panel e13 WIRING DC 12V 500mA Z40 Z39 COM Z38 Z37 Z36 Z35 COM Z34 Z33 AUX BLL ou...

Page 69: ...dify them according to your need Administrator Password 9876 User Password 1234 Entry exit delay time 10 seconds Power line control active Ringing time to pick up PSTN phone for remote connection 7 Telephone line cut control active Arm disarm message report to CMS OFF Timing arm disarm Off Autoarm disarm time 00 00 Time for reporting arm disarm to CMS 00 00 Types of alarm siren ON sound burglar pe...

Page 70: ...ed to proceed easy setting Zone O Zone open loop trouble on wired zone 33 40 Zone O Zone sensor open on wireless zone 01 32 Wireless zone default set 1 2 3 4 5 zone type wireless zone perimeter 6 7 8 9 32 burglar burglar burglar burglar burglar burglar burglar burglar wireless zone Burglar zones enable when system is away armed Perimeter zones enable when the system is away armed and home armed Ga...

Page 71: ...er or press up down to the option you want then press to enter setting then press or confirm key to save setting When hear setting saved means setting successfully otherwise setting failure The key on numeric keyboard numbers for user to enter numbers and for delete for confirm Basic Operations Switching on After connecting the AC DC adapter please turn ON the batteries switches so the backup batt...

Page 72: ...umber and alarm type on the LCD screen The panel will dial the preset voice numbers if there is no disarming operation during this period When the panel dial the preset voice numbers if there is no operation or not disable the alarm by pressing the key 1 or 0 then the panel will continue to call other voice numbers Alarm report The panel will dial the preset telephone number off hook Alarm receivi...

Page 73: ...mmand the control panel asnwer succesfull operation 3 5 CMS Supervisory Istitute The panel use the Ademco Contact ID to sent alarm information to the alarm center If the panel got the confirmation from the CMS center then the dialer will stop otherwise the panel will repeat alarm the max times re dialing the center number is 5 Alarm information will be display and resolve by the alarm center compu...

Page 74: ... 3 The icon on display shows the alarm status 4 The red LED blinkin means alarm triggered 1 the detectors activated send alarm information to alarming center 3 sending alarm information to CMS Telephones Mobile Alarm software 110 alarm centers 2 The panel will dial 1 4 telephones as preset and the siren will sound Alarm process diagram Telephone line After cancelling an alarm alert warning the con...

Page 75: ...able telephone line trouble control 747411 Disable Siren during telephone line trouble event 858512 Enable siren during telephoneline trouble event 858513 3 8 Anti tamper alarm function 3 8 1 When the control panel receives the tamper signal the control panel immediately activates the siren and the dialer to call the Supervisory institute CMS and stored telephone numbers After resetting the sensor...

Page 76: ...m the fifth zone at 8 30am 3rd April 2009 Press the inquiry keys continuously you can get the record one by one chronologically Press the button for showing the next event Press the button UP for showing the previuos event Press the CHECK button 3 9 3 Temporary AC Black out In the case of power failure Red LED power indicator blinks 30 minutes after the control panel warns the supervisory institut...

Page 77: ... the LCD screen Press the panic button on remoter or press key on panel for 3 seconds the control panel will dial the preset phone numbers and activate the sirens Press the key for away arm on remote or the key on the keypad the panel voice message inform you that the system is going on away arm status there will be 10 secs Dee before the system is totally armed 3 10 EASY OPERATION When arming the...

Page 78: ...advanced menu After you enter the advanced menu for user convenience the screen will display the default or the setting user programmed before Then the user can enter the setting he want to modify and press ENTER key to confirm If the user do not want to modify he can press ENTER to keep the former setting After this operation the LCD display will back to the status of enter command so that the us...

Page 79: ...secret agenda in case you forget there will be denied the full operation on the control panel User password setting Example 1 change the user password into 1111 1 2 3 4 Enter the user password 2 1 1 1 1 enter 4 digit user password Press back key to exit Press confirm key to save ENTER ENTER Time to set June 1st 2009 20 09 Follow the operation User password utente BYPASS 1 ENTER 1 YEAR MONTH DAY HO...

Page 80: ...phone number premi back key to exit press to save press to delete 1 set first voice alarm receive phone number 2 3 4 press back key to back to previous menull set second voice alarm receive phone number set third voice alarm receive phone number set fourth voice alarm receive phone number ENTER ENTER ENTER 1 2 3 4 Enter the user password 3 ENTER Setting saved 1 set first voice alarm receive phone ...

Page 81: ...he 0 Zone enable Zone disable Enable disable the zone enter 1 to 40 zone number to modify press back key to exit press confirm key to confirm Please choose Press 1 to switch ON Press 0 to switch OFF ENTER ENTER ENTER 0 9 Setting saved Setting saved e26 USER menu SYSTEM SETTING ...

Page 82: ...full operation of the control panel Under disarm status press for 3 seconds enter the password 9876 press 1 ENTER then follow the voice guide system administrator Set password 1 2 M M M M M M M M Press then enter administrator password then press 1 Setting is saved 1 administrator setting 2 password setting Press back key to back to previous menu Setting is saved 1 administrator setting 2 password...

Page 83: ...ey to back to previous menu to reset 2 The factory default of administrator password is 9876 If you have modified the password please enter the new password Press key and hold on for 3 seconds 9 8 7 6 1 please enter password 1 1 set password 1 1 1 1 1 set administrator password Enter four digit administrator password Press back key to exit Press confirm key to save Setting saved ENTER e28 ADMINIST...

Page 84: ...ENTER ENTER The user code in the CMS setting which is identification code in the CMS And the user code in transfer alarm setting is user identificat ion code between same model panel After set CMS number user s code should be also programmed The panel adopt 4 8digit algorism user code to meet the demand of different us ers quantity It can used for telecom alarm receiving center system U se 4 5digi...

Page 85: ...larm receiving phone number set third voice alarm receiving phone number set fourth voice alarm receiving phone number ENTER ENTER ENTER Press and hold on for 3 seconds Set alarm receiving phone number 1 set first voice alarm receiving phone number 1 2 3 4 2 set second voice alarm receiving phone number 3 set third voice alarm receiving phone number 4 set fourth voice alarm receiving phone number ...

Page 86: ... 8 9 4 1 0 9 0 6 0 1 2 0 0 9 Y M D ENTER ENTER ENTER This is an important adjustment setting the clock the system displays the local time then the activity of auto arming disarming self diagnosis and registration events will be executed with the time set and displayed 1 clock setting 2 entry delay setting 3 exit delay setting 4 siren time setting 5 ringing times setting 6 detector loss test settin...

Page 87: ...r protection During the countdown no intrusion is detected this allows you to leave your home without causing unwanted alarm The external siren will confirm the sistem arm with 2 BEEP if function is enable Exit delay is working on the delayed perimeter burglar zones please refer to paragraph 4 8 4 6 2Entry delay time setting Getting into the house with the system armed the control panel give you a...

Page 88: ...motely the control panel because function will be disable 4 6 4 Siren time setting T he siren time after control panel start alarming default value is 5 minutes 6 7 8 9 4 4 0 3 ENTER ENTER ENTER 4 6 5 Set the ringing time to answer the dialer remote access How to change the number of rings that determine the response of alarm control panel default 7 rings Please operate as follows 6 7 9 8 4 5 0 8 ...

Page 89: ... Time interval between the signal presence sensors control factory default is 00 Allows the control panel supervising the sensors and alert you incase of Low battery or other malfunctions 6 7 8 9 4 6 1 8 ENTER ENTER ENTER 4 6 7 Set communication inspection interval time Time interval for panel communicate with Supervisory Institute CMS Default value is 00 6 7 8 9 4 7 0 4 ENTER ENTER ENTER Setting ...

Page 90: ...en indication press for 3s 1 no indication 2 short sound Example Set arm disarm report to CMS Press and hold on for 3s 6 7 8 9 4 8 1 ENTER ENTER ENTER 4 6 9 Set arming disarming report to Supervisory Institute CMS Set if report arm disarm to supervisory CMS 6 7 8 9 4 9 1 no report 2 report 2 ENTER ENTER ENTER Setting is saved Setting is saved Choose arm disarm indication voice One no voice two sho...

Page 91: ...ce indication 1 2 3 4 5 6 7 6 7 8 9 5 1 Enroll remote 2 enroll detector 3 Enter code of remote 4 Enter code of detector 5 delete remote 6 delete detector 7 Enroll wireless siren Press and hold on for 3s In case of malfuction encontered during the automatic enrolling we recommend to enroll detectors remote manually by entering the codes Setting is saved Enroll successfully Please trigger the remote...

Page 92: ...ion do not enroll the same sensor in two different position memory 2 2 5 8 4 1 2 2 5 ENTER Example enroll the sensor with code 145228522 in zone nr 16 Setting is saved Setting is saved Enter number 1 to 8 serial number of remote to delete separately enter 0 to delete all press back key to exit press confirm key to confirm press back key to exit press confirm key to save Enroll successfully trigger...

Page 93: ...omaly zone L need to disable the zone see par 4 8 after that you can cancel the sensor E xample enroll the wireless siren 6 7 8 9 5 7 4 7 3 Enroll the wireless siren ENTER ENTER Setting is saved press back key to exit press confirm key to save Enter number 1 to 32 serial number of detector to delete seperately Enter 00 to delete all Press back key to exit Press confirm key to confirm Enroll wirele...

Page 94: ...to forty zone number to modify press back key to exit press confirm key to confirm enter one to forty zone number to modify 00 for emergency button press back key to exit press confirm key to confirm One set zone attribution 1 2 3 Chose zone type siren one pedal point two pulse tone three mute Press back key to exit press confirm key to save Setting is saved 3 2 3 2 Chose zone type 0 disable the z...

Page 95: ...trol panel access Key access Key LEGENDA Zone Zone Terminal GND Common Terminal SW Switch Eol resistor Note Key Zone Only for wired zones sensors nr 33 40 used for access control The selection Key zone zona chiave disables the burglar function 1 Open circuit is to arm short circuit is to disarm 2 Open circuit is to disarm short circuit is to arm User can program the zone type 1 6 when the zone is ...

Page 96: ...RM 22 54 DISARM Arm Disarm Time setting 1 4 enter timing armtime It is invalid to set both hour and minute as zero One set 1 timing arm disarm time 2 3 Two set 2 timing arm disarm time Four set 4 timing arming disarming time 1 2 3 4 Hour Minute Setting is saved Enter timing disarm time It is invalid to set bothhour and minute as zero 2 2 5 4 Hour Minute Three set 3 timing arm disarm time Setting i...

Page 97: ... time Press and hold on for 3S Save the settings Hint 4 groups of timing arm disarm can be set according to the schedule of user 6 7 8 9 7 1 0 6 5 0 0 3 5 2 ENTER ENTER ENTER ENTER Setting is saved Enter timing disarm time It is invalid to set both hour and minute as zero enter timing armtime It is invalid to set both hour and minute as zero ...

Page 98: ...ication test has to be used only in case of CMS connection The test will be carrry out ONLY if the CMS will be enable the control panel will dial the CMS only system maintenance One zone walking testing Two communication testing Four delete event recording Five back to factory default Enter walking testing mode press back key to exit press confirm key to confirm communication testing failure Delet...

Page 99: ...larm signal from a delayed zone generates two tones sound dee dee and starts the countdown of the delay time indicated with the same tonebut higher frequency If thecontrol panel wiil not be turn off within the preset time the dialer starts routine calls to phone numbers programmed if the alarm signal received from one of the areas types intrusion perimeter emergency fire gas the activation of the ...

Page 100: ... prompts you to type the 4 digit PIN default PIN 1234 Type the PIN for access to the control panel and to follow the voice guidee to interact phone Users to call landlinephones Enter the user code according to voice prompting For example the phone rings7 times After 7 timesring the panelwill automatically off hook After you type the command the control panel asnwer operation succesfull Jeiko alarm...

Page 101: ...ack the control panel resumes operations while charging the battery 6 In case of main power failure if the built in battery is empty or in case of rechargeable battery replacement the control panel does not keep the correct time and therefore it must be reprogrammed again The swithing ON operation of the control panel is subjected to connecting the power supply and the presence of the main power 7...

Page 102: ...larm type Alarm type Wired Zone Wireless Zone Burglar Burglar 02 02 02 Disable Disable Disable Enable Enable 03 1 9 2 8 33 40 03 Perimeter Perimeter Perimeter Perimeter Delayed Alarm Type Code type Code type Alarm Type Emergency Burglar AWAY ARM HOME ARM DISARM Table 3 Alarm type and icons 10 32 Gas Fire Tamper 01 02 03 04 05 06 07 09 10 08 ...

Page 103: ...frequency variation 1 5 Communication Protocol with CMS Ademco Contact ID 9 2 Physical performance Area data 8 wired areas 32 wireless zones 8 remote controllers Zone type robbing alarm thief alarm gas leak alarm ambulance alarm self defined alarm fire alarm and boundary alarm events Frequency 433MHz Signal transmit distance 60 to 100 meters open area Operating st by time without AC main power 10 ...

Page 104: ...he Radio Telecommunication Terminal Equipment R TTE directive 1999 5 EC Although the products is a high standard products there is also some limitation of them such as false alarm or no alarm the reasons may be below Lack of Maintenance The system needs maintenance and test regularly test The sensitive of the detectors may decrease and the siren may not whistle Lack of power supply If no power inp...

Page 105: ...ns The warranty does not cover any faults caused by the case negligence incompetence negligence and careless use failure to comply with the requirements in the booklet of instructions Maintenance not covered in the book of instructions or made by unauthorized personnel Tampering or interventions to increase the power or effectiveness of the product Improper installation power voltage other than th...

Page 106: ...herefore take these products reached at suitable recycling centers or to the reseller in the case of equipment when buying a new type equivalent in terms of one to one The proper collection for subsequent equipment and dispose of batteries recycling treatment and environmentally compatible disposal contributes in preventing possible adverse environmental and health and promotes the reuse and or re...

Page 107: ...ountedclosetoobjectswhichmayinterferewithRFtransmission 3Thebatteryofthesirenisempty a CleanSolarPanelandcheckthecorrectinstallationandpositionoftheunit SUD b Checkageofrechargeablebattery replaceifandendoftheusefulllife Controlpanel doesnotaccepttheadministratorpassword 1Incorrectpassword entered 2checkthepasswordwritteninyouragenda andenteritcorrectly Alarm occurs when the system has not been tr...

Page 108: ...f the control panel and is not mountedclosetoobjectswhichmayinterferewithRFtransmission Refertopag111 4 Ensure that the magnet is correctly positioned in relation to detector and that the gap betweenmagnetanddetectorisnottoolarge max 10mm Magneticcontactsensor DW 1 Ensure that the detector is within effective radio range of the control panel and is not mountedclosetoobjectswhichmayinterferewithRFt...

Page 109: ...m with your Alarm please call the Helpline on 39 031 712304 email service1 jeiko eu www jeiko eu Lines open 9 30am to 5 00pm Monday to Friday ControlpaneldoesnotcallthestoredCMSanduserswhenalarming 1Telephonelinenotconnetedorfaulty checkphonelinewithanotherphone 2TheuserphonenumberandCMSnumber havenotbeencorrectlystored 3CMSserviceagrementnotsignedporexpired 4Alarm messagenotstored TROUBLE SHOOTIN...

Page 110: ...e55 ...

Page 111: ...e56 ...

Page 112: ...AL3BRPLUS Ed 2012 2 L assistenza tecnica telefonica è a vostra disposizione al numero 031 712304 Non esitate a contattarci per suggerimenti durante l installazione o nel caso di malfunzionamento del vostro sistema di allarme Email dal lunedì al venerdì dalle 09 30 alle 17 00 service1 jeiko eu ...

Reviews: