background image

ERROR CODES

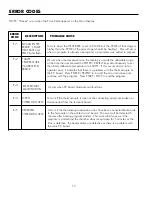
NOTE: . .“Beeps” .occur .when .the .Error .Code .appears .on .the .Main .Display

ERROR

CODE

DESCRIPTION

PROBABLE CAUSE

INVALID .ENTRY .
ERROR: . .STAGE, .
HEAT .RATE .and .

TEMP .lights .flash

Occurs . when . the . HEAT .RATE . is . set . to . COOL . but . the . TEMP . of . that . stage . is .
higher .than .the .TEMP .of .the .prior .stage .(should .be .heating) . . .This .will .occur .
when .a .program .is .already .running .and .a .parameter .was .edited .in .process .

Er .1

Occurs .when .the .temperature .on .the .display .is .outside .the .allowable .range .
at .the .time .the .user .pressed .the .ENTER ./ .REVIEW .keys .simultaneously .to .set .
the .Infinity .calibration .temperature .to .1500

°

F . . .If .this .occurs .and .is .not .an .

operator .error, .it .indicates .that .there .is .a .problem .with .the .thermocouple .or .
the .PC .board . . .Press .ENTER ./ .REVIEW .to .turn .off .the .error .indication .and .
continue .with .the .program . . .Press .START ./ .STOP .to .end .the .program .

TABLET
TEMPERATURE
CALIBRATION

ERROR

Er .2

ELECTRONICS .
MALFUNCTION

Er .3

Occurs .when .PC .board .hardware .malfunctions .

OPEN .
THERMOCOUPLE

Occurs .if .the .thermocouple .is .open .or .the .connecting .wire(s) .are .broken .or .
disconnected .from .the .terminal .board .

Er .4

REVERSED
THERMOCOUPLE

Occurs .if .the .thermocouple .extension .wires .have .been .connected .backwards .
to .the .terminals .on .the .printed .circuit .board . . .The .error .will .be .detected .5 .
minutes .after .heating .program .started . . .This .error .will .also .occur .if .the
program .is .started .and .the .chamber .door .is .kept .open .for .5 .minutes .or .the .
triac .is .defective, .the .heater .plates .are .defective .or .there .is .a .problem .with .
the .main .PC .board .

Er .5

17

Summary of Contents for Infinity M-30

Page 1: ...Infinity Burnout Furnaces TM OPERATOR S MANUAL A6732 ISO 13485 1996 ISO 9001 2000 Air Techniques Inc Hicksville NY ...

Page 2: ...ogram 10 Program and Operate Three Stage Program 11 Program and Operate Four Stage Program 12 Review a Program 13 Edit While a Program is Running 14 Sample Programs 15 Error Codes 17 18 Service 19 20 Field Service 21 26 Replacement of Heating Plates 21 Replacement of Main PC Board 23 Replacement of Thermocouple Assembly 25 Replacement of the Triac 26 Spare Parts List 27 28 Program Cards 29 30 TABL...

Page 3: ...l is not liable for indirect or consequential damage or loss of any nature in connection with this equipment This warranty is in lieu of all other warranties expressed or implied No representative or person is authorized to assume for us any liability in connection with the sale of our equipment SAFETY INSTRUCTIONS Use of the Infinity furnace not in conformance with the instructions specified in t...

Page 4: ...f Programs 30 NIGHT TIME DELAY START 0 99 hours Note This is the time required for the program to be completed and ready to cast HEAT RATE Stage 1 a 1 30 F min 1 17 C min b FULL Stage heats at the maximum rate attainable HEAT RATE Stages 2 3 4 a 1 30 F min 1 17 C min b FULL Stage heats at the maximum rate attainable c NO Stage is not used d COOL Stage cools down to the programmed temperature Note ...

Page 5: ... a program or to review the program currently running 7 STAGE 1 2 3 4 While programming the number of active stages are illuminated In the burnout process the current STAGE flashes 8 F and C Identifies the temperature scale 9 MIN Identifies the heat rate 10 HH MM Indicates time When flashing it indicates that a power failure has occurred 11 Main Display A The 4 digit display indicates the chamber ...

Page 6: ...5 Figure 1 INFINITY M 30 AND L 30 IDENTIFICATION 13 10 11 9 8 7 6 5 12 4 3 2 1 Front Panel Heating Chamber Vent Tube key parts identification and explanation ...

Page 7: ... furnaces the AC power cord is detachable and connects to a standard IEC receptacle C AC power cords are provided to correspond to receptacles that are available in a specific country 2 Circuit Breaker Protects circuitry from electrical overload Black button will pop out if overload is present To reset wait one minute and push black button into body of circuit breaker Figure 2 INFINITY LOWER BACK ...

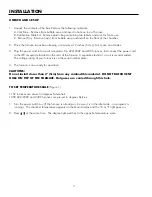
Page 8: ...le located on the rear of the furnace A separate electrical circuit is recommended The voltage rating of your furnace is on the serial number plate 4 The furnace is now ready for operation CAUTIONS Do not install closer than 2 5cm from any combustible material DO NOT BLOCK VENT HOLE ON TOP OF THE FURNACE Hot gases are vented through this hole TO SET TEMPERATURE SCALE Figure 1 115V furnaces are pre...

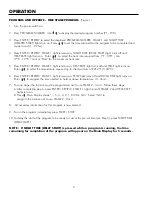
Page 9: ...mode no program us running 2 Press and while holding press PROGRAM NUMBER to display the status of the beep ON indicates the beep is active OFF indicates the beep is inactive 3 Use either of the to turn the beeps on or off 4 To return to the idle mode wait 7 seconds or press STOP START twice If STOP START is pressed once cycle starts to turn the beep on and off Figure 1 ...

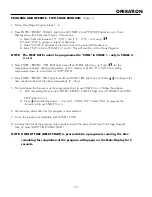
Page 10: ...re required up to the maximum of 2012 F 1100 C 6 Press ENTER REVIEW STAGE 1 light remains on TEMP light turns off and HOLD TIME light turns on Enter to program the time needed to hold at above temperature 0 4hrs 7 For one stage the furnace must be programmed not to use STAGE 2 3 or 4 Follow these steps A After completing step 6 press ENTER REVIEW STAGE 1 light turns off STAGE 2 and HEAT RATE light...

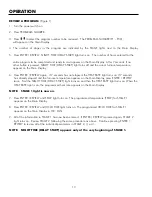
Page 11: ...2 F 1100 C or cooling temperature down to a minimum of 100 F 38 C 4 Press ENTER REVIEW TEMP light turns off and HOLD TIME light turns on Enter to program the time needed to hold at the above temperature 0 4hrs 5 For two stages the furnace must be programmed not to use STAGE 3 or 4 Follow these steps A After completing Step 4 press ENTER REVIEW STAGE 2 light turns off STAGE 3 and HEAT RATE lights t...

Page 12: ... 2012 F 1100 C or cooling temperature down to a minimum of 100 F 38 C 4 Press ENTER REVIEW TEMP light turns off and HOLD TIME light turns on Enter to program the time needed to hold at the above temperature 0 4hrs 5 For three stages the furnace must be programmed not to use STAGE 4 Follow these steps A After completing Step 4 press ENTER REVIEW STAGE 3 light turns off STAGE 4 and HEAT RATE lights ...

Page 13: ...3 Press ENTER REVIEW HEAT RATE light turns off and TEMP light turns on Enter for the temperature required heating temperature up to a maximum of 2012 F 1100 C or cooling temperature down to a minimum of 100 F 38 C 4 Press ENTER REVIEW TEMP light turns off and HOLD TIME light turns on Enter to program the time needed to hold at the above temperature 0 4 hrs 5 All necessary information for this prog...

Page 14: ...urns on If 7 seconds has already elapsed and the furnace temperature appears on the Main Display press ENTER REVIEW twice First the NIGHT TIME DELAY START light turns on and then the HEAT RATE light turns on When the HEAT RATE light is on the programmed heat rate appears on the Main Display NOTE STAGE 1 light is now on 7 Press ENTER REVIEW and TEMP light turns on The programmed temperature TEMP fo...

Page 15: ...tages already completed 4 To change a parameter while a program is running press ENTER REVIEW to advance to the desired STAGE and parameter i e HEAT RATE TEMP or HOLD TIME Initially STAGE 1 will appear Any parameter can be increased or decreased by pressing or 5 Any program can be stopped or started by pressing the START STOP button 6 If a program is edited while running and the HEAT RATE in STAGE...

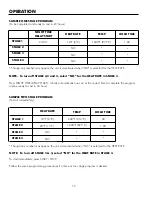
Page 16: ...NIGHT TIME DELAY START Infinity automatically turns on at the correct time to complete the program and be ready to cast in 24 hours Sample two stage program To start immediately HEAT RATE TEMP HOLD TIME STAGE 1 STAGE 2 STAGE 3 STAGE 4 10 F 6 C 1600 F 871 C 1 00 NO NO Though any number may appear the unit is deactivated when NO is selected for the HEAT RATE 20 F 11 C 600 F 316 C 30 NOTE To turn off...

Page 17: ...s stage the furnace ignores the programmed HEAT RATE except for NO and automatically cools to the pre set temperature The time required for the cooling stage is determined by the pre set temperature The lower the temperature the more time needed to cool down OPERATION HEAT RATE TEMP HOLD TIME STAGE 1 STAGE 2 STAGE 3 STAGE 4 10 F 6 C 1600 F 871 C 1 00 NO NO Though any number may appear the unit is ...

Page 18: ...that there is a problem with the thermocouple or the PC board Press ENTER REVIEW to turn off the error indication and continue with the program Press START STOP to end the program TABLET TEMPERATURE CALIBRATION ERROR Er 2 ELECTRONICS MALFUNCTION Er 3 Occurs when PC board hardware malfunctions OPEN THERMOCOUPLE Occurs if the thermocouple is open or the connecting wire s are broken or disconnected f...

Page 19: ...or the Main PC board developed a problem during a burnout process Er 6 THERMAL RUNAWAY Er 7 invalid entry error while a program is running Flashing 99 99 when NIGHT TIME DELAY START is pressed during a program Occurs when the HEAT RATE in STAGE 2 3 or 4 is set to COOL but the corresponding TEMP is entered to heat to a higher temperature than the previous stage Occurs when the temperature has excee...

Page 20: ...calibration procedure Temperature Calibration with Calibration Tablets Figure 3 1 Place a short metal casting ring towards the front center of the chamber 2 Place a ceramic tray or a small piece of casting ring lining material on top of the ring Place a tablet in the center of the tray 3 Program the Infinity as follows HEAT RATE TEMP HOLD TIME STAGE 1 FULL 1200 F 649 C 0 05 STAGE 2 25 F 14 C 1700 ...

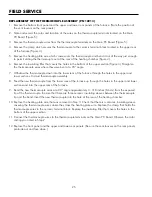
Page 21: ...0 PN 15712 Door Insulation Infinity M 30 and L30 PN 33997 Door Spring and Hook Assembly Kit 1 Open locate and remove the two screws on the door closest to the door hinges which hold the retainer strip in place Remove the retainer strip 2 Remove the one piece door insulation by sliding it toward the rear of the furnace and slightly lifting 3 To replace the springs remove each spring from the hook w...

Page 22: ... two rear heating plates on Infinity L 30 may now be removed 5 Check the condition of the filler strip insulation in the space to the left and right of the ceramic front sections Replace if required 6 Check the condition of the floor plate which provides insulation and serves as a spacer between the bottom ends of the heating plates Replace if required 7 To install the new heating plates reverse t...

Page 23: ...ng Panel Thermocouple Thermocouple Clamp Ceramic Insulating Bushing Insulating Filler Rear Insulating Panel Thermocouple Thermocouple Clamp Ceramic Insulating Bushing Insulating Filler Heating Plate Wire Power Terminal Heater Power Leads Jumper Heating Plate Wire Power Terminal Heater Power Leads Jumper Insulating Filler Ceramic Insulating Bushing Thermocouple Clamp Thermocouple Rear Insulating Pa...

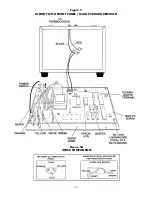
Page 24: ...e fasteners and screws 7 Reconnect the electrical connectors as follows Black wire to terminal marked H E5 Orange wire to terminal marked GATE E4 Yellow wire to terminal marked LOAD E3 White wire to terminal marked N E2 Green wire to ground terminal E1 8 Reconnect calibration jack connector The green wire on the connector is closest to the bottom edge of the front panel 9 Reconnect the two thermoc...

Page 25: ...Figure 5A OTHER COMPONENTS 24 Figure 5 INFINITY WITH FRONT PANEL MAIN PC BOARD REMOVED ...

Page 26: ...Discard thermocouple assembly 8 Feed the new thermocouple from the lower rear of the furnace up through the holes in the upper and lower sections and into the upper rear of the furnace 9 Bend the new thermocouple wires at a 90 angle approximately 3 3 8 inches 8 6cm from the exposed tip of the thermocouple Be sure that there are three ceramic insulating sleeves between the thermocouple tip and the ...

Page 27: ...insulating pad located between triac and panel If it did not come off with the triac remove it from the rear panel Do not reuse Wipe the rear panel to remove any grease like materials 5 Put the new insulating pad and then the new triac in place on the rear panel Locate the triac so that the center terminal will face downward when the rear panel is in place 6 Replace the three wires on the triac te...

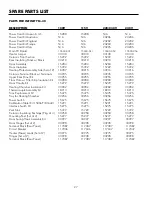
Page 28: ...rip Insulation Kit 33980 33980 33980 33980 Door Handle Kit 15279 15279 15279 15279 Heating Chamber Insulation Kit 33982 33982 33982 33982 Thermocouple Assembly Kit 18913 18913 18913 18913 Triac Replacement Kit 15475 15475 15475 15475 Tray for Heating Chamber 33256 33256 33256 33256 Power Switch 15675 15675 15675 15675 Calibration Tablet Kit 1500oF 816oC 15291 15291 15291 15291 Interlock Switch Kit...

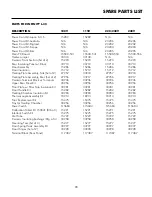
Page 29: ...ramic Terminal Block w Terminals 33936 33936 33936 33936 Upper Rear Panel Kit 33956 33956 33956 33956 Floor Plate w Filler Strip Insulation Kit 33981 33981 33981 33981 Door Handle Kit 15282 15282 15282 15282 Heating Chamber Insulation Kit 33983 33983 33983 33983 Thermocouple Assembly Kit 18913 18913 18913 18913 Triac Replacement Kit 15475 15475 15475 15475 Tray for Heating Chamber 33256 33256 3325...

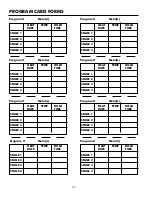
Page 30: ...TEMP HOLD RATE TIME Program Metal s STAGE 1 STAGE 2 STAGE 3 STAGE 4 HEAT TEMP HOLD RATE TIME Program Metal s STAGE 1 STAGE 2 STAGE 3 STAGE 4 HEAT TEMP HOLD RATE TIME Program Metal s STAGE 1 STAGE 2 STAGE 3 STAGE 4 HEAT TEMP HOLD RATE TIME Program Metal s STAGE 1 STAGE 2 STAGE 3 STAGE 4 HEAT TEMP HOLD RATE TIME Program Metal s STAGE 1 STAGE 2 STAGE 3 STAGE 4 HEAT TEMP HOLD RATE TIME Program Metal s...

Page 31: ...TEMP HOLD RATE TIME Program Metal s STAGE 1 STAGE 2 STAGE 3 STAGE 4 HEAT TEMP HOLD RATE TIME Program Metal s STAGE 1 STAGE 2 STAGE 3 STAGE 4 HEAT TEMP HOLD RATE TIME Program Metal s STAGE 1 STAGE 2 STAGE 3 STAGE 4 HEAT TEMP HOLD RATE TIME Program Metal s STAGE 1 STAGE 2 STAGE 3 STAGE 4 HEAT TEMP HOLD RATE TIME Program Metal s STAGE 1 STAGE 2 STAGE 3 STAGE 4 HEAT TEMP HOLD RATE TIME Program Metal s...

Page 32: ...c has been a leading manufacturer of dental laboratory equipment essential to the fabrication of porcelain caps crowns and bridges for over thirty years Innovative design and superior product performance are proven Jelrus trademarks T www jelrus com Jelrus International is a Division of 1 800 AIR TECH 1 800 247 8324 www airtechniques com ...

Reviews: