15
Calibration:
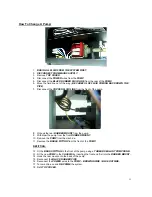
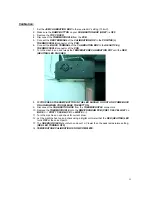
1. Set the
JEM
CALIBRATION
BOX
to the required mV setting (13.4mV).
2. Make sure the
RAMP
BUTTON
on your
CALIBRATION BOX (GREY
) is
OFF
.
3. Remove the
TOP
COVER
.
4. Disconnect the
THERMOCOUPLE
from the
PCB
.
5. Connect the
RED
TERMINAL
of the
CALIBRATION
BOX
to the
POSITIVE
(+)
THERMOCOUPLE
connector of the
PCB
.
6. Connect the
BLACK
TERMINAL
of the
CALIBRATION
BOX
to the
NEGATIVE
(-)
THERMOCOUPLE
connector of the
PCB
.
7. Turn the machine on and tweak the
TEMPERATURE CALIBRATION POT
until the
RED
(HEATING) LED FLASHES.
8.
IF YOU PRESS THE RAMP BUTTON IN THE LED SHOULD GO OUT AND COME BACK
ON AGAIN WHEN YOU RELEASE THE BUTTON.
9. Disconnect the
CALIBRATION
BOX
from the
THERMOCOUPLE
connectors.
10. Replace the
THERMOCOUPLE
onto the
DMX/PROGRAM
PCB (PRE 11/06:
YELLOW = +
BLUE = - / POST 11/06: BLACK = + WHITE = -)
11. Turn the machine on and check for current draw.
12. Let the machine heat up and check using a digital volt meter that the
RED (HEATING)
LED
turns
OFF
at the correct point.
13. The
GREEN
(OK)
LED
should turn on about 1mV lower than the peak temperature setting.
(RED LED TURNING OFF)
14.
TEMPERATURE
CALIBRATION
IS
NOW
COMPLETE
.
Summary of Contents for ZR12-AL
Page 1: ......
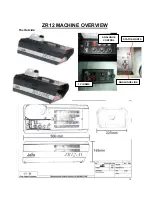
Page 10: ...10 ZR12 MACHINE OVERVIEW The Outside ANALOGUE CONTROL 3 PIN DMX ANALOGUE LINK STATUS LIGHTS ...
Page 18: ......
Page 19: ......
Page 20: ......
Page 21: ......
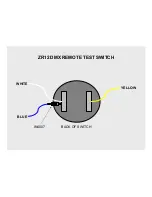
Page 23: ...YELLOW BLUE WHITE ZR12 DMX REMOTE TEST SWITCH BACK OF SWITCH IN4007 ...


