background image

16

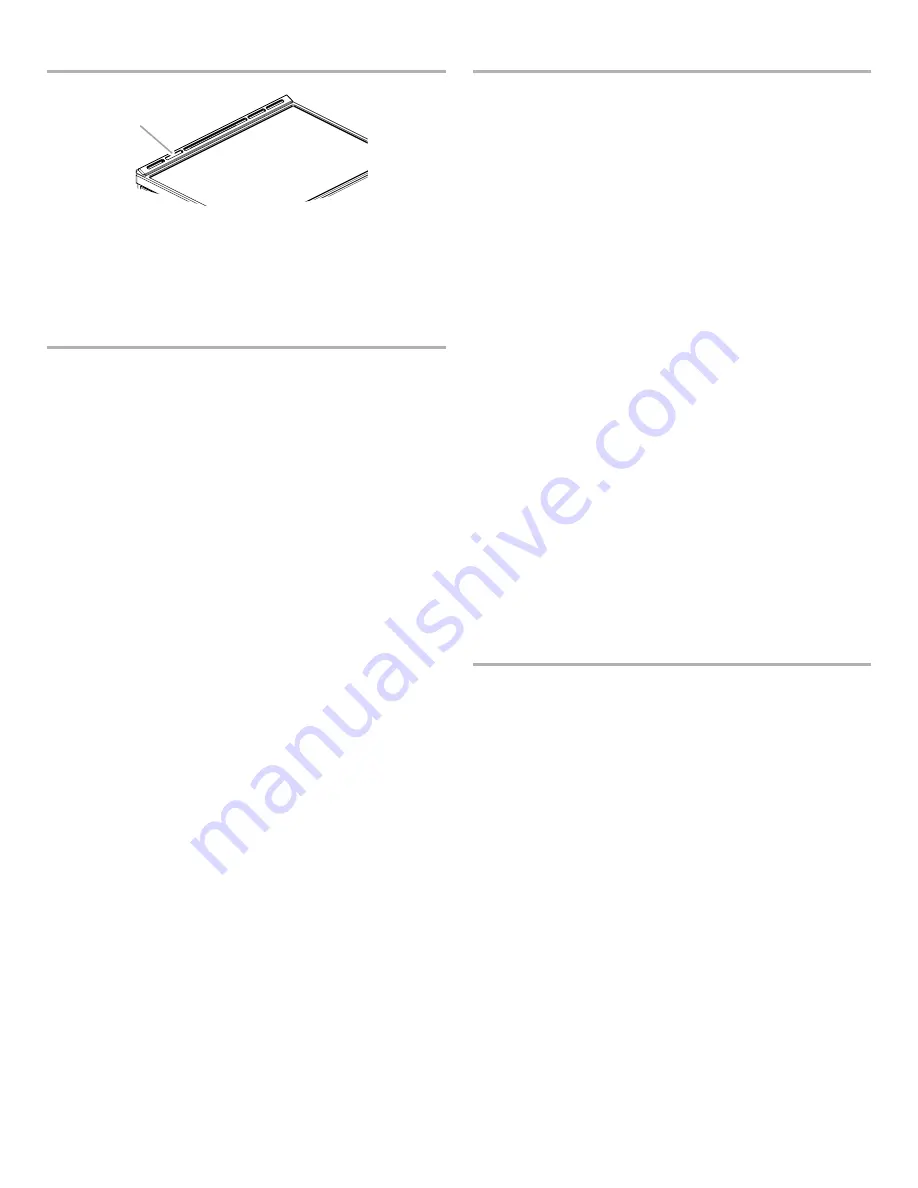
Oven Vent

The oven vent releases hot air and moisture from the oven and 

should not be blocked or covered. Blocking or covering the vent 

will cause poor air circulation, affecting cooking and cleaning 

results. Do not set plastics, paper, or other items that could melt  

or burn near the oven vent.

Sabbath Mode

The Sabbath mode sets the oven to remain on in a bake setting 

until turned off.
When the Sabbath mode is set, only the Bake cycle will operate. 

All other cooking and cleaning cycles are disabled. No tones will 

sound and the displays will not indicate temperature changes.
When the oven door is opened or closed, the oven light will not 

turn on or off and the heating elements will not turn on or off 

immediately.

To Enable Sabbath Mode Capability (One Time Only):

1. 

Press OPTIONS/CLOCK until “SABBATH” is displayed.  

“OFF. Press (1) for On” will scroll in the display.

2. 

Press the “1” keypad. “ON. Press (1) for Off” will scroll in  

the display. Sabbath mode can be activated for baking.

3. 

Press START or CANCEL UPPER to exit and display the time 

of day.

NOTE:

 To disable the Sabbath mode, repeat steps 1 through 3 

to change the status from “SABBATH ON” to “SABBATH OFF.”

To Activate Sabbath Mode:

1. 

Press BAKE for the desired oven.

2. 

Press the number keypad to set a temperature other than 

350°F (177°C).

3. 

Press START.
For timed cooking in Sabbath mode, press COOK TIME and 

then the number keypads to set the desired cook time.

4. 

Press OPTIONS/CLOCK. Three tones will sound. Then press 

“7.” “SAb” will appear in the display.

To Adjust Temperature (When Sabbath Mode Is Running):
1. 

Press the number keypad as instructed by the scrolling text  

to select the new temperature.

NOTE:

 The temperature adjustment will not appear on the 

display. The scrolling text will be shown on the display as it 

was before the keypad was pressed.

2. 

Press START.

To Deactivate Sabbath Mode:

Press OPTIONS/CLOCK, and then press “7” to return to  

regular baking, or press CANCEL for the desired oven to  

turn off the range.

A

A.  Oven vent

Baking and Roasting

Preheating

When beginning a Bake, Convect Bake, or Convect Roast cycle, 

the oven will begin preheating after Start is pressed. The oven 

will take approximately 12 to 15 minutes to reach 350°F (177°C) 

with all of the oven racks provided with your oven inside the 

oven cavity. Higher temperatures will take longer to preheat. The 

preheat cycle rapidly increases the oven temperature. The actual 

oven temperature will go above your set temperature to offset 

the heat lost when your oven door is opened to insert food. This 

ensures that when you place your food in the oven, the oven 

will begin at the proper temperature. Insert your food when the 

preheat tone sounds. Do not open the door during preheat before 

the tone sounds.

Oven Temperature

While in use, the oven elements will cycle on and off as needed 

to maintain a consistent temperature, but they may run slightly 

hot or cool at any point in time due to this cycling. Opening the 

oven door while in use will release the hot air and cool the oven 

which could impact the cooking time and performance. It is 

recommended to use the oven light to monitor cooking progress.

NOTE:

 On models with convection, the convection fan may run in 

the non-convection Bake mode to improve oven performance.

Temperature Management System

The Temperature Management System electronically regulates the 

oven heat levels during preheat and Bake to maintain a precise 

temperature range for optimal cooking results. The bake and broil 

elements or burners cycle on and off in intervals. On convection 

range models, the fan will run while preheating and may be cycled 

on and off for short intervals during Bake to provide the best 

results. This feature is automatically activated when the oven  

is in use.
Before baking and roasting, position racks according to 

“Positioning Racks and Bakeware” section. When roasting, it is 

not necessary to wait for the oven preheat cycle to end before 

putting food in, unless it is recommended in the recipe.

Broiling

When broiling, preheat the oven for 2 minutes before putting  

food in, unless recommended otherwise in the recipe. Position 

food on grid in a broiler pan, and then place it in the center of  

the oven rack.

IMPORTANT:

 Close the door to ensure proper broiling 

temperature.
Changing the temperature when broiling allows more precise 

control when cooking. The lower the broil setting is, the slower 

the cooking. Thicker cuts and unevenly shaped pieces of meat, 

fish, and poultry may cook better at lower broil settings. Use rack 

6 or 7 for broiling. Refer to the “Positioning Racks and Bakeware” 

section for more information.
On lower settings, the broil element will cycle on and off to 

maintain the proper temperature.


For best results, use a broiler pan and grid. It is designed  

to drain juices and help avoid spatter and smoke.
If you would like to purchase a broiler pan, one may be 

ordered. See the “Accessories” section.

Summary of Contents for JIS1450D

Page 1: ...a mano el n mero de modelo y de serie que est n ubicados en el marco del horno detr s del lado derecho superior de la puerta del horno Table of Contents W10665267D RANGE SAFETY 2 The Anti Tip Bracket...

Page 2: ...ip if you apply too much force or weight to the open door without having the anti tip bracket fastened down properly Tip Over Hazard A child or adult can tip the range and be killed Verify the anti ti...

Page 3: ...these pans or bowls during cooking may subject wiring or components underneath to damage Protective Liners Do not use aluminum foil to line surface unit drip bowls or oven bottoms except as suggested...

Page 4: ...p and the receiver Connecting the receiver into a different outlet It is the user s responsibility to correct any interference NOTE People with a pacemaker or similar medical device should use care wh...

Page 5: ...f the oven racks provided with your oven inside the oven cavity Higher temperatures will take longer to preheat The preheat cycle rapidly increases the oven temperature The actual oven temperature wil...

Page 6: ...on TIMER SET OFF Oven timer The Timer can be set in hours or minutes up to 9 hours and 59 minutes 1 Press TIMER SET OFF 2 Press the number keypads to set the length of time in hr min min Leading zero...

Page 7: ...ress START Let the dough rise until nearly doubled in size Proofing time may vary depending on dough type and quantity 3 Press CANCEL UPPER when finished proofing Refer to the Proofing Bread section f...

Page 8: ...l be displayed 3 Press the 1 keypad to adjust the setting 4 Press START or CANCEL UPPER to exit and display the time of day Audible Tones Disable Turns off all tones including the end of cycle tone an...

Page 9: ...Temperature Offset Control IMPORTANT Do not use a thermometer to measure oven temperature Elements will cycle on and off as needed to provide consistent temperature but may run slightly hot or cool a...

Page 10: ...be displayed When a surface cooking area is left at the 0 power level for 30 seconds the surface cooking area will automatically turn off and display only the middle dash without the indicator light...

Page 11: ...n extra large cooking zone To Turn On the Bridge 1 Touch BRIDGE The heat setting levels for the 2 left surface cooking areas will default to 0 and can be set from a minimum of 1 to a maximum of 9 If t...

Page 12: ...ion your ceramic glass cooktop Refer to the Range Care section for additional information IMPORTANT To avoid permanent damage to the cooktop surface and to make soils easier to remove clean the cookto...

Page 13: ...seconds to place the correct pan on the surface cooking area the surface cooking area will turn off If there is no activity for 90 seconds the cooktop will turn off Ideal cookware should have a flat...

Page 14: ...eats hamburgers steaks 6 Broiled meats poultry fish 3 or 4 Most baked goods casseroles frozen foods 2 Roasted meats 1 Large roasts or poultry For hamburger patties to have a well seared exterior and a...

Page 15: ...nd then push the rack assembly to the back of the oven Lower the front of the rack assembly so the ladder hook engages with the ladder on both sides of the oven To Remove Roll Out Rack 1 Push the slid...

Page 16: ...pidly increases the oven temperature The actual oven temperature will go above your set temperature to offset the heat lost when your oven door is opened to insert food This ensures that when you plac...

Page 17: ...sagna pizza Proofing Bread Proofing bread prepares the dough for baking by activating the yeast Follow the recipe directions as a guide Proof should be used for fresh dough thawed dough and for the fi...

Page 18: ...for conventional baking and keeping hot cooked foods warm It is not recommended to prepare foods taller than the height of the Baking Drawer rack handles or foods that may rise above 2 6 4 cm in the...

Page 19: ...Additional Clean cycles may be run to help remove the stubborn soils IMPORTANT Do not use oven cleaners The use of chemicals including commercial oven cleaners or metal scouring pads may cause perman...

Page 20: ...the Cooktop Scraper For best results use the Cooktop Scraper while the cooktop is still warm but not hot to the touch It is recommended to wear an oven mitt while scraping the warm cooktop Hold the C...

Page 21: ...sult Cleaning Method Clean cycle See the Clean Cycle section first Remove Replace Drawer Remove all items from inside the baking drawer and then allow the range to cool completely before attempting to...

Page 22: ...needs adjustment See Oven Temperature Control in the Electronic Oven Controls section Oven indicator lights flash Needs service Oven indicator lights are flashing See Control Display in the Electroni...

Page 23: ...bottom during the Clean cycle Level the range See the Installation Instructions To remove deposits use a cloth soaked with vinegar Then use a cloth dampened with water to thoroughly remove any vinega...

Page 24: ...y when the power is turned down Crackling Cookware is used that consists of different materials The noise is caused by vibrations in the joint faces between the different layers The sound may change d...

Page 25: ...rder Part Number W10423113RP Cooktop Scraper ceramic glass models Order Part Number WA906B Granite Cleaner and Polish Order Part Number W10275756 Gas Grate and Drip Pan Cleaner Order Part Number 31617...

Page 26: ...tc 5 Defects or damage caused by the use of non genuine Jenn Air parts or accessories 6 Conversion of products from natural gas or L P gas 7 Damage from accident misuse abuse fire floods acts of God o...

Page 27: ...CUISINI RE 28 La bride antibasculement 28 CONSEILS L MENTAIRES D UTILISATION 31 Technologie d autonettoyage AquaLift 31 Temp ratures en surface 31 Pr chauffage 31 Nettoyage de la table de cuisson en v...

Page 28: ...la bride antibasculement n est pas convenablement fix e Risque de basculement Un enfant ou une personne adulte peut faire basculer la cuisini re ce qui peut causer un d c s V rifier que la bride antib...

Page 29: ...onc e Les endroits pr s des l ments de surface peuvent devenir assez chauds pour causer des br lures Pendant et apr s l utilisation ne pas toucher les l ments chauffants et ne pas laisser les v tement...

Page 30: ...ne surface chaude Exercer une grande prudence lors de l ouverture de la porte Laisser l air chaud ou la vapeur s chapper avant d enlever ou de replacer un plat Ne pas faire chauffer des contenants fer...

Page 31: ...le four sont l int rieur Pour atteindre une temp rature plus lev e le pr chauffage est plus long Le programme de pr chauffage augmente rapidement la temp rature du four La temp rature r elle du four...

Page 32: ...itu e sur le tableau de commande du four La porte du four tant ferm e appuyer sur LIGHT lampe pour allumer ou teindre la lampe La lampe du four s allume automatiquement l ouverture de la porte TIMER S...

Page 33: ...cuisson souhait e 6 Appuyer sur START mise en marche 7 Ins rer les aliments lorsque demand 8 Pour modifier la temp rature r p ter les tapes 3 6 9 Appuyer sur CANCEL UPPER annulation four sup rieur apr...

Page 34: ...ficher l heure Les sections suivantes d taillent toutes les fonctions modifiables Appuyer sur CANCEL UPPER annulation du four sup rieur pour quitter le mode Settings r glages Horloge Cette horloge est...

Page 35: ...ogramme 1 Appuyer sur OPTIONS CLOCK options horloge jusqu afficher REMINDER TONE signal sonore de rappel 2 Le r glage en cours s affiche 3 Appuyer sur la touche 1 pour changer le r glage 4 Appuyer sur...

Page 36: ...ulation du four sup rieur pour quitter et afficher l heure Commande de d calage de temp rature du four IMPORTANT Ne pas utiliser de thermom tre pour mesurer la temp rature du four Les l ments chauffan...

Page 37: ...tirets un par zone clignotent et un signal sonore d action invalide retentit 4 fois Risque d incendie Fermer tous les r glages lorsque la cuisson est termin e Le non respect de cette instruction peut...

Page 38: ...re automatiquement les fonctions d bullition avec capteur et d optimisation du rendement Dans certains cas il est possible qu elle ne puisse pas activer simultan ment les fonctions d bullition avec ca...

Page 39: ...tiquement pour prot ger les composants lectroniques internes de la table de cuisson en les emp chant ainsi de surchauffer Timer Minuterie Utiliser la minuterie de cuisson pour r gler des dur es de 1 9...

Page 40: ...s fonds des casseroles et po les sont propres et secs avant de les utiliser Les r sidus et l eau peuvent laisser des d p ts quand ils sont chauff s A B C A D passement maximal de 1 3 cm B Rebord de la...

Page 41: ...erm e et bien a r e Papier d aluminium IMPORTANT Pour viter des dommages permanents au fini du fond du four ne pas recouvrir le fond du four avec du papier d aluminium ou un rev tement quelconque Pour...

Page 42: ...ust e en cons quence comme dans l illustration pr c dente Cuisson sur plusieurs grilles Cuisson sur 2 grilles sans convection Utiliser les positions de grille 2 et 5 ou 3 et 6 Cuisson sur 2 grilles av...

Page 43: ...tient le r glage de cuisson au four tant que le four n est pas teint Lorsque le mode Sabbat est r gl seul le programme de cuisson au four fonctionne Tous les autres programmes de cuisson et de nettoya...

Page 44: ...ontr le plus pr cis de la cuisson Plus le r glage du gril est bas plus la cuisson est lente Les morceaux pais et de forme irr guli re de viande de poisson et de volaille cuisent mieux des r glages de...

Page 45: ...la recette est s lectionn e le four commence le pr chauffage pour le programme r gl 4 Pour modifier la temp rature appuyer sur les touches num riques pour r gler la temp rature souhait e 5 Appuyer sur...

Page 46: ...p rature souhait e entre 170 F et 451 F 75 C et 233 C en utilisant les touches num riques La temp rature par d faut est de 350 F 180 C 3 Appuyer sur START mise en marche 4 Pour modifier la temp rature...

Page 47: ...ponge ou un chiffon imm diatement apr s la fin du programme de nettoyage La plupart de l eau initiale contenue dans 2 tasses 16 oz 500 mL restera dans le four apr s la fin du programme de nettoyage S...

Page 48: ...e nettoyants abrasifs de cr me polir pour table de cuisson de tampons en laine d acier de chiffons de lavage r ches ou d essuie tout abrasifs Ils peuvent endommager les surfaces en acier inoxydable m...

Page 49: ...temp rature les aliments r agissent avec l mail et peuvent provoquer la formation de taches une attaque acide des piq res ou des d colorations blanch tres M thode de nettoyage D tergent doux CAVIT DU...

Page 50: ...emp rature du four est trop lev e ou trop basse Le calibrage de la temp rature du four doit tre ajust Voir Commande de temp rature du four dans la section Commandes lectroniques du four Les t moins lu...

Page 51: ...yage R gler l aplomb de la cuisini re Voir les Instructions d installation Utiliser un chiffon imbib de vinaigre pour enlever les d p ts Utiliser ensuite un chiffon humide pour enlever compl tement to...

Page 52: ...errompue Cr pitement L ustensile de cuisson utilis est compos de diff rents mat riaux Le bruit est caus par les vibrations dans les jointures entre les diff rentes couches Le bruit peut varier selon l...

Page 53: ...P Grattoir pour table de cuisson mod les avec vitroc ramique Commander la pi ce num ro WA906B Nettoyant et poli pour granite Commander la pi ce num ro W10275756 Nettoyant pour plateau d gouttement et...

Page 54: ...ant de l utilisation de pi ces ou accessoires Jenn Air non authentiques 6 Conversion de votre produit du gaz naturel ou du gaz de p trole liqu fi 7 Dommages caus s par accident m susage abus incendie...

Page 55: ...55 Notes...

Page 56: ...W10665267D SP PN W10665270 2016 Used under license in Canada All rights reserved Utilis sous licence au Canada Tous droits r serv s 3 16...

Reviews: