background image

5

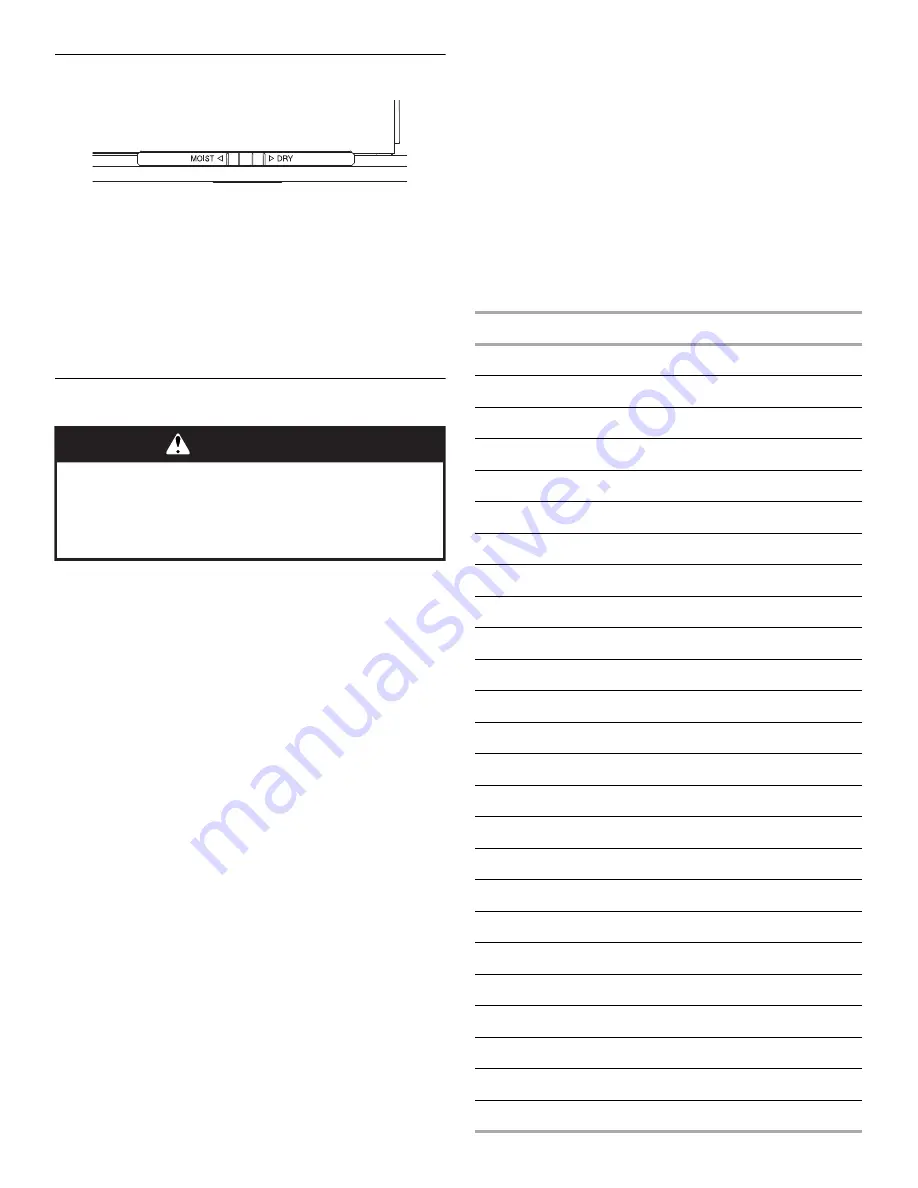
Moist-Dry Slide Control

The Moist-Dry slide control allows you to open or close the vent 
slots in the door. The MOIST setting holds moisture in, while the 
DRY setting allows steam and moisture to escape from the 
drawer.
NOTE: Condensation may form on inner surfaces. This is normal.
To keep foods moist, slide control to MOIST, closing the vents. 
Closing the vents will seal the drawer and keep hot foods soft 
and moist.
To keep foods crisp, slide control to DRY, opening the vents. 
Opening the vents releases moisture from the drawer and keeps 
hot foods crisp and dry. See the Warming Drawer Temperature 
Chart in the “Setting the Controls” section.

Setting the Controls

The Indoor/Outdoor Warming Drawer is ideal for keeping hot 
cooked foods at serving temperature. It is designed to operate 
properly either indoors or outdoors at temperatures down to 32°F 
(0°C). If the drawer is operated at temperatures colder than 32°F 
(0°C), performance may be affected. 
Different types of food may be placed in the warming drawer at 
the same time. 
When keeping several types of food hot, use the setting for the 
highest temperature food in the warming drawer. Place foods 
requiring the highest temperature on the bottom of the drawer 
and those foods requiring the lowest temperature on the elevated 
rack.
For best results, do not hold foods in the warming drawer longer 
than 1 hour. For smaller quantities or heat-sensitive foods, such 
as eggs, do not hold longer than 30 minutes.
Food must be cooked and heated to serving temperature before 
being placed in the warming drawer. Cover foods with a lid.
Breads, pastries, and fruit pies may be heated from room 
temperature on the High setting. Remove food from plastic bags 
and place in oven-safe container.
Oven-safe serving dishes and dinner plates can be heated while 
the warming drawer is preheating. 
NOTE: To conserve heat, place cookware and positioning rack in 
the warming drawer before preheating.

To Use:

1. Push in and turn the control knob to the desired food 

warming setting: Low, between Low and Med (medium low), 
Med (medium), between Med and High (medium high), or 
High.
NOTE: For best results, meats, seafood, poultry and any 
foods containing meat, seafood or poultry should be set to 
medium or higher.

2. Select MOIST or DRY setting.

3. Allow warming drawer to preheat. Recommended minimum 

preheating times are 5 minutes for Low, 10 minutes for Med, 
and 20 minutes for High.

4. Push in and turn the control knob to OFF when finished.

WARMING DRAWER TEMPERATURE CHART

Different foods require different settings in order to maintain the 
ideal serving temperature. Use the following chart as a guide.
You can set the drawer temperature anywhere between Low and 


High. For best results, meats, seafood and poultry should be set 
to medium or higher. Cover food, if desired, to maintain heat and 
moisture.
When keeping several different types of food hot, set the drawer 
to the food requiring the highest temperature setting. Place 
item(s) requiring the highest temperature on the bottom of the 
drawer and those items requiring the lowest temperature on the 
rack.

WARNING

Food Poisoning Hazard

Do not let food sit for more than one hour before or 
after cooking.

Doing so can result in food poisoning or sickness.

FOOD

SETTING

Bacon

Med to High - DRY

Beef, medium and well-done

Med to High - MOIST

Bread, hard rolls

Med - DRY

Bread, soft rolls

Med - MOIST

Casseroles - with a crisp top

Med - DRY

Casseroles

Med - MOIST

Coffee cake

Med - MOIST

Cooked cereal

Med to High - MOIST

Eggs

High - MOIST

Fish, Seafood (no breading)

High - MOIST

Fish, Seafood (breaded)

High - DRY

Fried foods

High - DRY

Gravy, Cream Sauces

High - MOIST

Ham

Med High - MOIST

Hors d’oeuvres (crisp)

High - DRY

Lamb

Med to High - MOIST

Pancakes, waffles

High - DRY

Pies, single crust

Med - DRY

Pies, double crust

Med to Low - DRY

Pizza

High - DRY

Pork

Med to High - MOIST

Potatoes, baked

Med - DRY

Potatoes, mashed

Med to High - MOIST

Poultry

High - DRY

Vegetables

Med to High - MOIST

Summary of Contents for JWD3030EX

Page 1: ... in the U S A call 1 800 JENNAIR 1 800 536 6247 or visit our website at www jennair com In Canada call 1 800 JENNAIR 1 800 536 6247 or visit our website at www jennair ca Guide d utilisation et d entretien Au Canada pour assistance installation ou service composez le 1 800 JENNAIR 1 800 536 6247 ou visitez notre site web à www jennair ca Table of Contents Table des matières 2 W10736617A ...

Page 2: ...n the U S A 9 In Canada 9 Accessories 9 WARRANTY 10 TABLE DES MATIÈRES SÉCURITÉ DU TIROIR RÉCHAUD 11 Spécifications électriques 13 UTILISATION DU TIROIR RÉCHAUD 13 Bouton de commande 13 Curseur de réglage Moist Dry humide sec 14 Réglage des commandes 14 Ustensiles de réchauffage 15 Positionnement des grilles et des ustensiles 15 Levée du pain 15 Fonction de cuisson lente 16 Ensemble de panneaux 16...

Page 3: ...Flammable materials should not be stored in a warming drawer Do Not Use Water on Grease Fires Smother fire or flame or use dry chemical or foam type extinguisher Use Only Dry Potholders Moist or damp potholders on hot surfaces may result in burns from steam Do not let potholder touch hot heating elements Do not use a towel or other bulky cloth Use Care When Opening Drawer Let hot air or steam esca...

Page 4: ...r is in operation When finished turn the control knob to OFF to turn off the warming drawer When the warming drawer is turned off the blue power indicator light will go out and the drawer will begin to cool The temperature is controlled by rotating the control knob to the desired setting The temperature setting ranges from Low to High on the warming drawer control to keep heated foods warm at the ...

Page 5: ...at place cookware and positioning rack in the warming drawer before preheating To Use 1 Push in and turn the control knob to the desired food warming setting Low between Low and Med medium low Med medium between Med and High medium high or High NOTE For best results meats seafood poultry and any foods containing meat seafood or poultry should be set to medium or higher 2 Select MOIST or DRY settin...

Page 6: ...ugh for baking by activating the yeast Check dough periodically for progress To Proof 1 Cover dough with lightly oiled waxed paper and place temperature safe bowl s on rack 2 Set control knob to PROOF setting 3 Place vent on MOIST setting 4 Verify doneness by pressing 2 fingers 1 27 cm into dough If indentation remains the dough is ready For second proofing of dough repeat steps 1 through 4 Slow R...

Page 7: ... 4 Hold the drawer by the sides not by the front Pull it slowly all the way out To Replace 1 Align the drawer rails with the receiving slides 2 Push drawer in all the way 3 Gently open and close the drawer to ensure it is seated properly on the slides General Cleaning IMPORTANT Before cleaning make sure all controls are off and the warming drawer and the drawer accessories are cool Always follow l...

Page 8: ... fuse or reset the circuit breaker If the problem continues call an electrician Is the power supply cord unplugged Plug into a grounded 3 prong outlet Warming drawer does not slide properly Has the drawer been mounted properly on the slides See Warming Drawer Care section Has the drawer been overloaded The weight inside the drawer should not exceed 100 lbs 45 kg Is the drawer load uneven Redistrib...

Page 9: ...one directory Yellow Pages For further assistance If you need further assistance you can write to Jenn Air with any questions or concerns at Jenn Air Brand Home Appliances Customer eXperience Center 553 Benson Road Benton Harbor MI 49022 2692 Web address www jennair com Please include a daytime phone number in your correspondence In Canada Call the Jenn Air Customer eXperience Centre toll free 1 8...

Page 10: ...e light bulbs batteries air or water filters preservation solutions etc 5 Conversion of products from natural gas or L P gas 6 Damage from accident misuse abuse fire floods acts of God or use with products not approved by Jenn Air 7 Repairs to parts or systems to correct product damage or defects caused by unauthorized service alteration or modification of the appliance 8 Cosmetic damage including...

Page 11: ...e non respect des instructions Votre sécurité et celle des autres est très importante Nous donnons de nombreux messages de sécurité importants dans ce manuel et sur votre appareil ménager Assurez vous de toujours lire tous les messages de sécurité et de vous y conformer AVERTISSEMENT DANGER Voici le symbole d alerte de sécurité Ce symbole d alerte de sécurité vous signale les dangers potentiels de...

Page 12: ...e du tiroir réchaud à l endroit voulu lorsque le tiroir réchaud est froid Si la grille doit être déplacée pendant que le tiroir réchaud est chaud ne pas laisser les mitaines toucher l élément chaud de chauffage dans le tiroir réchaud NE PAS TOUCHER LES ÉLÉMENTS DE CHAUFFAGE OU LES SURFACES INTÉRIEURES DU TIROIR RÉCHAUD Les éléments chauffants peuvent être chauds même lorsqu ils ont une teinte fonc...

Page 13: ...nde pour mettre en marche le tiroir réchaud Le témoin d alimentation bleu s allume et reste allumé tant que le tiroir réchaud fonctionne À la fin du réchauffage tourner le bouton de commande à la position OFF arrêt pour éteindre le tiroir réchaud Lorsque le tiroir réchaud est éteint le témoin d alimentation bleu s éteint et le tiroir commence à refroidir La commande de la température s effectue pa...

Page 14: ...le tiroir réchaud préchauffe REMARQUE Pour conserver la chaleur placer l ustensile de cuisson et la grille dans le tiroir réchaud avant le préchauffage Utilisation 1 Pousser et tourner le bouton de commande au réglage de réchauffage souhaité Low basse entre Low et Med moyenne basse Med moyenne entre Med et High moyenne élevée ou High élevée REMARQUE Pour les meilleurs résultats la viande les fruit...

Page 15: ...suivant pour déterminer le positionnement correct des rails de support pour chaque taille d ustensile Les ustensiles pleine grandeur ne peuvent pas être utilisés avec le tiroir réchaud de 24 61 cm Lors de l utilisation d ustensiles de service s assurer que les rails de support d ustensile sont bien installés dans l encoche de positionnement avant d insérer les ustensiles Levée du pain La levée du ...

Page 16: ... réchaud S assurer que le tiroir réchaud est complètement fermé pendant le fonctionnement 4 Tourner le bouton de commande à OFF arrêt après avoir terminé Ensemble de panneaux accessoire Un ensemble de panneaux est disponible pour personnaliser la façade du tiroir réchaud et s harmoniser avec les autres appareils ménagers Jenn Air Voir la section Assistance ou Service pour commander ENTRETIEN DU TI...

Page 17: ...nt légèrement abrasif ou nettoyant pour acier inoxydable avec chiffon humide ou éponge Laver à l eau propre essuyer et sécher complètement Répéter au besoin Nettoyant pour cuisine et appareils ménagers affresh pièce n W10355010 non inclus Voir la section Assistance ou service pour placer une commande GRILLES Méthode de nettoyage Tampon en laine d acier et eau tiède savonneuse Laver rincer et séche...

Page 18: ...de pièces de rechange Orientation vers des concessionnaires compagnies de service de réparation et distributeurs de pièces de rechange locaux Les techniciens de service désignés par Jenn Air sont formés pour remplir la garantie du produit et fournir un service après la garantie partout au Canada Pour plus d assistance Si vous avez besoin de plus d assistance vous pouvez écrire à Jenn Air Brand Hom...

Page 19: ...ons de conservation etc 5 Conversion de votre produit du gaz naturel ou du gaz de pétrole liquéfié 6 Dommages causés par accident mésusage abus incendie inondations catastrophe naturelle ou l utilisation de produits non approuvés par Jenn Air 7 Réparations aux pièces ou systèmes dans le but de rectifier un dommage ou des défauts résultant d une réparation altération ou modification non autorisée f...

Page 20: ...W10736617A 2014 Jenn Air Used under license in Canada All rights reserved Utilisé sous licence au Canada Tous droits réservés 11 14 Printed in U S A Imprimé aux É U ...

Reviews: