background image

14

NOTE: After 5 minutes of continuous dispensing, the 
dispenser will stop dispensing water to avoid flooding. To 
continue dispensing, press the dispenser button again. 

Allow 24 hours for the refrigerator to cool down and chill 
water. Dispense enough water every week to maintain a fresh 
supply.

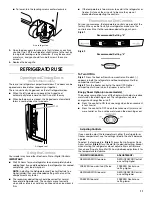
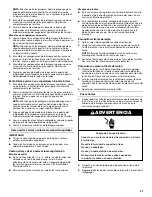
Dispensing Water

1. Hold a container under the dispenser while pressing the 

button.

2. Release the button to stop dispensing.

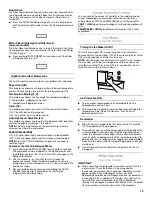
Water Filtration System

The water filter is located in the upper right-hand corner of the 
refrigerator compartment. 

Water Filter Status Lights

The water filter status lights will remind you when it is time to 
order and replace your water filter. When the yellow (Order) light is 
on, it is almost time to change the water filter. When the red 
(Replace) light is on, a new water filter should be installed. The 
disposable water filter should be replaced at least every 6 months 
OR earlier if the flow of water to your water dispenser or ice maker 
decreases noticeably.
After replacing the water filter, press and hold Reset Filter or Filter 
Reset (depending on your model) for 3 seconds. The Order and 
Replace indicator lights will blink and then go off when the system 
is reset. See “Using the Controls.” 

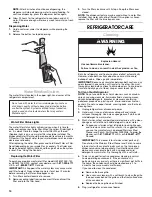
Replacing the Water Filter

To purchase a replacement water filter, model UKF8001AXX-750 
or UKF8001AXX-200, contact your dealer or call 1-877-232-6771 
U.S.A. or 1-800-807-6777 Canada.
IMPORTANT: Air trapped in the water system may cause water 
and filter to eject. Always dispense water for at least 2 minutes 
before removing the filter or blue bypass cap. 
1. Turn filter counterclockwise to remove.
2. Remove sealing label from replacement filter and insert the 

filter end into the filter head.

3. Turn the filter clockwise until it stops. Snap the filter cover 

closed.

NOTE: The dispenser feature may be used without a water filter 
installed. Your water will not be filtered. If this option is chosen, 
replace the filter with the blue bypass cap.

REFRIGERATOR CARE

Cleaning

Both the refrigerator and freezer sections defrost automatically. 
However, clean both sections about once a month to avoid 
buildup of odors. Wipe up spills immediately.
IMPORTANT: Because air circulates between both sections, any 
odors formed in one section will transfer to the other. You must 
thoroughly clean both sections to eliminate odors. To avoid odor 
transfer and drying out of food, wrap or cover foods tightly.

To Clean Your Refrigerator:

NOTE: Do not use abrasive or harsh cleaners such as window 
sprays, scouring cleansers, flammable fluids, cleaning waxes, 
concentrated detergents, bleaches or cleansers containing 
petroleum products on plastic parts, interior and door liners or 
gaskets. Do not use paper towels, scouring pads, or other harsh 
cleaning tools.
1. Unplug refrigerator or disconnect power.
2. Hand wash, rinse, and dry removable parts and interior 

surfaces thoroughly. Use a clean sponge or soft cloth and a 
mild detergent in warm water. 

3. Wash stainless steel and painted metal exteriors with a clean 

sponge or soft cloth and a mild detergent in warm water. 

To keep your stainless steel refrigerator looking like new 
and to remove minor scuffs or marks, it is suggested that 
you use the manufacturer’s approved Stainless Steel 
Cleaner and Polish, Part Number 20000008. To order the 
cleaner, call 1-877-232-6771 U.S.A. or 1-800-807-6777 
Canada.

IMPORTANT: This cleaner is for stainless steel parts only!

Do not allow the Stainless Steel Cleaner and Polish to come 
into contact with any plastic parts such as the trim pieces, 
dispenser covers or door gaskets. If unintentional contact 
does occur, clean plastic part with a sponge and mild 
detergent in warm water. Dry thoroughly with a soft cloth.

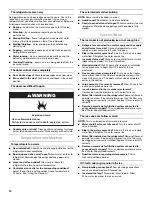
4. There is no need for routine condenser cleaning in normal 

home operating environments. If the environment is 
particularly greasy or dusty, or there is significant pet traffic in 
the home, the condenser should be cleaned every 2 to 
3 months to ensure maximum efficiency.
If you need to clean the condenser:

Remove the base grille.

Use a vacuum cleaner with a soft brush to clean the grille, 
the open areas behind the grille and the front surface area 
of the condenser.

Replace the base grille when finished.

5. Plug in refrigerator or reconnect power.

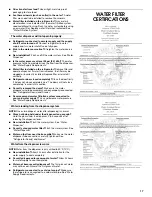
Do not use with water that is microbiologically unsafe or 
of unknown quality without adequate disinfection before 
or after the system. Systems certified for cyst reduction 
may be used on disinfected waters that may contain 
filterable cysts.

WARNING

Explosion Hazard

Use nonflammable cleaner.

Failure to do so can result in death, explosion, or fire.

Summary of Contents for Refrigerators

Page 1: ...DATOS DEL PRODUCTO 39 GARANT A 41 S CURIT DU R FRIG RATEUR 42 INSTRUCTIONS D INSTALLATION 43 UTILISATION DU R FRIG RATEUR 52 ENTRETIEN DU R FRIG RATEUR 56 D PANNAGE 57 FEUILLES DE DONN ES SUR LE PRODU...

Page 2: ...tlet Do not remove ground prong Do not use an adapter Do not use an extension cord Disconnect power before servicing Replace all parts and panels before operating Remove doors from your old refrigerat...

Page 3: ...al control to the word OFF or press the freezer Down Arrow control until a dash appears in both the Freezer and Refrigerator displays as shown Disconnect the refrigerator from the electrical source Wh...

Page 4: ...ing Use 6 35 mm O D outside diameter copper tubing Be sure both ends of copper tubing are cut square 5 Using a cordless drill drill a hole in the cold water pipe you have selected 6 Fasten the shutoff...

Page 5: ...aching the trim to the upper end of the handle Using a flat blade screwdriver wrapped in masking tape pry the trim piece from the lower end of the handle Then remove the screws attaching the handle to...

Page 6: ...door from the bottom hinge pin NOTE Remove the hinge pin cover from the bottom hinge pin and keep it for later use See Bottom Hinge graphic Reverse Door Standard Door optional IMPORTANT If you want t...

Page 7: ...le Pull the handle straight out from the drawer Make sure you keep the screws for reattaching the handles See Metal Handle graphic 2 To replace the handle reverse the directions Plastic Handles To rem...

Page 8: ...C D A B C Bottom Hinge Door Swing Reversal optional 1 A Door Hinge Hole Plug 3 A A Cabinet Hinge Hole Plugs 1 2 A A Door Stop Screws B Door Stop 4 Side View Front View A B 1 1 1 A A Hex Head Hinge Scr...

Page 9: ...Replacement A or Setscrew A A Metal Handle Metal Handle Plastic Handle Plastic Handle 1 1 2 2 Top Hinges A Hinge Cover Screw B Top Hinge Cover C 5 16 Hex Head Hinge Screws D Top Hinge B A C D A Hinge...

Page 10: ...r edge swing the cover toward the cabinet and snap it into place 7 Replace the base grille Style 2 Freezer Drawer Models 1 Remove the base grille Grasp the grille firmly and pull it toward you 2 Raise...

Page 11: ...ontrols Electronic and Dial Controls For your convenience the temperature controls are preset at the factory When you first install your refrigerator make sure the controls are still set to the recomm...

Page 12: ...ntrol for the freezer will operate The Speed Ice feature will automatically shut off in approximately 24 hours Humidity Control on some models The Humidity Control feature turns on a heater to help re...

Page 13: ...references by pressing and holding the DOOR ALARM touch pad for 3 seconds or by shutting the refrigerator compartment door Crisper Humidity Control You can control the amount of humidity in the moistu...

Page 14: ...th sections any odors formed in one section will transfer to the other You must thoroughly clean both sections to eliminate odors To avoid odor transfer and drying out of food wrap or cover foods tigh...

Page 15: ...nt Insert the tabs on the shield into the liner holes on each side of the light assembly Slide the shield toward the front until it locks NOTE To avoid damaging the light shield do not force the shiel...

Page 16: ...supply and the supply shutoff valve turned on Connect refrigerator to water supply and turn water shutoff valve fully open Kink in the water source line A kink in the line can reduce water flow Straig...

Page 17: ...pletely see The doors will not close completely earlier in this section Recently removed the doors Make sure the water dispenser wire tube assembly has been properly reconnected See Refrigerator Door...

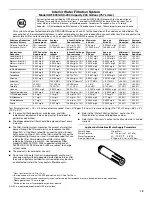
Page 18: ...zene Carbofuran Toxaphene Cysts Turbidity Asbestos Tetrachloroethylene and Lindane Substance Reduction Aesthetic Effects NSF Reduction Requirements Average Influent Influent Challenge Concentration Ma...

Page 19: ...ements Average Influent Influent Challenge Concentration Maximum Effluent Average Effluent Minimum Reduction Average Reduction Chlorine Taste Odor Particulate Class I 50 reduction 85 reduction 2 00 mg...

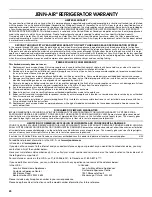
Page 20: ...tches dents chips or other damage to the finish of your major appliance unless such damage results from defects in materials or workmanship and is reported to Jenn Air within 30 days from the date of...

Page 21: ...mbolo de advertencia de seguridad Este s mbolo le llama la atenci n sobre peligros potenciales que pueden ocasionar la muerte o una lesi n a usted y a los dem s Todos los mensajes de seguridad ir n a...

Page 22: ...1 2 54 cm detr s del refrigerador Si su refrigerador tiene f brica de hielo aseg rese que hay espacio adicional atr s para las conexiones de la l nea de agua Si Ud instala el refrigerador pr ximo a un...

Page 23: ...or lo menos cada 6 meses Presi n del agua Se necesita un suministro de agua fr a con presi n de agua entre 35 y 120 lbs pulg 241 y 827 kPa para hacer funcionar el despachador de agua y la f brica de h...

Page 24: ...cipiente o fregadero y ABRA el suministro principal de agua Enjuague la tuber a hasta que el agua salga limpia CIERRE la v lvula de cierre de la tuber a de agua Conexi n al refrigerador Dependiendo de...

Page 25: ...a plana envuelto en cinta adhesiva protectora levante la pieza de adorno del extremo inferior de la manija Luego saque los tornillos que sujetan la manija a la puerta Vea la ilustraci n 2 de Montaje f...

Page 26: ...dor inferior de la bisagra NOTA Saque la cubierta del pasador de la bisagra inferior y gu rdela para usarla m s tarde Vea la ilustraci n Bisagra inferior C mo invertir el cierre de la puerta Puerta es...

Page 27: ...uitar y volver a colocar el caj n del congelador Todas las ilustraciones se incluyen en esta secci n m s adelante despu s de Pasos finales C mo quitar y volver a colocar la manija del caj n Manijas de...

Page 28: ...l sentido de apertura de las puertas opcional 1 A Tap n del orificio de la bisagra de la puerta 3 A A Tapones del orificio de la bisagra de la carcasa 1 2 A A Tornillos del ret n de la puerta B Ret n...

Page 29: ...o de ajuste de A A Manija met lica Manija met lica Manija de pl stico Manija de pl stico 1 1 2 2 Bisagras superiores A Tornillo para la cubierta de la bisagra B Cubierta de la bisagra superior C Torni...

Page 30: ...pie del freno a cada lado gir ndolo hacia la derecha hasta que quede firmemente contra el piso 6 Vuelva a colocar la cubierta del soporte Coloque la cubierta del soporte en el extremo exterior gire l...

Page 31: ...nfriado por completo sus alimentos podr an echarse a perder NOTA Poner los Controles del refrigerador y del congelador en un ajuste m s alto m s fr o que el recomendado no enfriar m s r pido los compa...

Page 32: ...per odos de alto uso del refrigerador cargas completas de comestibles o temperaturas ambientales temporalmente calientes Presione el bot n t ctil de MAX COLD Fr o m ximo para fijar el congelador y el...

Page 33: ...de control de estado del filtro de agua cada vez que usted reemplace el filtro de agua Vea Sistema de filtraci n de agua Presione y sostenga FILTER RESET Reajustar el filtro durante 3 segundos hasta...

Page 34: ...comenzado a correr contin e presionando y soltando el bot n del despachador 5 segundos activado 5 segundos desactivado por otros 2 minutos Este proceso eliminar el aire en el filtro y en el sistema de...

Page 35: ...tibia Para mantener como nuevo su refrigerador de acero inoxidable y para quitar marcas o rayaduras peque as se sugiere usar el limpiador de acero inoxidable aprobado por el fabricante pieza n mero 2...

Page 36: ...iona el contacto Enchufe una l mpara para ver si funciona el contacto Hay un fusible de la casa fundido o se dispar el cortacircuitos Reemplace el fusible o reposicione el cortacircuitos Si el problem...

Page 37: ...istro de agua Est encendida la f brica de hielo Aseg rese de que el brazo o interruptor de cierre de alambre dependiendo del modelo est en la posici n de ON Encendido Es nueva la instalaci n Espere 24...

Page 38: ...instalarlo correctamente Est completamente cerrada la puerta del refrigerador Cierre la puerta con firmeza Si no se cierra completamente vea Las puertas no cierran completamente anteriormente en esta...

Page 39: ...i n de plomo mercurio atrazina benceno paradiclorobenceno carbofurano toxafeno quistes turbidez asbestos tetracloroetileno y lindano Reducci n de sustancias Efectos est ticos Requisitos de reducci n d...

Page 40: ...e sustancias Efectos est ticos Requisitos de reducci n de NSF Promedio influente Concentraci n en el agua a tratar M ximo efluente Promedio efluente m nimo de reducci n promedio de reducci n Cloro sab...

Page 41: ...as desportilladuras u otro da o al acabado de su electrodom stico principal a menos que el mismo sea debido a defectos en los materiales o la mano de obra y se le informe a Jenn Air en un lapso de 30...

Page 42: ...AVERTISSEMENT DANGER Voici le symbole d alerte de s curit Ce symbole d alerte de s curit vous signale les dangers potentiels de d c s et de blessures graves vous et d autres Tous les messages de s cur...

Page 43: ...onnel est pr vu l arri re pour permettre les raccordements des conduits d eau En cas d installation du r frig rateur pr s d un mur fixe laisser un espace minimum de 2 6 3 cm du c t de la charni re cer...

Page 44: ...use une obstruction plus facilement Utiliser un tube en cuivre et v rifier s il y a des fuites Installer les tubes en cuivre seulement des endroits o la temp rature se maintient au dessus du point de...

Page 45: ...la bague de compression du raccord sur le tube en cuivre comme on le voit sur l illustration Ins rer l extr mit du tube aussi loin que possible dans le raccord de sortie du robinet Visser l crou de co...

Page 46: ...ure l embout sup rieur de la poign e l aide d un tournevis lame plate recouvert de ruban adh sif soulever la pi ce de garniture de l embout inf rieur de la poign e Ensuite retirer les vis fixant la po...

Page 47: ...e entre les deux sections Voir l illustration de la Fiche de branchement REMARQUE Le conducteur vert de liaison la terre reste fix la charni re 6 Enlever les pi ces de la charni re sup rieure du c t g...

Page 48: ...staller le tiroir du cong lateur IMPORTANT Deux personnes peuvent tre n cessaires pour d poser et r installer le tiroir du cong lateur Toutes les illustrations mentionn es dans les instructions suivan...

Page 49: ...du sens d ouverture de la porte facultatif 1 A Bouchon d obturation des trous de charni re de la porte 3 A A Bouchons d obturation des trous de charni re dans la caisse 1 2 A A Vis de but e de la port...

Page 50: ...ou A A Poign e en m tal Poign e en m tal Poign e en plastique Poign e en plastique 1 1 2 2 B A C D Fiche de branchement A Vis du couvercle de la charni re B Couvercle de la charni re sup rieure C Vis...

Page 51: ...ieurs tours et vous devriez tourner les deux vis de r glage des roulettes de fa on gale 5 Abaisser le pied de stabilisation de chaque c t en le tournant dans le sens horaire jusqu ce qu il touche bien...

Page 52: ...re verticale Lors de l ouverture de la porte du c t gauche le joint charni re se replie automatiquement pour qu il n y ait pas d interf rence Lorsque les deux portes sont ferm es le joint charni re a...

Page 53: ...La commande du CONG LATEUR r gle la temp rature du compartiment de cong lation S il est n cessaire d ajuster la temp rature dans le compartiment de r frig ration ou de cong lation utiliser les r glage...

Page 54: ...ignal sonore et l alternance d affichage des temp ratures Le t moin Temp Alarm continue de clignoter jusqu ce que le r frig rateur revienne la temp rature r gl e Door Alarm avertisseur de la porte La...

Page 55: ...garder quoi que ce soit sur le dessus de la machine gla ons ou dans le bac gla ons Distributeur d eau sur certains mod les IMPORTANT Apr s avoir connect le r frig rateur une source d alimentation en...

Page 56: ...doux dans de l eau ti de 3 Laver les surfaces ext rieures en acier inoxydable ou en m tal peint avec une ponge propre ou un linge doux et un d tergent doux dans de l eau ti de Pour que votre r frig r...

Page 57: ...Aux U www jennair com Au Canada www jennair ca Fonctionnement du r frig rateur Le r frig rateur ne fonctionne pas Le cordon d alimentation lectrique est il d branch Brancher sur une prise 3 alv oles...

Page 58: ...uster les commandes un cran plus froid V rifier la temp rature au bout de 24 heures Voir Utilisation de la des commande s Il y a une accumulation d humidit l int rieur REMARQUE Une certaine accumulati...

Page 59: ...le robinet d arr t d eau est il ouvert Brancher le r frig rateur l alimentation en eau et ouvrir le robinet d arr t d eau compl tement La canalisation de la source d eau du domicile comporte t elle un...

Page 60: ...et en vertu de la norme NSF ANSI 53 r duction de plomb mercure atrazine benz ne p dichlorobenz ne carbofuran toxaph ne kystes turbidit amiante t trachloro thyl ne et lindane R d de substances Effets...

Page 61: ...achloro thyl ne et lindane R d de substances Effets esth tiques Crit res de r duction NSF Affluent moyen Concentration dans l eau traiter Effluent maximal Effluent moyen de r d minimale de r d moyenne...

Page 62: ...bles du domicile ou rectifier le c blage ou la plomberie du domicile 3 Les visites de service pour r parer ou remplacer les ampoules lectriques les filtres air ou les filtres eau de l appareil Les pi...

Page 63: ...frig ration Pour assistance ou service aux U composez le 1 800 536 6247 Au Canada composez le 1 800 807 6777 Si vous avez besoin de plus d assistance vous pouvez crire Jenn Air en soumettant toute que...

Page 64: ...Trademark of Jenn Air U S A Used under license by Maytag Limited in Canada Marca registrada Marca de comercio de Jenn Air U S A Usada bajo licencia por Maytag Limited en Canad Marque d pos e Marque de...

Reviews: