40
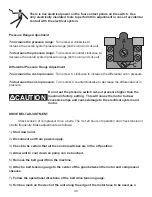
There is live electrical power on the four contact points on the switch. Use
only electrically insulated tools to perform this adjustment in case of accidental
contact with the electrical system.
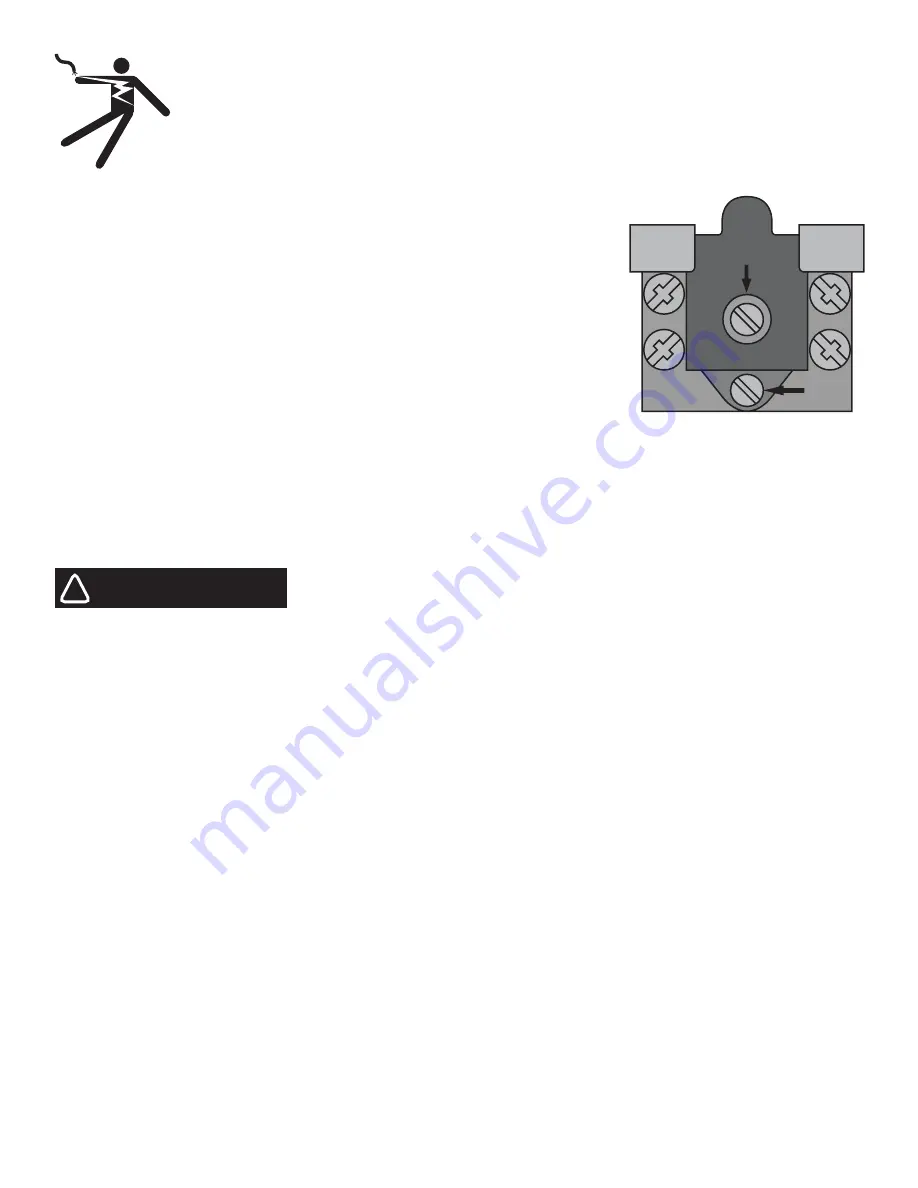
Pressure Range Adjustment
To increase the pressure range:
Turn screw A clockwise to
increase the overall system pressure range (both cut-in and cut-out).
To decrease the pressure range:
Turn screw A counter clockwise to
decrease the overall system pressure range (both cut-in and cut-out).
Differential Pressure Range Adjustment
To increase the cut-in pressure:
Turn screw C clockwise to increase the differential cut in pressure.
To decrease the cut-in pressure:
Turn screw C counterclockwise to decrease the differential cut in
pressure.
Do not set the pressure switch cut-out pressure higher than the
maximum factory setting. This will cause the motor to draw
excessive amps and cause damage to the electrical system and
motor.
DRIVE BELT ADJUSTMENT
Check tension of compressor drive v-belts. The f rst 24 hours of operation and check tension of
v-belts frequently. Make adjustments as follows:
1.)
Shut down unit.
2.)
Disconnect unit from power supply.
3.)
Check to be certain that all the control switches are in the off position.
4.)
Allow unit to cool down so pump can be touched.
5.)
Remove the belt guard from the machine.
6.)
Attach a belt tension gauge to the center of the span between the motor and compressor
sheaves.
7.)
Follow the operational directions of the belt drive tension gauge.
8.)
Scribe a mark on the deck of the unit along the edge of the motor base to be used as a
A
C
CAUTION
!
Summary of Contents for Reciprocating Air Compressors
Page 4: ...4 Section 1 Safety and Health Instructions...
Page 14: ...14 Section 2 Introduction and Description...
Page 19: ...19 Section 3 Preparation for Use and Initial Installation Instructions...
Page 24: ...24 Section 4 Operating Instructions...
Page 36: ...36 Section 5 Maintenance Instructions...

