41
reference location.
9.)
If the def ection of belt too great, then loosen the motor or engine bolts and slide the motor
or engine away from the pump. If the def ection of belt too small, then loosen the motor or
engine bolts and slide the motor or engine toward the pump.
A.) Remove the Belt
B.) Scribe a mark approximately 1/8” from the original reference mark.
C.) Loosen the 4 screws holding the electric motor or gasoline engine.
D.) Slide the motor or engine to the new mark.
E.) Ensure that the pulleys are in alignment. Use a straight edge to check.
F.) Properly tighten the 4 screws to hold the electric motor or gasoline engine in place.
G.) Roll the belt onto motor pulley and then the pump f ywheel.
Care must be taken when rolling the belt onto the pulleys, as f ngers can get
caught between the belt and the pulleys.
10.)
Recheck the belt tension with the gauge.
11.)
Repeat steps 6 & 7 until the proper belt tension is achieved.
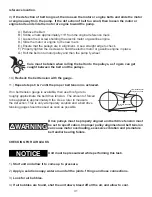
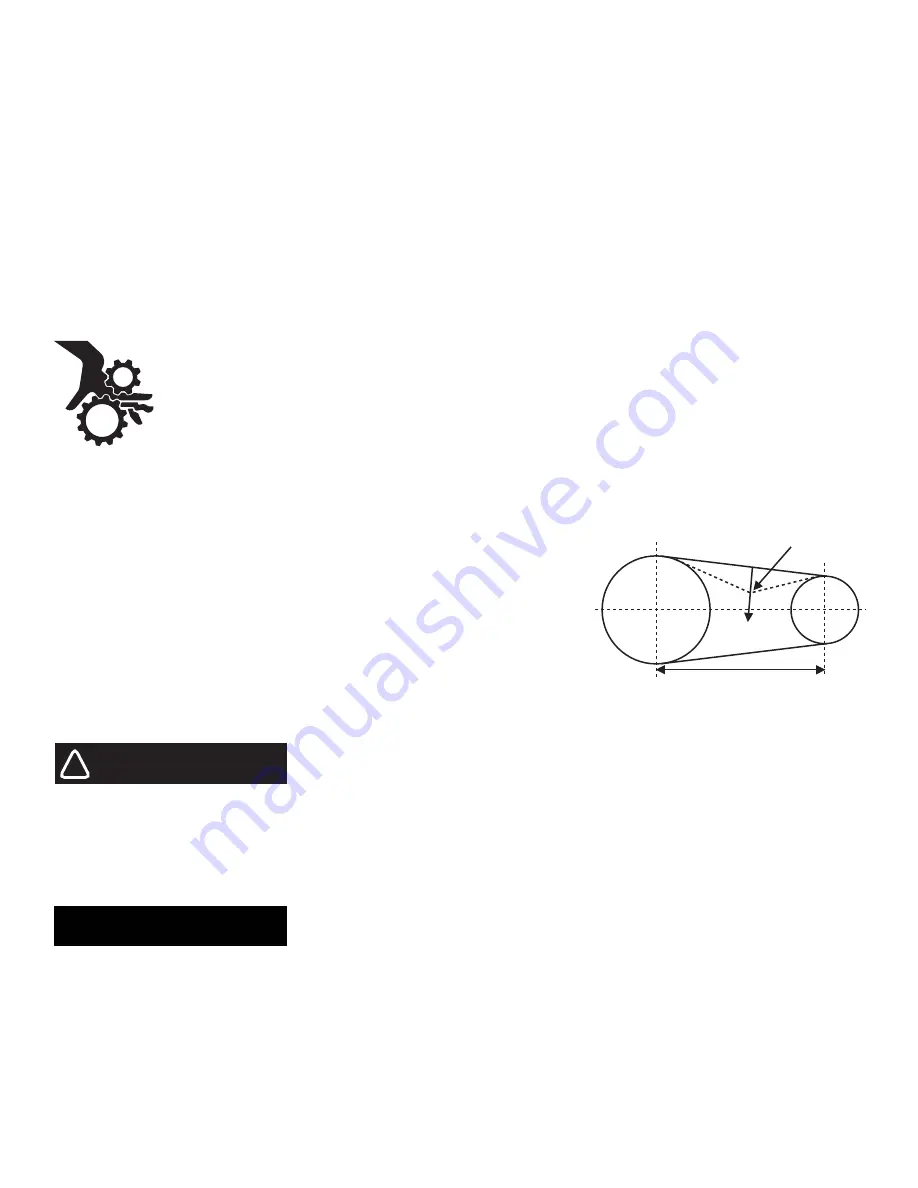
If no belt tension gauge is available, then use this f gure to
roughly approximate the belt drive tension. The amount of forced
to be applied is approximately 8 lbs. Use a ruler to measure
the def ection. This is only a temporary solution and a belt drive
tension gauge should be used as soon as possible.
Drive pulleys must be properly aligned and belt drive tension must
be set to specif cation. Improper pulley alignment and belt tension
can cause motor overloading, excessive vibration and premature
belt and/or bearing failure.
CHECKING FOR AIR LEAKS
Unit must be pressurized while performing this task.
1.)
Start unit and allow it to come up to pressure.
2.)
Apply a solution soapy water around all the joints, f ttings and hose connections.
3.)
Look for air bubbles.
4.)
If air bubbles are found, shut the unit down, bleed off all the air, and allow to cool.
1/64" Deflection for
every inch of span
Direction of Applied
Force
Span Length
!
WARNING
NOTICE
Summary of Contents for Reciprocating Air Compressors
Page 4: ...4 Section 1 Safety and Health Instructions...
Page 14: ...14 Section 2 Introduction and Description...
Page 19: ...19 Section 3 Preparation for Use and Initial Installation Instructions...
Page 24: ...24 Section 4 Operating Instructions...
Page 36: ...36 Section 5 Maintenance Instructions...

