


5
INSTALLATION OPTIONS
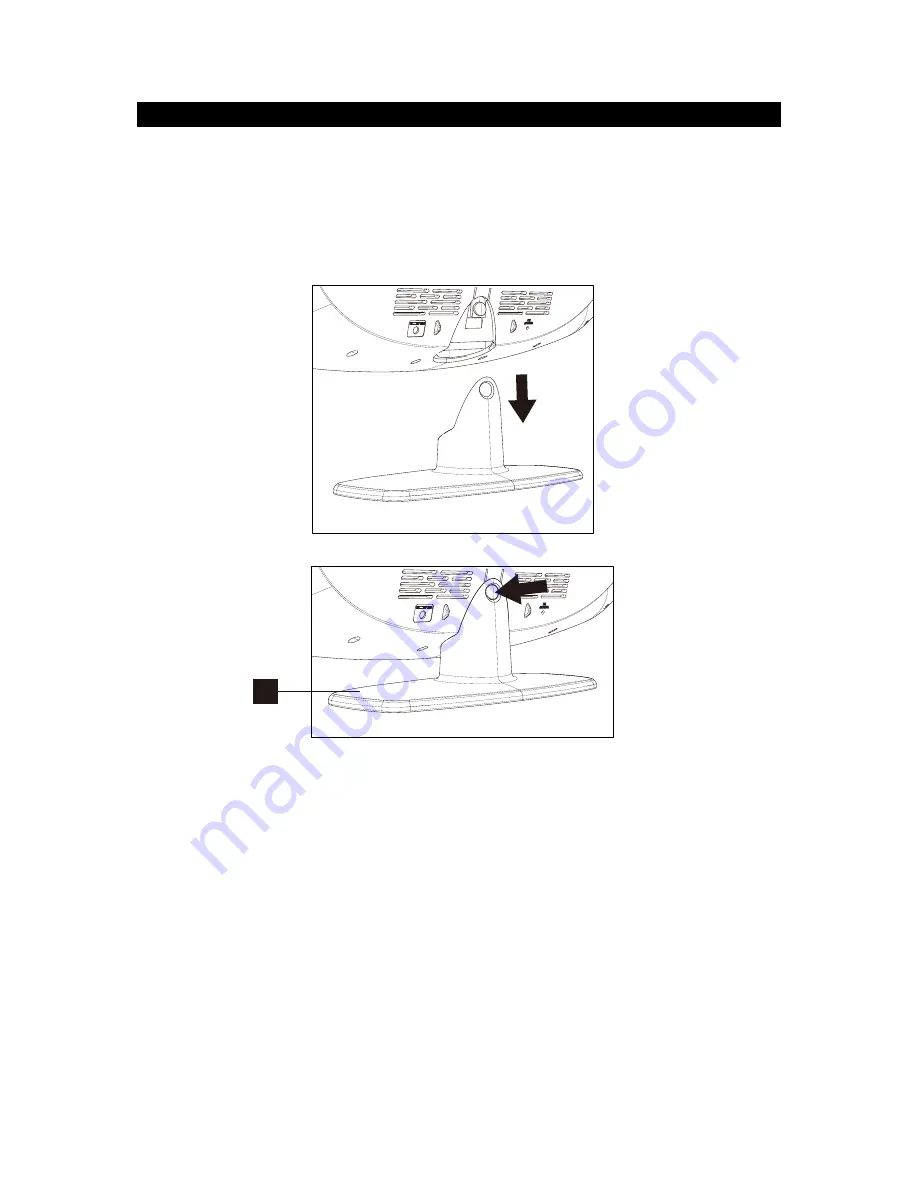
ATTACHING THE STAND
Align the top portion of the stand with the mounting area located on the bottom of the
main unit. Once in place, the round mounting on the stand will align with the circular
mounting tab located on the back of the unit. A “click” sound is heard when the stand
is attached. Check that the base is locked firmly in place and does not come off. To
remove the stand, press on the mounting tab to unlock the stand, and pull down to
remove the stand, see illustration below:
FOR WALL MOUNTING (STAND REMOVED)
It’s important to be sure there are no electric, gas or water lines located behind the
wall where you are attaching the unit. We recommend having this speaker
professionally installed.
Use the included wall mounting accessories and template to
attach the sound bar to the wall.
1. Use the supplied wall mounting instruction sheet to make marks on the wall for
the plastic anchors. Make sure the marks are level before drilling.
2. Drill ¼” holes on the marks.
3. Insert the included plastic anchors into the holes until they are flush with the wall.
4. Attach the 2 included spacer sleeves to the wall using the included screws, and
tighten the screws.
5. When the screws are tightened, the screw heads should be about ¼” away from
the spacer sleeves. Line up the keyhole slots located on the back of the main unit
with screws in the wall, see illustration below:
6


