background image

23

VM9311

XM

®

 RADIO OPERATION

Listeners can subscribe to XM

®


Radio on the Web by 

visiting www.xmradio.com, or by calling (800) 967-2346. 
Customers should have their Radio ID ready (see 
“Displaying the Identification (ID) Code”). Customers can 
receive a limited number of free-to-air channels without 
activation.

Accessing XM

® 

Radio Mode

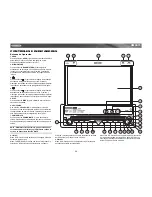
To switch to XM

®


Radio mode, press the 

SRC 

button (15) 

until the XM RADIO control panel appears on the display.

Displaying the Identification (ID) Code

Before you listen to XM

®

 Radio, you must subscribe to the 

service using your radio’s identification number. To display 
the radio ID, press


the 

<

 or 

>

 buttons (8, 9) on the joystick 

repeatedly to tune to channel 000. The screen displays the 8-
character XM radio ID under “CHANNEL NAME”.

Selecting a Station

Press


the 

<

 or 

>

 buttons (8, 9) on the joystick or the 

|<<

 or 

>>|


buttons (17, 19) on remote control to change to another 
station.

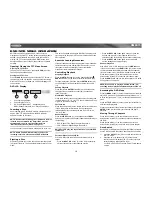
Preset Mode

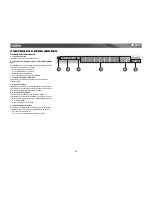
To enter preset mode, press the band button to change to 
XM-1, XM-2, or XM-3 (indicated in the top right corner of the 
TFT screen).

Six numbered preset buttons store and recall stations for 
each band. All six stored stations (XM1-XM6) for the current 
band appear on the TFT screen.

Storing a Station

1.

Select a band (XM-1, XM-2 or XM-3), then select a sta-
tion.

2.

Hold a preset button (1-6) for three seconds. The preset 
station appears in the corresponding preset box on the 
bottom half of the screen.

Recalling a Station

1.

Select a band (XM-1, XM-2 or XM-3).

2.

Press a preset button (1-6) to select the corresponding 
stored station.

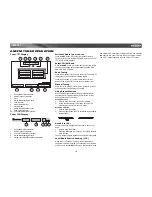
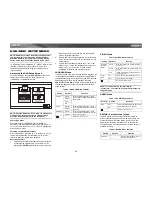
Channel/Category Guide Mode

There are two search modes to help navigate through 
channels and or categories. To access the Channel/Category 
Guide mode press, the 

ZOOM

 button (23) on the remote 

control. 

Channel Guide is the default search mode. To access 
Category Guide, press the 

TITLE

 button (2) on the remote 

control. To return to Channel Guide, press the 

SUBTITLE


button (9) on the remote control.

Channel Guide Mode

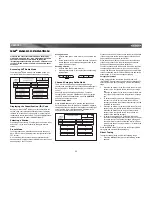
When the 

ZOOM

 button (23) is pressed and the Channel 

Guide is selected, “Search Mode” and “CHANNEL” appear in 
the top half of the user interface. “XM” appears in the top right 
corner and the first six XM channels are displayed in the 
boxes in the bottom half of the TFT screen.

Press the 

>>

 button (14) on the remote control or the 

/\

 button 

(18) on the joystick to view the next page of stations. Each 
page contains six channels to select from.

Press the 

<<

 button (22) on remote control or the

 V

 button 

(19) on the joystick to view the previous page of stations. 
Each page contains six channels to select from.

To select a channel while in Channel Guide mode, press the 
corresponding preset number (1-6) on the unit or remote 
control. The channel will begin playing and the unit will return 
to the Preset Mode. While in Preset Mode, press and hold a 
preset button (1- 6) to store the channel playing. 

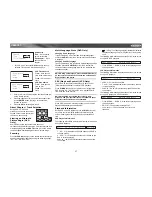
Category Guide Mode

When Category Mode is selected, “Search Mode” and 
“CATEGORY” appear in the top half of the user interface. To 
select a station in a specific category, perform the following 
steps.

1.

Press the 

>>

 button (14) on the remote control or the 

/\


button (18) on the joystick to view the next six catego-
ries.
Press the 

<<

 button (22) on remote control or the 

but-

ton (19) on the joystick to view the previous six catego-
ries.

2.

To select a category, press the corresponding preset 
number (1-6) on the unit or remote control. Once a 
category is selected, the stations in that category will be 
displayed on the screen.

3.

Press the 

>>

 button (14) on the remote control or the 

/\


button (18) on the joystick to view the next six stations.
Press the 

<<

 button (22) on remote control or the 

V


button (19) on the joystick to view the previous six 
stations in the selected category.

4.

To select a channel while in Category Guide mode, 
press the corresponding preset number (1-6) on the unit 
or remote control. The channel will begin playing and 
the unit will return to the Preset Mode. While in Preset 
Mode, press and hold a preset button (1- 6) to store the 
channel playing. 

Press the 

TITLE

 button (2) to return to the Category Mode 

main page and select a different category.

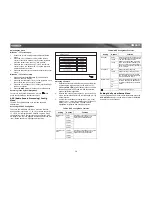
Direct Tuning

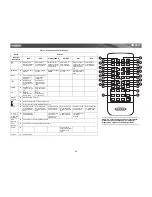
To enter a station directly, perform the following steps.

1.

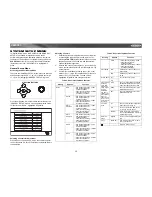
Press the 

GOTO

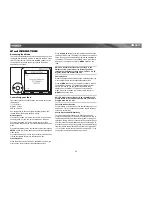
 button (21) until the following screen 

appears.

1

2

3

4

5

6

XM

Summary of Contents for Mobile Multimedia AM/FM/DVD Receiver VM9311

Page 1: ...VM9311 Instruction Manual Manual de Instrucciones Guide d instructions ...

Page 2: ......

Page 3: ...M FM Tuner Operation 15 Tuner TFT Display 15 Tuner LCD Display 15 Switch to Radio Tuner source 15 Select FM AM Band 15 Seek Tuning 15 Manual Tuning 15 Using Preset Stations 15 Auto Store AS 15 Local Radio Station Seeking LOC 15 DVD VCD Video Operation 16 Opening Closing the TFT Video Screen 16 DVD LCD Display 16 Inserting a Disc 16 Ejecting a Disc 16 Reset the Loading Mechanism 16 Controlling Play...

Page 4: ...el Radio 43 Cambio a Fuente de Radio 43 Selección de Banda FM AM 43 Búsqueda de Sintonía 43 Sintonía Manual 43 Utilizando Estaciones Configuradas Previamente 43 Almacenamiento Automático AS 43 Buscador de Estaciones de Radio Local LOC 43 Operación del Video de DVD VCD 44 Abriendo Cerrando la Pantalla de Video TFT 44 Pantalla LCD del DVD 44 Insertar un Disco 44 Eyectar un Disco 44 Reinicie el Mecan...

Page 5: ...er AM FM 71 Affichage tuner TFT 71 Affichage aux cristaux liquides tuner 71 Changer à la source tuner radio 71 Sélectionner la bande AM FM 71 Rechercher la syntonisation 71 Syntonisation à la main 71 Utilisation des stations pré réglées 71 Auto stockage AS 71 Recherche station de radio locale LOC 71 Operation video DVD VCD 72 Ouvrir Fermer l écran vidéo TFT 72 Affichage aux cristaux liquides DVD 7...

Page 6: ...iv ...

Page 7: ...e and fader Bass center frequency adjustment 60 80 100 130 150 and 200Hz Bass Q factor 1 0 1 25 1 5 and 2 0 Treble center frequency adjustment 10 12 5 15 and 17kHz Subwoofer crossover 80 120 and 160Hz Subwoofer Phase 0 180 degrees Subwoofer level variable 100 ohm low impedance preamp outputs all channels 5V Peak 2V RMS RCA outputs all channels 1 pair Front RCA outputs 1 pair Rear RCA outputs Singl...

Page 8: ...ery cable prior to installation NOTE If the VM9311 is to be installed in a car equipped with an on board drive or navigation computer do not disconnect the battery cable If the cable is disconnected the computer memory may be lost Under these conditions use extra caution during installation to avoid causing a short circuit ...

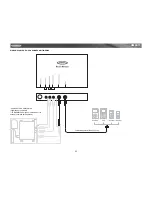
Page 9: ...3 VM9311 WIRING DIAGRAM ...

Page 10: ...4 VM9311 WIRING DIAGRAM MULTIMEDIA CONNECTIONS TERK XMDJEN100 cables sold separately TERK XMD1000 Direct Tuner and antenna sold separately ...

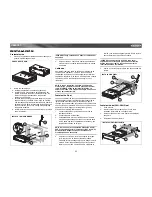
Page 11: ... corrected Once proper operation is achieved turn off the ignition switch and proceed with final mounting of the chassis 1 Connect wiring adaptor to existing wiring harness 2 Connect antenna lead 3 Carefully slide the radio into the half sleeve making sure it is right side up until it is fully seated and the spring clips lock it into place NOTE For proper operation of the CD DVD player the chassis...

Page 12: ...DISP Press the DISP button 5 to display system information on the screen 6 VOL LOC DX Rotate the VOL LOC DX knob 6 to adjust the volume Press and release to enter and or confirm audio settings Press and hold to activate the Local LOC setting 7 POWER MUTE Press the POWER MUTE button 7 once to turn the unit on Press again to mute the volume Press and hold to turn the unit off NOTE The VM9311 feature...

Page 13: ...Press once to play back previous chapter track TUNER Mode Press once to auto search for the previous available radio station MENU Mode Press once to move the cursor to the left 17 DVD Mode Press once to enter the next chapter or track TUNER Mode Press once to auto search the next available radio station MENU Mode Press once to move the cursor to the right 18 DVD Mode Press once for fast forward TU...

Page 14: ...unction is activated 4 Main Display The main display is an 8 digit 14 segment LCD which displays the time tuning frequency and other text information 5 Channel Disc Display The channel disc display is a 2 digit 7 segment LCD display which displays the disc number or radio channel indicators when the corresponding function is active CH radio is activated DISC DVD CD mode is activated 6 Stereo Local...

Page 15: ...de SUBTITLE 9 Language selec tion for subtitle DISP 10 Displays playing information Displays playing information Displays playing information Display playing information Displays playing information Display playing information ANGLE 13 Plays back disc in different angle for a scene Plays back Picture CD with different angle of picture displayed 14 Fast forwards the disc content Fast forwards the d...

Page 16: ...t angle Increases monitor tilt angle Increases monitor tilt angle Increases monitor tilt angle Increases monitor tilt angle Increases monitor tilt angle WIDE 28 For DVD SD card with Video Camera and AUX IN Selects dis play mode CIN EMA NORMAL or OFF Selects display mode CINEMA NORMAL or OFF Selects display mode CINEMA or OFF Selects display mode CINEMA NORMAL or OFF Selects display mode CINEMA or ...

Page 17: ... front TFT monitor will display video only when the parking brake sequence is engaged Before starting the parking brake sequence the radio must be on with the video media disc inserted and playing Parking Brake Sequence There are two situations that can start the Parking Brake Sequence Parking brake is engaged on when the vehicle is started or the accessory ignition is turned on To activate video ...

Page 18: ...e allows you to easily adjust your audio system to meet the acoustical characteristics of your vehicle which vary depending on the type of vehicle and its measurements To get the best possible sound quality from your new system be sure to adjust the settings for the speakers as well Proper setting of the Fader and Balance boosts the effects of the cabin equalizer Accessing the Audio Control Menu P...

Page 19: ...FM Frequency Band 87 5MHz 107 9MHz Europe AM Frequency Spacing 9kHz AM Frequency Band 522kHz 1620kHz FM Frequency Spacing 50kHz FM Frequency Band 87 5MHz 108 0MHz South America 1 AM Frequency Spacing 10kHz AM Frequency Band 530kHz 1720kHz FM Frequency Spacing 100kHz FM Frequency Band 87 5MHz 108 0MHz South America 2 AM Frequency Spacing 5kHz AM Frequency Band 520kHz 1600kHz FM Frequency Spacing 10...

Page 20: ... remote or by pressing the ENTER joystick button 20 on the unit A submenu appears in a second row with the selected option highlighted in light blue 2 Select a new value by pressing the or buttons 14 22 on the remote control or the or V buttons 18 19 on the joystick 3 Confirm your selection by pressing the or buttons 14 17 19 on the remote control or the or button 16 17 on the joystick The new val...

Page 21: ... next station lower Manual Tuning Press the or V buttons 18 19 on the joystick to increase or decrease the tuning frequency one step Using Preset Stations Six numbered preset buttons store and recall stations for each band All six stored stations P1 P6 for the current band appear on the TFT screen Storing a Station 1 Select a band if needed then select a station 2 Hold a preset button 8 13 for thr...

Page 22: ... 4 1 6 or 1 7 the normal speed Press 18 to resume normal play Fast Forward Press the button 14 on the remote control or the button 18 on the joystick to fast forward Keep pressing and releasing the button to increase the rate from 2X to 4X 8X and 20X Repeat Playback Press the 4 REP button 11 on front panel or the REPT button 7 on remote control to alter repeat mode according to the following DVD R...

Page 23: ...hen PBC is activated fast forward slow playback and previous next track are available Repeat and direct track selection are not available When PBC is activated selecting random scan or search playback automatically deactivates PBC Playback Information During DVD and VCD playback press the DISP button 10 on remote control to display playback information on the screen including the media playing and...

Page 24: ...mber of subtitle languages available on the disc maximum of 32 Number of angles provided maximum of 9 Aspect ratios available LB stands for Letter Box and PS stands for Pan Scan In the example on the left the 16 9 video can be converted to Letter Box video Indicates the region code where the disc can be played Region 1 USA Canada East Pacific Ocean Islands Region 2 Japan Western Europe Northern Eu...

Page 25: ...re than 1 Subtitle or Audio language all the languages are available for selection during playback If the selected language is not supported by the DVD then the default language is used During playback press the SUBTITLE 9 or AUDIO 5 button on the remote control to change the language directly This will not effect the DVD menu settings VIDEO Menu NOTE For standard discs not formatted for widescree...

Page 26: ...ailable on the disc the parental lock feature is unavailable Some discs restrict only portions of the disc and the appropriate content will play For details please refer to the disc description Rating 1 Kid Safe Select the appropriate rating level for the intended audience You may override higher ratings by using your password 2 G 3 PG 4 PG 13 5 PG R 6 R 7 NC 17 8 Adult Load Factory Reset Select R...

Page 27: ...y mode you can Press the or button 17 19 on remote control or the or button 16 17 on the joystick to select a track in random order instead of the normal progression Press 5 RDM again to cancel Random Play mode NOTE CD R and CD RW will not play unless the recording session is closed Fast Forward Press the button 14 on the remote control or the button 18 on the joystick to fast forward Keep pressin...

Page 28: ...onitor To exit VIDEO mode press the button 14 on the remote control or MENU button on the iPod NOTE To transmit the video from your iPod to the VM9311 screen you must set the following options through the iPod video settings menu TV Out On TV Signal NTSC and Widescreen On Photo Playback While iPod photos can be viewed on the VM9311 screen you must use the iPod to control photo playback options Pre...

Page 29: ...cted Search Mode and CHANNEL appear in the top half of the user interface XM appears in the top right corner and the first six XM channels are displayed in the boxes in the bottom half of the TFT screen Press the button 14 on the remote control or the button 18 on the joystick to view the next page of stations Each page contains six channels to select from Press the button 22 on remote control or ...

Page 30: ...troubleshooting Parental Control By default this feature is unlocked and all channels can be accessed by anyone listening to the radio To lock a station press the button 22 on the remote control or V button 19 on the joystick until Channel Number is highlighted blue Input the channel number to be locked Press the button on the remote control or button on the joystick and select LOCK Repeat this se...

Page 31: ...ute malfunction MUTE wire is grounded Check that MUTE connection is not grounded and that it s properly insulated Unit resets itself when engine is off Incorrect connection between ACC and positive battery wire Check wiring and correct TFT MONITOR Monitor does not open automatically TFT Auto Open is turned off Turn TFT Auto Open on No image Incorrect connection to parking brake wire Check wiring a...

Page 32: ...an LCD can display XM RADIO No Sound Incorrect cable connections Check RCA cables XM source not available Incorrect cable connections Check XM Data cable or Media Module Cable ANTENNA appears on XM main screen Antenna not connected Check satellite antenna connection All other Errors Reset Media Module IPOD iPod source not available Incorrect cable connections Check jLink and Media Module cables Ca...

Page 33: ... this unit either with or without an adaptor as damage to the player and or disc may occur Such damage is not covered by the Warranty on this product 6 The CD player may not operate properly in extreme hot or cold If such conditions occur allow the interior of the vehicle to reach a normal temperature before using player 7 When the vehicle warms up during cold weather or under damp conditions cond...

Page 34: ...ve in material or workmanship within 12 months from the date of original purchase such defect s will be repaired or replaced with new or reconditioned product at the Company s option without charge for parts and repair labor To obtain repair or replacement within the terms of this Warranty please contact Jensen at the telephone number provided below This Warranty does not extend to the elimination...

Page 35: ...distancia infrarrojo de la función completa 1 NTSC salida de vídeo compuesto para las pantallas adicionales OSD En control de menú de la pantalla Procesador del audio del alto rendimiento Volumen bajo triple equilibrio y atenuador electrónicos Ajuste bajo de la frecuencia de centro 60 80 100 130 150 y 200Hz Factor de Bajo Q 1 0 1 25 1 5 y 2 0 Ajuste triple de la frecuencia de centro 10 12 5 15 y 1...

Page 36: ...a salida estéreo RCA para una fácil conexión a las entradas auxiliares de radios Desconexión de la Batería Para prevenir un cortocircuito asegúrese de apagar la ignición y quitar el cable negativo de la batería antes de la instalación NOTA Si el VM9311 se instala en un automóvil equipado con una unidad a bordo o una computadora de navegación no desconecte el cable de la batería Si el cable se desc...

Page 37: ...31 VM9311 DIGRAMA CABLEADO ...

Page 38: ...32 VM9311 DIGRAMA CABLEADO CONEXIONES MULTIMEDIAS Cables de TERK XMDJEN100 vendidos por separado TERK XMD1000 dirigen el sintonizador y la antena vendidos por separado ...

Page 39: ...iones de cables hasta que se solucione el problema Una vez que se alcanza una operación correcta apague el interruptor de ignición y proceda con el montaje final del chasis 1 Conecte el adaptador del cableado a un arnés de cableado existente 2 Conecte la punta de la antena 3 Cuidadosamente deslice el radio dentro de la media manga asegurándose que el lado correcto esté hacia arriba hasta que esté ...

Page 40: ...stema en la pantalla 6 VOL LOC DX Gire el botón VOL LOC DX 6 para ajustar el volumen Presione y suelte este botón para ingresar y o confirmar las configuraciones de audio Presione y mantenga presionado este botón para activar la configuración Local LOC 7 POWER MUTE Presione el botón POWER MUTE 7 para encender la unidad Presiónelo nuevamente para enmudecer el volumen Presione y mantenga presionado ...

Page 41: ...reproducción 6 Modo DVD Presione una vez para reproducir el capítulo pista previo Modo TUNER Presione una vez para buscar automáticamente una estación de radio previa disponible Modo MENU Presione una vez para mover el curso a la izquierda 17 Modo DVD Presione una vez para ingresar al capítulo o pista siguiente Modo TUNER Presione una vez para buscar automáticamente una estación de radio siguiente...

Page 42: ...a la función LOUD 4 Pantalla Principal La pantalla principal es un LCD Pantalla de Cristal Líquido de 8 dígitos y 14 segmentos que muestra la hora frecuencia en sintonía y alguna otra información de texto 5 Pantalla de Canal Disco La pantalla de canal disco es un LCD de 2 dígitos y 7 segmentos que muestra los indicadores de número de disco o canal de radio cuando la función correspondiente se acti...

Page 43: ...sub título DISP 10 Muestra información sobre la reproducción ANGLE 13 Reproduce el disco en un difer ente ángulo para una escena Reproduce el disco en un difer ente ángulo para una escena 14 Adelante el con tenido del disco Adelante el con tenido del disco Adelante el con tenido del disco Adelante el con tenido del disco Tiene acceso al menú del iPod VOL 15 Baja el volumen VOL 16 Sube el volumen 1...

Page 44: ...erra el monitor TFT 26 Reduce el ángulo de inclinación del monitor 27 Incrementa el ángulo de inclinación del monitor WIDE 28 Selecciona modo de reproducción Cinema Normal o OFF Selecciona modo de reproducción Cinema Normal o OFF Selecciona modo de reproducción Cinema o OFF Selecciona modo de reproducción Cinema Normal o OFF Selecciona modo de reproducción Cinema o OFF Selecciona modo de reproducc...

Page 45: ...lamente cuando se contrata la secuencia del freno de mano Antes de comenzar la secuencia del freno de mano la radio debe estar encendido con el disco video de los medios insertado y jugar Secuencia fel Freno de Mano Hay dos situaciones que pueden comenzar la secuencia del freno de mano Se contrata el freno de estacionamiento encendido cuando se enciende el vehículo o se gira el accesorio la ignici...

Page 46: ...ible de su nuevo sistema asegúrese de ajustar la configuración de sus altavoces también Una configuración adecuada de balances izquierdo derecho y delantero trasero potencia los efectos del ecualizador de la cabina Accediendo al Menú de Control de Audio Presione el botón VOL LOC DX 6 en el panel delantero una vez para mostrar el menú AUDIO Seleccionando una Función de Audio para Ajustar Presione c...

Page 47: ...pacing 200kHz FM Frequency Band 87 5MHz 107 9MHz Europe AM Frequency Spacing 9kHz AM Frequency Band 522kHz 1620kHz FM Frequency Spacing 50kHz FM Frequency Band 87 5MHz 108 0MHz South America 1 AM Frequency Spacing 10kHz AM Frequency Band 530kHz 1720kHz FM Frequency Spacing 100kHz FM Frequency Band 87 5MHz 108 0MHz South America 2 AM Frequency Spacing 5kHz AM Frequency Band 520kHz 1600kHz FM Freque...

Page 48: ...a opción seleccionada remarcada en celeste 2 Seleccione un nuevo valor presionando los botones o 14 22 3 Confirme su selección presionando los botones o 14 17 19 en el control remoto o los botones o 16 17 en el joystick El nuevo valor se remarca en celeste y la configuración se completa Saliendo del Menú de Configuración de Sistema Para salir del modo de configuración y reasumir una reproducción n...

Page 49: ...ja Sintonía Manual Presione los botones o 14 22 en el control remoto o los botones o V 18 19 en el joystick para incrementar o bajar la frecuencia de sintonía un paso a la vez Utilizando Estaciones Configuradas Previamente Seis botones numerados almacenan y sintonizan estaciones preseleccionadas por cada banda Todas las seis estaciones almacenadas en cada banda P1 a P6 aparecen en la pantalla TFT ...

Page 50: ...ar o reasumir la reproducción del disco Para reasumir aparato de lectura presione botón ENTER 20 en el panel delantero o el botón en el mando a distancia 18 Ejecución en Cámara Lenta Presione el botón V 19 en el control remoto para jugar el título actual en cámara lenta a 1 6 o 1 7 de la velocidad normal Presione 18 para reanudar la reproducción normal Avance Rápido Retroceso Rápido Presione el bo...

Page 51: ...anal Izquierdo Canal Derecho y Estéreo PBC Control de Reproducción VCD Solamente Para VCDs con funcionalidad de reproducción PBC control de reproducción provee controles adicionales para la reproducción de un VCD Presione le botón MENÚ 1 en el control remoto para alternar la función PBC entre encendido o apagado On Off Una vez que el PBC esté encendido la reproducción comienza de la pista uno de l...

Page 52: ...ro de len guajes en el disco máximo de 8 Número de lenguajes en subtítulo disponibles en el disco máximo de 32 Número de ángulos provistos máximo de 9 Proporción de imagen disponible LB significa Letter Box Buzón y PS significa Pan Scan paneo escaneo En el ejemplo en la izquierda el video 16 9 se puede convertir a video Letter Box Front DVD CD EQ Flat Loud Level 1 Indica el código de área donde el...

Page 53: ...ón se completa Menú LANGUAGE Lenguaje Si un DVD soporta más de 1 Subtítulo o lenguaje en el Audio todos los lenguajes están disponibles para ser seleccionados durante la reproducción Si el DVD no soporta el lenguaje seleccionado entonces se utiliza el lenguaje predeterminado Durante la reproducción presione el botón SUBTITLE 9 o AUDIO 5 en el control remoto para cambiar el lenguaje directamente Es...

Page 54: ...del disco y el contenido apropiado se verá Para detalles por favor refiérase a la descripción del disco Tabla 12 Funciones del Menú RATING Configuració n Opciones Función Contraseña _ _ _ _ Ingrese una contraseña de 4 dígi tos para activar la función de Rating clasificación Rating clasifi cación 1 Seguridad de Niños Seleccione el nivel de clasifi cación adecuado para la audien cia a la que se diri...

Page 55: ...anca de mando para seleccionar una pista en orden al azar en vez de la progresión normal Presione los 5 RDM otra vez para cancelar modo al azar del juego NOTA El CD R y CD RW no funcionarán a menos que la sesión de grabación se cierre Avance Rápido Presione el botón 14 en el control remoto o el botón 18 en el joystick para avance rápido Mantenga presionando y soltando el botón para incrementar la ...

Page 56: ...otón 14 en el mando a distancia o el botón del MENÚ en el iPod NOTA Para transmitir el vídeo de su iPod a la pantalla VM9311 usted debe fijar las opciones siguientes a través del menú video de los ajustes del iPod TV Out On TV Signal NTSC y Widescreen On Lectura de Foto Mientras que el vídeo del iPod se puede ver en la pantalla VM9311 usted debe utilizar el iPod para controlar las opciones foto de...

Page 57: ...el modo de la guía de Canal Categoría el botón del ZOOM 23 en el mando a distancia La guía del canal es el modo de la búsqueda del defecto Para tener acceso a la guía de la categoría presione el botón del TITLE 2 en el mando a distancia Para volver a la guía del canal presione el botón del SUBTITLE 9 en el mando a distancia Modo de la Guía del Canal Cuando se presiona el botón del ZOOM 23 y se sel...

Page 58: ...moto o el botón ENTER 20 en el joystick XM Menú Setup Mientras que en XM el modo de radio presione el botón del MENÚ 1 en el mando a distancia para visión el XM menú setup Presione el MENÚ para salir del submenu o del menú actual y para volver a la pantalla anterior Modo de Diagnóstico Esta característica es reservada para el uso de los profesionales del servicio para localizar averías Control Par...

Page 59: ...que que la conexión MUTE no esté a tierra y que esté apropiadamente aislada La unidad se reinicia sola cuando el motor está apagado Conexión incorrecta entre el ACC y el cable de batería positivo Verifique el cableado y corríjalo MONITOR TFT El Monitor no se abre automáticamente La apertura automática Auto Open del TFT está apa gada Encienda TFT Auto Open No hay imagen Conexión incorrecta al cable...

Page 60: ...o Conexiones de cable incorrectas Verifique las conexiones de cable de RCA XM fuente no disponible Conexiones de cable incorrectas Verifique las conexiones de cable de XM cable del cable de los datos o del módulo de los medios ANTENNA aparece en XM la pantalla de la cañería Antena no conectada Verifique la conexión basada en los satélites de la antena El resto de los errores Reajuste el Módulo de ...

Page 61: ...daños en el equipo y o en el disco Tales daños no están cubiertos por la garantía de este producto 6 El reproductor de CD puede no operar apropiadamente en calor o frío extremos Si tales condiciones se dan espere hasta que el interior del vehículo alcance una temperatura normal antes de utilizar el reproductor 7 Cuando el vehículo se calienta durante clima frío o bajo condiciones de humedad puede ...

Page 62: ...cho s defecto s serán reparados o reemplazados a criterio de la Compañía sin cargo alguno por las piezas y la mano de obra para la reparación Para obtener servicios de reparación o sustitución en virtud de los términos y las condiciones de la presente Garantía entre en contacto con por favor Jensen en el número de teléfono proporcionado abajo Esta Garantía no cubre la eliminación de la estática de...

Page 63: ...températures nominales Châssis galvanisé à haute résistance Général Télécommande pleine fonction à infra rouge Sortie vidéo composite 1 NSTC pour des écrans supplémentaires Contrôle menu pour affichage sur écran OSD Processeur audio à haute performance Volume basse aigu balance et équilibreur électroniques Ajustement de fréquence centre de basse 60 80 100 130 150 et 200 Hz Facteur Q de basse 1 0 1...

Page 64: ...ngin média portatif ou un engin multi média en utilisant une prise standardisée de 3 5mm Convertir l entrée auxiliaire 3 5mm à des sorties stéréos RCA pour un branchement facile aux entrées auxiliaires de radios Débranchez la pile Pour prévenir un court circuit assurez vous que le commutateur d allumage est mis en arrêt et enlevez la câble pile négative avant l installation A NOTER Si le VM9311 es...

Page 65: ...59 VM9311 DIAGRAMME DE CÂBLAGE ...

Page 66: ...60 VM9311 WIRING DIAGRAM MULTIMEDIA CONNECTIONS Câbles TERK XMD JEN 100 vendu séparément Tuner Direct et antenne TERK XMD 1000 vendu séparément ...

Page 67: ...Lorsque l opération est atteinte mettez le commutateur d allumage en arrêt et procéder à l installation finale du châssis 1 Branchez l adaptateur de câblage au harnais de câblage existant 2 Branchez le fil d antenne 3 Glissez la radio avec soin dans le demi manchon en vous assurant qu il est bien aligné sur le bon côté jusqu à ce qu il soit bien assis et les agrafes élastiques la mettent fermement...

Page 68: ...ge 5 DISP Appuyez sur le bouton DISP 5 pour afficher l information du système sur l écran 6 VOL LOC DX Tourner le bouton VOL LOC DX 6 pour ajuster le volume Appuyez et relâcher pour entrer et ou confirmer les réglages d audio 7 POWER MUTE Appuyez sur le bouton POWER MUTE 7 une fois pour mettre l appareil en marche Appuyez de nouveau pour assourdir le volume Appuyez et maintenez l appui pour mettre...

Page 69: ...a piste précédente Mode Tuner Appuyez une fois pour lancer la recherche automatique pour la station de radio disponible précédente Mode Menu Appuyez une fois pour déplacer le curseur à gauche 17 Mode DVD Appuyez une fois pour entrer le chapitre ou la piste prochaines Mode Tuner Appuyez une fois pour lancer la recherche automatique pour la station de radio disponible prochaine Mode Menu Appuyez une...

Page 70: ...principal L affichage principal est un affichage aux cristaux liquides à 8 chiffre et 14 segments qui affiche le temps la fréquence de syntonisation et d autres informations textuelles 5 Affichage chaîne disque L affichage chaîne disque est un affichage aux cristaux liquides à 2 chiffres et 7 segments qui affiche les indicateurs du numéro du disque et de la chaîne de radio lorsque la fonction corr...

Page 71: ...ion ANGLE 13 Reproduit le disque d un angle différent pour une scène Reproduit l image CD avec l image affiché d un angle différent 14 Avance rapide du contenu du disque Avance rapide du contenu du disque Avance rapide du contenu du disque Avance rapide du contenu du disque Accède au menu iPod VOL 15 Rabaisse le volume VOL 16 Augmente le volume 17 Sélectionne le chapitre précé dent pour repro duct...

Page 72: ...ramètres de configuration OPEN CLOSE 25 Ouvre Ferme le moniteur TFT 26 Rabaisse l angle de l inclination du moniteur 27 Augmente l angle de l inclination du moniteur WIDE 28 Sélectionne la mode d affichage CINEMA NOR MAL ou OFF Sélectionne la mode d affichage CINEMA NOR MAL ou OFF Sélectionne la mode d affichage CINEMA ou OFF Sélectionne la mode d affichage CINEMA NOR MAL ou OFF Sélectionne la mod...

Page 73: ...ue le fil Parking rose est branché à l interrupteur des freins du véhicule le moniteur TFT d avant n affichera du vidéo que lorsque la séquence des freins de parking est engagée Avant de commencer la séquence des freins de parking la radio doit être en marche avec un disque de média vidéo inséré et en jeu Séquence des freins de parking Il y a deux situations qui peuvent démarrer la séquence des fr...

Page 74: ...n contrôle d audio vous permet d ajuster facilement votre système audio pour satisfaire aux caractéristiques acoustiques de votre véhicule qui dépend du type de véhicule et ses dimensions Pour obtenir la meilleure qualité de son de votre système soyez sûrs d ajuster les réglages pour les haut parleurs aussi Le bon réglage de l équilibreur et la balance augmente les effets de l égaliseur de cabine ...

Page 75: ...Hz 107 9MHz Europe AM Frequency Spacing 9kHz AM Frequency Band 522kHz 1620kHz FM Frequency Spacing 50kHz FM Frequency Band 87 5MHz 108 0MHz South America 1 AM Frequency Spacing 10kHz AM Frequency Band 530kHz 1720kHz FM Frequency Spacing 100kHz FM Frequency Band 87 5MHz 108 0MHz South America 2 AM Frequency Spacing 5kHz AM Frequency Band 520kHz 1600kHz FM Frequency Spacing 100kHz FM Frequency Band ...

Page 76: ... sur l appareil Un sous menu apparaît dans le deuxième rang avec l option sélectionnée surlignée en bleu 2 Sélectionnez une nouvelle valeur en appuyant sur les boutons ou buttons 22 14 sur la télécommande ou les boutons ou V 18 19 sur la manette 3 Confirmez votre sélection en appuyant sur les boutons ou 22 17 19 sur la télécommande ou les boutons ou 16 17 sur la manette La nouvelle valeur est surl...

Page 77: ... manette pour augmenter ou diminuer la fréquence de syntonisation par une étape Utilisation des stations pré réglées Six boutons de pré réglage numérotés stockent et rappellent des stations pour chaque bande Toutes les six stations stockées P1 P6 pour la bande courante apparaissent sur l écran TFT Stockage d une station 1 Sélectionnez une bande si nécessaire et puis sélec tionnez une station 2 Mai...

Page 78: ... reprendre la reproduction appuyez sur le bouton manette ENTER 20 sur la télécommande 18 Faire pause pendant la reproduction Appuyez sur le bouton manette ENTER sur le panneau d avant 20 ou sur le bouton sur la télécommande 18 pour suspendre ou reprendre la reproduction du disque La reproduction en ralenti Appuyez sur le bouton V 19 pour jouer le titre courant en ralenti à 1 6 ou 1 7 la vitesse no...

Page 79: ...OTER Pendant la reproduction VCD appuyez sur le bouton AUDIO 5 sur la télécommande pour choisir entre Chaîne Gauche Chaîne Droite et Stéréo PBC Contrôle de la reproduction Seulement VCD Pour des VCDs avec la fonctionnalité de reproduction le contrôle de la reproduction PBC fournit des contrôles supplémentaires pour la reproduction VCD Appuyez sur le bouton MENU 1 sur la télécommande pour basculer ...

Page 80: ...s voix enregistré Le numéro à l intérieur de l icône Indique le nombre de langues sur le disque un maximum de 8 Le nombre de langues de sous tirage disponible sur le disque maximum 32 Le nombre d angles fourni maximum de 9 Rapport largeur longueur disponible LB veut dire Boîte de Lettres et PS veut dire Panoramique Bal ayage Dans l exemple à gauche le vidéo 16 9 est converti en vidéo Boîte à Lettr...

Page 81: ...gue audio ou de soustitrage toutes les langues sont disponibles pour sélections pendant la reproduction Si la langue sélectionnée n est pas soutenue par le DVD alors la langue par défaut est utilisée Pendant la reproduction appuyez sur le bouton SUBTITLE 9 ou AUDIO 5 sur la télécommande pour changer la langue directement Cela n aura aucun effet sur les réglages de menu DVD Fonction menu video A NO...

Page 82: ...disque la fonction verrouille parentale n est pas disponible non plus Certains disque ne restreignent que des sections du disque et le contenu approprié va jouer Pour des détails référez vous à la description du disque Rating classement 1 Kid Safe Sélectionnez le niveau de classe ment approprié pour le public en question Vous pouvez dépasser des classements supérieurs en util isant votre mot de pa...

Page 83: ...ur la manette pour sélectionner une piste dans l ordre mélangé au lieu de la progression normale Appuyez de nouveau sur le bouton 5 RDM pour annuler la mode de Reproduction au Hasard A NOTER CD R et CD RW ne joueront que si la séance d enregistrement est fermée Avance rapide Appuyez sur le bouton 14 sur la télécommande ou le bouton 18 sur la manette pour faire avance rapide Continuez à appuyer et ...

Page 84: ...puyez sur le bouton 14 sur la télécommande ou le bouton de MENU sur l iPod A NOTER Pour transmettre du vidéo depuis votre iPod à l écran du VM9311 vous devez regler les options suivantes à travers le menu réglages vidéo iPod TV Out en marche TV Signal NTSC et Widescreen En marche Reproduction de photos Alors que les photos iPod peuvent être vu sur l écran du VM9311 vous devez utilisez le iPod pour...

Page 85: ...Category le bouton de ZOOM 23 sur la télécommande Le guide de la Manche est le mode de recherche de défaut Pour accéder au guide de catégorie appuyez sur le bouton de TITLE 2 sur la télécommande Pour retourner au guide de la Manche appuyez sur le bouton de SUBTITLE 9 sur la télécommande Mode de Guide Chaîne Quand le bouton de ZOOM 23 est appuyé sur et le guide de la Manche est choisi le Search Mod...

Page 86: ...adio XM appuyez sur le bouton MENU 1 sur la télécommande pour voir le Menu Configuration XM Appuyez sur Menu pour sortir du menu ou du sous menu courant et retourner à l écran précédent Mode Diagnostique Cette fonction est réservée à l usage des professionnels de service pour dépannage Control Parental Par défaut ce dispositif est ouvert et tous les canaux peuvent être consultés par n importe qui ...

Page 87: ...ement Le fil Mute es terré Vérifez que le branchement MUTE de Tel Mute n est pas terré et qu il est bien isolé L appareil se réinitialise Branchement incorrect Vérifiez le câblage et corrigez Lorsque le moteur est coupé entre ACC et positif Moniteur TFT Moniteur ne s ouvre Ouverture automatique TFT Mettez ouverture automatique TFT en marche Pas d image Branchement incorrecte Vérifiez câblage et co...

Page 88: ...e Le message est plus grand que l affichage aux cristaux liq uides RADIO XM Acoustique non disponible Jonctions de câble incorrectes Vérifiez les jonctions de câble de RCA Source XM non disponible Jonctions de câble incorrectes Vérifiez les jonctions de câble de câble des données XM et de Media Module ANTENNA apparaît sur XM l écran primaire Antenne non reliée Vérifiez les raccordements satellites...

Page 89: ...sque De tels dégâts ne sont pas couvert par le garanti sur ce produit 6 La platine CD peut ne pas opérer dans des froids ou des chaleurs extrêmes Si de telles conditions arrivent permettez à la température à l intérieur du véhicule de redevenir normal avant de remettre la platine CD en marche 7 Lorsque le véhicule se réchauffe quand il fait froid ou humide de la condensation peut apparaître sur le...

Page 90: ...les 12 mois suivant la date d achat initial ce s défaut s sera seront réparé s ou remplacé s par un produit neuf ou reconditionné au choix de la Société sans frais de pièces ni de main d oeuvre Si ce produit doit être réparé ou remplacé durant la période de la Garantie entrez en contact avec svp Jensen au numéro de téléphone fourni ci dessous Cette Garantie ne couvre pas l élemination des parasite...

Reviews: