background image

MSR2107

6

System Menu

1.

Press and hold

 the 

AUDIO

 button (3) for more than 3 seconds to enter the system menu. 

“MENU” will appear on the display, followed by the first menu item, “CONTRAST.”

2.

Press the 

TUNE/TRK >>|

 or 

|<<

 button (19, 18) or press the 

AUDIO

 button repeatedly to 

navigate the system menu and select the desired item.

3.

Press the 

VOLUME


+/-

 buttons (2) to adjust the selected menu item.

4.

Press the 

AS/PS

 button to return to the previous operation immediately or wait for 5 

seconds to return automatically.

The following items can be adjusted:

CONTRAST (0 – 10): Set LCD contrast.  

LOW BATT (ON/OFF): Monitor voltage on ACC line.  

AREA (USA/LATIN/EUROPE/OIRT): Set frequency spacing for various regions. 

VOL PGM (0 – 46): Select an automatic turn-on volume. 

BEEP TONE (ON/OFF): Turn the audible beep ON/OFF (heard when functions/buttons 
are selected).  

NOTE: Beep tone off will not affect LOW BATT audible tone

.

RESUME: Return the EEPROM to factory default set up values and reset the Sirius Tuner 
Settings. "Yes" will blink on the LCD to confirm. Press 

MODE

 to select.

LOW BATTERY Operation

If LOW BATT is set to “ON”, a alarm will sound (8 beeps every 30 sec) when the voltage drops 
to 10.8V (+/- 0.03V). A visual warning (LOBA) will appear flashing (8 flashes every 30 sec) in 
the lower left corner of the LCD display.

NOTE: “OFF” is the default setting for LOW BATT. If the audio is muted or the volume is 

set to 0, the audible beep will not be heard. 

Equalizer

Press the 

EQ

 button (11) to turn on the equalization function and select between five pre-

defined bass and treble curves: OFF > POP > JAZZ > CLASSIC > BEAT > ROCK.

iX-Bass

Press and hold

 the 

EQ/IX-BASS

 button (11) toggle loudness on/off. When listening to music at 

low volumes, this feature will boost the bass range to compensate for the characteristics of 
human hearing. 

Auxiliary Input

To access an auxiliary device: 
1.

Connect the portable audio player to the AUX IN cables on the back of the tuner box.

2.

Press the 

MODE

 button (4) to select Aux In mode.

3.

Press 

MODE

 again to cancel Aux In mode and go to the next mode.

Liquid Crystal Display (LCD)

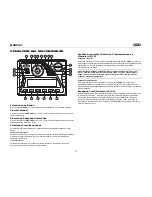
The current frequency and activated functions are shown on the LCD panel (23).

NOTE: LCD panels may take longer to respond when subjected to cold temperatures for 

an extended period of time. In addition, the visibility of the numbers on the LCD may 

decrease slightly. The LCD display will return to normal when the temperature increases 

to a normal range.

Scroll 

When the information is too long to be displayed on the LCD, 

press and hold

 the 

INFO/

SCROLL

 button (12) to view the entire title. The information will scroll twice and then return to 

abbreviated text.

Quick Exit Hot Key

In the following modes and conditions, press the 

AS/PS

 button < 3 seconds to quickly exit the 

current operation without waiting for the system default time out: 

System menu operation

Searching mode

Audio menu operation

Summary of Contents for MSR2107

Page 1: ...MSR2107 Installation and Operation Manual MARINE AUDIO SYSTEM AUDIO INFO MSR2107 50W x 4 SEARCH ERASE Manual del Usuario Guide d Utilisateur ...

Page 2: ...talación 16 Cableado 18 Operación Básica 19 Operación del Sintonizador 21 Operación de Radio Sirius 22 Operación del iPod 23 Operación de USB o Flash MP3 WMA 24 Cuidado y Mantenimiento 27 Solución de Problemas 27 Especificaciones 28 TABLE DES MATIÈRES Informations sur la securite 29 Installation 30 Câblage 32 Operation de base 33 Operation tuner 35 Operation radio Sirius 36 Operation iPod 37 Opera...

Page 3: ...N LOCATIONS THAT MIGHT HINDER VEHICLE OPERATION Doing so may obstruct vision or hamper movement which can result in a serious accident INSTALL THE WIRING SO THAT IT IS NOT CRIMPED OR PINCHED BY SCREWS OR SHARP METAL EDGES Route the cables away from moving parts or sharp pointed edges This will prevent crimping and damage to the wiring If the wiring must pass through a metal hole be sure to use a r...

Page 4: ...nterfere with driving and cannot injure passengers if there is a sudden or emergency stop Avoid installing the unit where it will be subject to high temperatures from direct sunlight hot air or from a heater or where it would be subject to excessive dust dirt or vibration Wired Commander Mounting 1 Choose a mounting area for the wired commander that is clean and flat allowing the rear gasket to fu...

Page 5: ...amplifier harness and cable throughout the vessel as required Keep some slack in the harness cables so it won t be too tight as this can cause damage to the wires 5 Follow the wiring diagram carefully and make certain all connections are secure and insulated with crimp connectors or electrical tape to ensure proper operation 6 After completing the wiring connections reconnect the negative terminal...

Page 6: ...MSR2107 4 WIRING WIRED COMMANDER TUNER AMP MODULE EXTENSION CABLE AUX AUDIO INPUTS ATTENTION Compatible with SCC1 MML and SCVDOC1 M only LOW LEVEL AUDIO OUTPUTS B B ...

Page 7: ...not operate error symbol on the display Use a ball point pin or thin metal object to press the RESET button located on the tuner box You can recover factory default settings using the RESUME function located on the system menu With YES flashing press the MODE button 4 to activate Audio Menu Press the AUDIO button 3 on the control panel to access the audio menu You can navigate through the audio me...

Page 8: ...the audio is muted or the volume is set to 0 the audible beep will not be heard Equalizer Press the EQ button 11 to turn on the equalization function and select between five pre defined bass and treble curves OFF POP JAZZ CLASSIC BEAT ROCK iX Bass Press and hold the EQ IX BASS button 11 toggle loudness on off When listening to music at low volumes this feature will boost the bass range to compensa...

Page 9: ...stations and store them in the current band The new stations replace any stations already stored in that band NOTE During Auto Store AS the tuner will default to Local mode while scanning the band initially After scanning the entire band once the unit will switch to Distant mode for all subsequent Auto Store tuning Preset Scan Select a band if needed Press AS PS 15 to scan stations stored in the c...

Page 10: ...s MODE to confirm channel selection Channel Up Down Tuning Press the TUNE TRK buttons 18 19 to search for a channel Press and hold the TUNE TRK buttons to fast search Storing Preset Channels The preset buttons 5 10 can be used to store 6 channels allowing convenient access to your favorite channels Programming Channels 1 Select the channel you want to store in memory 2 Press and hold a preset butt...

Page 11: ...k press the 1 button 8 to pause the iPod player Pause will appear on the LCD Press 1 again to resume playback Repeat Play During playback press the 3 RPT button 5 to repeat the current song Repeat will appear on the LCD Press 3 RPT again to stop repeat playback Random Play During playback press the 4 RDM button 7 to play all songs in the current category in random order Random play will begin once...

Page 12: ... Read Error for 3 seconds and then switch to the previous mode Controlling Playback This unit can play MP3 WMA files stored in the internal Flash Memory or on a USB Memory device File Folder Intro Play Press and hold the 2 INT button 6 for more than 3 seconds while playing MP3 WMA files to intro play all files in the current folder Press the 2 INT button 6 to intro play all files Press the 2 INT b...

Page 13: ...ton 4 to begin folder copy NOTE Press the COPY button a 3rd time to return to current playing status COPY ALL Entire Device To copy all files on a USB device to internal FLASH memory perform the following steps 1 During MP3 WMA music file playing status press and hold the COPY button 20 to access COPY ALL mode 2 Press the MODE SEL button 4 to begin the COPY ALL function NOTE Do not remove the USB ...

Page 14: ...utton to select between FREE USB and FREE Flash and then press the MODE SEL button 4 to see the amount of free USB memory FLASH Memory During FLASH mode playing status press the AUDIO MENU button 3 and select the ROM option press VOLUME button to select FREE USB and FREE Flash and then press the MODE SEL button 4 to see the amount of free FLASH memory ...

Page 15: ... vessels employ this wire and resistor but it may be necessary to check them for correct operation Another method of suppression is the use of additional noise suppressors These can be obtained from most CB A radio or electronic supply shops Interference Radio reception in a moving environment is very different from reception in a stationary environment home It is very important to understand the ...

Page 16: ...equency Range USA 530 1710 kHz Frequency Range Europe 522 1620 kHz Sensitivity S N 20dB 36 dB General Operating Voltage DC 12 Volts Grounding System Negative Ground Speaker Impedance 4 8 ohms per channel Tone Controls Bass at 100 Hz 10 dB Treble at 10 kHz 10 dB Power Output 50W x 4 Current Drain 15 Ampere max Commander Dimensions 5 15 W x 1 2 D x 3 7 H Tuner Amp Dimensions 8 35 W x 6 55 D x 2 4 H ...

Page 17: ...N LUGARES QUE PUEDAN OBSTRUIR LA OPERACIÓN DEL VEHÍCULO Hacerlo puede obstruir la visión u obstaculizar movimientos y puede provocar accidentes serios INSTALE EL CABLEADO DE TAL FORMA QUE NO SE DOBLE O PUNCE CON TORNILLOS O FILOS Coloque los cables lejos de partes movibles o con bordes filosos o con punta Esto prevendrá doblar o dañar el cableado Si el cableado debe pasar por un agujero de metal a...

Page 18: ...l manejo y no pueda herir a ningún pasajero si se frena repentinamente o de emergencia Evite instalar la unidad donde sea sometida a altas temperaturas debido a luz directa del sol aire caliente o del calentador o donde reciba polvo suciedad o vibración en exceso Montaje del Comando Cableado 1 Elija un área de montaje para el comando cableado que sea limpio y plano permitiendo que la junta trasera...

Page 19: ...ravés del buque como sea necesario Mantenga el arnés cables algo flojo para que no esté demasiado ajustado causando daños a los cables 5 Siga el diagrama de cableado detalladamente y asegúrese de que todas las conexiones estén seguras y aisladas con conectores crimpados o cinta aisladora para asegurar la instalación adecuada 6 Luego de completar las conexiones del cableado conecte nuevamente el te...

Page 20: ...LOR ALAMBRE SALIDAS DE AUDIO DE BAJO NIVEL ALTAVOZ DELANTERO DERECHO ALTAVOZ TRASERO DERECHO ALTAVOZ TRASERO DERECHO SIN CONEXIÓN ALTAVOZ TRASERO IZQUIERDO ALTAVOZ TRASERO IZQUIERDO SALIDA DE AMPLIFICACIÓN PREVIA TRASERA COMÚN SALIDA DE PREAMPLIFICACIÓN DERECHA TRASERA ALTAVOZ DELANTERO IZQUIERDO ALTAVOZ DELANTERO IZQUIERDO SIN CONEXIÓN ANTENA DE ENERGÍA IGNICIÓN ACCESORIA TIERRA SALIDA DE PREAMPL...

Page 21: ... un bolígrafo o un objeto de metal delgado para presionar el botón RESET ubicado en la caja del radio Usted puede volver a la configuración de fábrica usando la función RESUME ubicada en el menú de sistema Con el cartel YES destellando presione el botón MODE 4 para activar Menú de Audio Presione el botón AUDIO 3 en el panel de control para acceder al menú de audio Usted puede navegar a través de l...

Page 22: ...efecto para LOW BATT es apagado OFF Si se enmudece un audio o el volumen está en 0 el bip audible no se escuchará Ecualizador Presione el botón EQ 11 para encender la función de ecualización y seleccionar entre cinco curvas de bajos y agudos predefinidos OFF POP JAZZ CLASSIC BEAT ROCK iX Bass Graves iX Mantenga presionado el botón EQ IX BASS 11 para cambiar entre sonoridad encendida o apagada Cuan...

Page 23: ...tomáticamente seis estaciones fuertes y grabarlas en la banda actual Las nuevas estaciones reemplazan cualquier estación almacenada anteriormente en esa banda NOTA Durante el Grabado Automático AS el radio por defecto estará en modo Local mientras realiza el escaneo inicial de la banda Luego de escanear toda la banda una vez la unidad cambiará a modo Distante para toda configuración de Grabado Aut...

Page 24: ...rriba o hacia Abajo Presione los botones TUNE TRK 18 19 para buscar un canal Mantenga presionado los botones TUNE TRK para búsqueda rápida Guardando Canales Preseleccionados Los botones de preselección 5 10 se pueden usar para guardar hasta 6 canales permitiendo acceso conveniente a sus canales favoritos Programando Canales 1 Seleccione el canal que usted quiere guardar en memoria 2 Mantenga presi...

Page 25: ...ante la reproducción presione el botón 3 RPT 5 para repetir la canción actual En pantalla aparecerá Repeat Presione 3 RPT nuevamente para detener la repetición Reproducción Aleatoria Durante la reproducción presione el botón 4 RDM 7 para pasar todas las canciones de esa categoría en orden aleatorio La reproducción aleatoria se iniciará cuando la canción actual finalice En pantalla aparecerá Shuffl...

Page 26: ...a flash incorporada el LCD mostrará No File Sin Archivos por 3 segundos y luego cambiará al modo anterior Si la unidad no puede reproducir el archivo el LCD mostrará Read Error error de lectura por 3 segundos y luego cambiará al modo anterior Cómo Controlar la Reproducción Esta unidad puede reproducir archivos MP3 WMA almacenados en la Memoria Flash interna o un dispositivo de Memoria USB Reproduc...

Page 27: ...ra acceder al modo FLASH Modo Copia de Archivo Carpeta Durante Reproducción Normal Esta opción sólo puede realizarse cuando reproduce un archivo de música MP3 WMA 1 Durante la reproducción de archivo de música MP3 WMA presione el botón COPY 20 para activar el modo COPY Copiar 2 Presione los botones VOLUME 2 para cambiar el archivo de música a ser copiado dentro de la memoria interna 3 Presione el ...

Page 28: ...E FILE Borrar archivo 4 Presione el botón BAND por segunda vez para seleccionar ERASE ALL borrar todo Presione BAND por tercera vez para volver al estado de reproducción actual 5 Después de realizar los pasos 2 o 3 presione el botón MODE SEL 4 para comenzar el borrado NOTA Una vez que comienza la operación de BORRADO No hay acceso para detener el proceso de borrado NOTA Para poder evitar el borrad...

Page 29: ...istor pero puede ser necesario verificarlos para una operación correcta Otro método de supresión es el uso de supresores adicionales Éstos se pueden obtener en la mayoría de los comercios CB A de radio o electrónica Interferencia La recepción de radio en un ambiente en movimiento es muy diferente de la recepción en un ambiente estacionado casa Es muy importante entender la diferencia La recepción ...

Page 30: ... USA 530 1710 kHz Cobertura de la Frecuencia Europe 522 1620 kHz Sensibilidad S N 20dB 36 dB General Voltaje de Funcionamiento DC 12 Volts Poner a Tierra el Sistema Tierra Negativa Impedancia del Altavoz 4 8 ohmios por el canall Controles del Tono Bajo at 100 Hz 10 dB Agudos at 10 kHz 10 dB Salida de Energía 50W x 4 Dren Eléctrico 15 Ampere max Dimensiones de Comando 5 15 W x 1 2 D x 3 7 H Dimensi...

Page 31: ...ager le produit NE PAS INSTALLEZ DANS DES ENDROITS OU CELA PEUT INTERFERE AVEC L OPERATION DU VEHICULE Cela peut faire obstacle à la vision ou empêcher le mouvement et produire un accident sérieux INSTALLEZ LE CABLAGE DE SORTE QU IL NE SOIT PAS PINCE PAR DES ECROUS OU DES BORDS METALLIQUES FINS Faites traverser le câble loin des parties amovibles ou des bords pointus fins Cela évitera d endommager...

Page 32: ...as avec la conduite et ne peut pas blesser les passagers lorsqu il y a un arrêt abrupt Evitez d installer l appareil là où il sera sujet à des températures hautes venant des rayons de soleil directs de l air chaud ou d un réchaud ou bien là où il sera sujet à de la poussière excessive des ordures ou de la vibration Montage du commandant cable 1 Choisissez un emplacement de montage pour le commanda...

Page 33: ...câble du tuner amplificateur partout dans le vaisseau comme exigé Gardez les câbles et le harnais relâchés pour qu ils ne soient pas trop serrés comme cela peut endommager les câbles 5 Suivez le diagramme de câblage avec soin et assurez vous que tous les branchements sont sûrs et isolés avec raccords à sertir ou de la bande électrique pour assurer une bonne opération 6 Après avoir terminé les bran...

Page 34: ...AGE ACCESSOIRE TERRE PAS DE CONNECTION PAS DE CONNECTION PAS DE CONNECTION LIGNE DE PRE AMPLIFICATEUR D ARRIERE GAUCHE DEHORS VUE A A MONTRE DEPUIS LA VUE D AIGUILLE VUE B B VUE D INSERTION DU FIL COMMANDANT CABLE MODULE TUNER AMPLIFICATEUR CABLE D EXTENSION ENTREE D AUDIO AUXILIAIRE CONNECTEUR SIRIUS CONNECTEUR IPOD EXTERNE A DISTANCE NOIR GRIS BLANC NOIR NOIR JAUNE PRISE ANTENNE CONNECTEUR RCA R...

Page 35: ...miné Les bouton de fonctions n opère pas Symbole d erreur sur l affichage Utilisez une bille ou un objet métallique fin pour appuyez sur le bouton de réinitialisation situé sur la boîte tuner Vous pouvez retrouver les réglages par défaut d usine en utilisant la fonction RESUME situé sur le menu système Avec YES clignotant appuyez sur le bouton MODE 4 pour activer Menu Audio Appuyez sur le bouton A...

Page 36: ...e est réglé à 0 le bip audible ne sera pas entendu Egaliseur Appuyez sur le bouton EQ 11 pour mettre l égaliseur en marche et pour sélectionner entre cinq courbes basse ou aigu pré définies OFF POP JAZZ CLASSIC BEAT ROCK iX Bass Appuyez et maintenez l appui sur le bouton EQ IX BASS 11 pour basculer l intensité en marche en arrêt Lorsque vous écoutez la musique à des volumes bas cette fonction va a...

Page 37: ...plus de 3 secondes pour automatiquement sélectionner six stations fortes et les mettre en mémoire dans la bande courante Les nouvelles stations remplacent les stations déjà mises en mémoire dans cette bande A NOTER Pendant Auto Store AS le tuner va revenir par défaut à la mode Locale lorsqu il balaye la bande Après avoir balayé la bande une fois l appareil va changer à la mode Distant pour tout la...

Page 38: ...isation de chaîne vers le haut vers le bas Appuyez sur le bouton TUNE TRK ou pour chercher une chaîne Appuyez et maintenez l appui sur le bouton TUNE TRK pour chercher rapidement Mise en mémoire des chaînes pré réglées Les boutons de pré réglage 5 10 peuvent être utilisés pour mettre en mémoire 6 chaînes permettant un accès commode à vos chaînes favories Programmer des chaînes 1 Sélectionnez la ch...

Page 39: ...on 3 RPT 5 pour répéter la chanson actuelle Repeat va apparaître sur l affichage aux cristaux liquides Appuyez de nouveau sur 3 RPT pour arrêter la répétition de la reproduction Reproduction au hasard Pendant la reproduction appuyez sur le bouton 4 RDM 7 pour jouer toutes les chansons dans la catégorie actuelle dans un ordre mélangé La reproduction au hasard commencera dès que la chanson actuelle ...

Page 40: ...e mis en mémoire dans la mémoire flash encastrée l affichage aux cristaux liquides va afficher No File pendant 3 secondes et puis va revenir au mode précédent Si l appareil ne peut pas jouer le fichier l affichage aux cristaux liquides va afficher Read Error pendant 3 secondes et puis changera au mode précédent Commander la reproduction Cet appareil peut jouer des fichiers MP3 WMA mis en mémoire d...

Page 41: ...ur de mettre les fichiers musique en mémoire en transférant jusqu à 1 GB depuis un dispositif à mémoire USB L appareil peut alors reproduire les fichiers musiques mis en mémoire depuis le flash encastré en pressant le bouton MODE 4 pour accéder au mode FLASH Copier Fichier Dossier pendant le mode de reproduction normale Cette operation ne peut être performée que lorsque l on joue un fichier musiqu...

Page 42: ...istaux liquides affiche le nom du dossier pressez et maintenez le bouton BAND pour activer le mode d éffacement du dossier 3 Pressez le bouton BAND button pour la première fois pour sélectionner ERASE FILE 4 Pressez le bouton BAND une deuxième fois pour sélectionner ERASE ALL Pressez BAND une troisième fois pour revenir au statut de reproduction actuel 5 Après avoir exécuté les étapes 2 ou 3 press...

Page 43: ...lise ce fil et résisteur mais il peut être nécessaire de les contrôler pour une opération bonne Une autre méthode de suppression est d utiliser les supprimeurs de bruit supplémentaires On peut les procurer des magasins de radio et fournitures électroniques CB A Interférence La réception radio dans un environnement mobile est très différent de la réception radio dans un environnement stationnaire I...

Page 44: ...lité S N 20dB 36 dB Généralités Tension d Opération DC 12 Volts Fondre le Système La Terre Négative Impédance de Haut Parleurs 4 8 4 ohms par canal Commandes de Tonalité Basse at 100 Hz 10 dB Aigu at 10 kHz 10 dB Rendement de Puissance 50W x 4 Drainage Courant 15 Ampere max Commandant Dimensions 5 15 W x 1 2 D x 3 7 H Tuner Amp Dimensions 8 35 W x 6 55 D x 2 4 H ASA Electronics Corporation www asa...

Reviews: