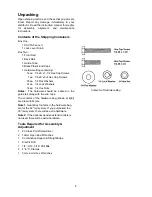
8
Back Rail Installation
1. Locate the
back rail
which is 1-1/2" x 1-1/2"
with holes running along one side only. The
height of the back rail when attached to the
saw is not critical.
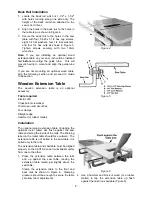
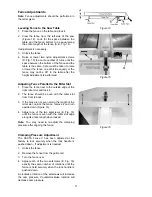
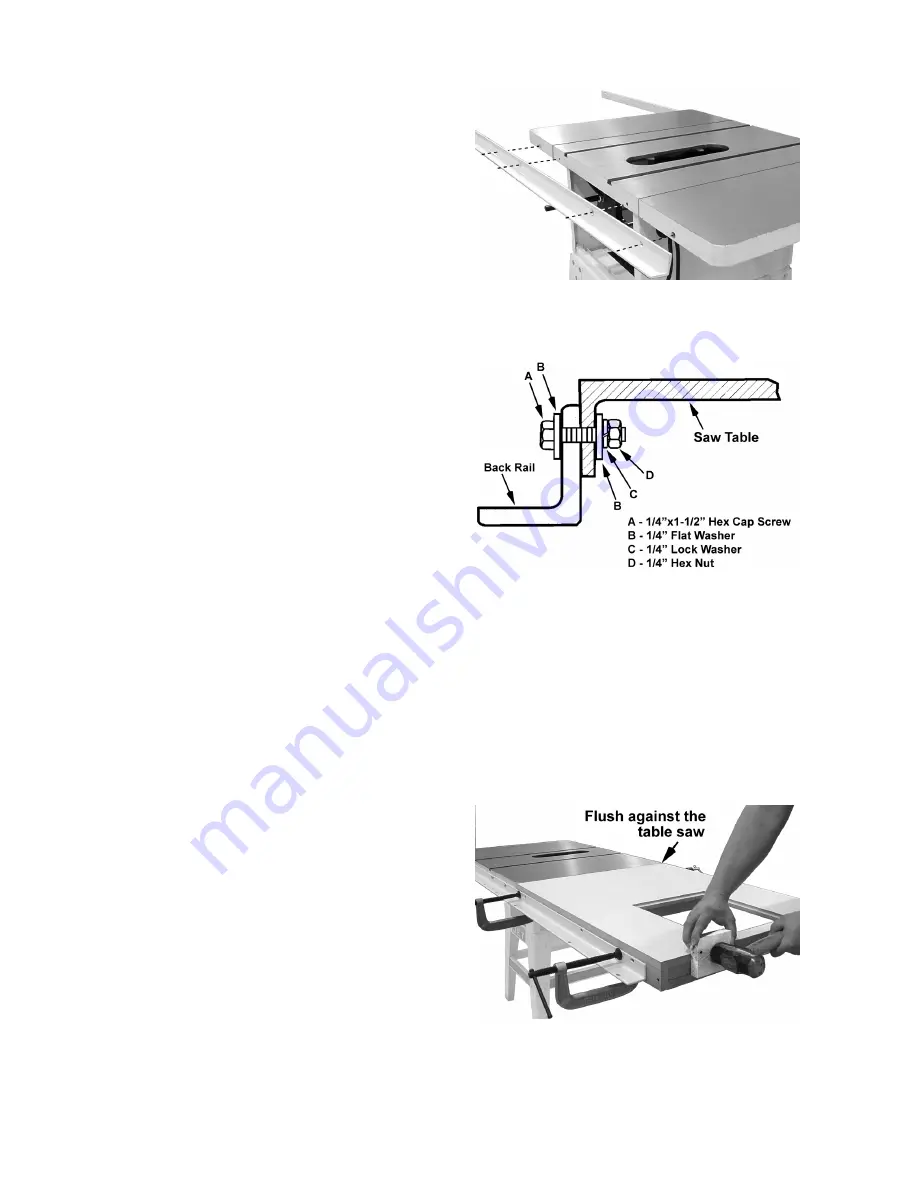
2. Align the holes in the
back rail
to the holes in
the table top, as shown in Figure 4.
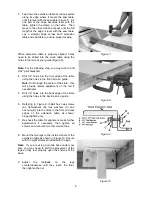
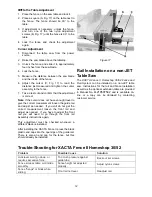
3. Secure the
back rail
to the holes in the saw
table with four 1/4-20x 1-1/2 hex cap screws,
eight 1/4 flat washers, four 1/4 lock washers,
and four 1/4 hex nuts as shown in Figure 5.
Tighten screws securely with two 10mm
wrenches.
Note:
If you are installing an optional wood
extension table on your saw, it should be installed
first
before
mounting the guide tube. This will
prevent having to mount and align the guide tube
twice.
If you are not mounting an optional wood table,
skip the following section and proceed to
Guide
Tube
section.
Wooden Extension Table
The
wooden extension table
is an optional
accessory.
Tools required
Electric drill
Cross point screwdriver
10mm open end wrenches
Four clamps
Straight edge
Hammer (or rubber mallet)
Installation
The optional wood extension table (including the
optional router table) sits flush against the saw
table and along the inside of the rails. The Warning
label on the router table should face outward. The
extension table is not bolted to the saw table; it is
bolted only to the rails.
The extension table and saw table must be aligned
properly so the XACTA Fence II will slide smoothly
from one to the other.
1. Place the extension table between the rails
and up against the saw table, leaving the
extension table raised just slightly above the
saw table.
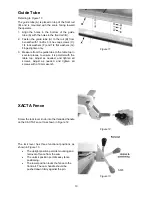
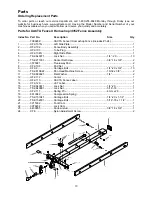
Clamp the extension table to the front and
back rails as shown in Figure 6. Clamping
pressure should be enough to secure the table
yet allow minor adjustments.
Figure 4
Figure 5
Figure 6
2. Use a hammer and block of wood (or a rubber
mallet) to tap the extension table up flush
against the cast iron saw table (Figure 6).


